
The best camera cages are the ones that fit your exact camera without blocking controls, provide useful mounting points where your rig needs them, and leave enough room for cables, batteries, and a compatible handle.
As an Amazon Associate we earn from qualifying purchases at no extra cost to you.


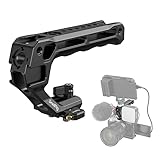
Top 3 picks at a glance
Best Camera Cages at a Glance
| Best for | Recommended cage type | What to prioritize | Typical market range |
|---|---|---|---|
| Mirrorless video builds | Camera-specific aluminum full cage | Accurate fit, HDMI clearance, NATO rail, multiple 1/4″-20 mounts | Usually $60–$180 |
| Run-and-gun shooting | Half cage or compact full cage with top handle | Low weight, quick access to the grip, cold shoe and strap mounts | Usually $50–$160 |
| Heavy cinema rigs | Full cage with ARRI-style locating points | Anti-twist mounts, rosette arms, baseplate compatibility, high rigidity | Usually $150–$500 |
| Modular multi-camera work | Brand ecosystem cage | Interchangeable handles, rails, monitor mounts and quick-release plates | Usually $100–$350 before accessories |
Our Picks for the Best Camera Cages
SmallRig Camera-Specific Cages: Best Overall Flexibility
SmallRig’s camera-specific cages are a strong choice for most mirrorless cameras because the range covers many Sony, Canon, Nikon, Fujifilm, Panasonic and Blackmagic models. The important advantage is not simply the number of holes: SmallRig builds cage ecosystems around NATO rails, top handles, side handles, monitor mounts, baseplates and follow-focus accessories.
Look for a model with several 1/4″-20 threads, at least one 3/8″-16 mounting point with locating holes, and a NATO rail if you plan to remove a handle quickly. Some versions also include an integrated cable clamp, which is valuable when using an external monitor or SSD. A cable clamp protects the camera’s HDMI or USB-C socket from sideways strain; that can matter more than adding another accessory shoe.
SmallRig is usually the easiest recommendation when you want to begin with a cage and expand later. Check the exact camera model and generation before buying, since ports, battery doors and screen hinges can differ even within one camera family.
Tiltaing Cages: Best for a Structured Cinema Rig
Tilta’s Tiltaing system suits users who already know they want a top handle, side handle, baseplate, monitor arm or follow-focus system. The cages commonly use a mix of 1/4″-20 and 3/8″-16 mounting points, NATO-style attachment options and ARRI-compatible locating features on selected components.
The main benefit is a more deliberate rig-building path. Instead of attaching a random collection of arms, you can use matching handles, power options and support accessories. Tilta cages are especially appealing for cameras used with a shoulder rig, rods, matte box or external power system.
They can be less convenient for a minimal setup if the cage and handle combination adds more bulk than you need. Before choosing one, decide whether the camera will be handheld, mounted on a tripod, used on a gimbal or built into a rod-supported rig.
8Sinn Cages: Best for Low-Profile Protection
8Sinn cages are worth considering when you want a rigid, carefully finished cage without turning a compact mirrorless camera into a large production rig. Many designs emphasize a clean silhouette, built-in handle options and solid protection around the camera body.
They are a good match for filmmakers who want to mount a monitor, microphone or compact handle while retaining access to the camera’s main controls. Their designs often favor a polished, integrated appearance over the maximum possible number of exposed mounting holes.
That trade-off matters. A low-profile cage can be easier to carry and less likely to catch on a bag, but it may offer fewer attachment positions for unusual accessories. Choose it when your rig is relatively simple and repeatable.
Kondor Blue Cages: Best for Fast-Cable and NATO Workflows
Kondor Blue cages are designed around practical production use, with attention to NATO rails, cable management, quick-release hardware and accessory compatibility. They are useful for operators who frequently change between a bare camera, handheld configuration and monitor-equipped setup.
When comparing one with a conventional cage, examine the location of the NATO rail rather than merely counting rails. A rail on the top lets you remove a handle quickly; a side rail can support a compact handgrip; a poorly positioned rail may interfere with the camera’s articulating screen or access to a card door.
Wooden Camera Cages: Best for Professional Rig Integration
Wooden Camera cages are aimed at more demanding builds where the cage forms part of a broader professional camera system. They are particularly attractive when you need dependable integration with baseplates, dovetails, rods, monitor supports and cinema-style handles.
Their value is less about obtaining the lightest possible cage and more about creating a stable platform for accessories that may be used repeatedly in production. If your camera will carry a large monitor, wireless video transmitter, follow focus and external battery, prioritize rigidity and locating features over a minimal price.
How to Choose the Right Cage
1. Confirm the Fit Before Counting Mounts
A cage should hold the camera firmly without pressing buttons, twisting against the lens mount or blocking the battery door. Check these areas:
- The camera’s grip should slide in without excessive force.
- The shutter, record, menu and control dials should remain usable.
- The articulating screen should open, rotate and close normally.
- The HDMI, USB-C, microphone and headphone ports should accept plugs without sharp bends.
- The battery and memory-card doors should open without removing the cage.
- The tripod socket should align correctly with the cage’s mounting screw.
A universal cage can be cheaper, but a camera-specific cage is usually safer for port access and anti-twist support. A small mismatch can become expensive if it damages an HDMI connector or prevents access to the battery during a shoot.
2. Match Mounting Points to Your Actual Rig
For a basic video setup, two or three strategically positioned mounts are more useful than a dozen inaccessible holes. A practical configuration might use a top NATO rail for a handle, a side 1/4″-20 thread for a monitor arm and a bottom 3/8″-16 or 1/4″-20 connection for a quick-release plate.
For heavier rigs, prioritize:
- ARRI-style locating holes: These resist accessory rotation better than a single 1/4″-20 screw.
- Rosettes: Useful for strong, angle-adjustable handles and arms.
- Multiple bottom mounts: Helpful when balancing the camera on a baseplate or dovetail.
- Integrated NATO rails: Faster for swapping handles and monitor arms.
Do not assume every 3/8″-16 hole is suitable for a locating pin. Confirm that it has the correct locating-hole pattern if you need anti-twist support.
3. Check Handle Compatibility
A top handle is not automatically compatible with every cage. NATO handles need a NATO rail with adequate clearance, while screw-mounted handles may require a top surface with correctly spaced 1/4″-20 or 3/8″-16 threads.
For low-angle shooting, choose a handle with enough forward or rearward extension to clear the camera’s viewfinder and screen. For overhead operation, check the handle’s load rating and attachment method. A handle that is comfortable for carrying a lightweight mirrorless camera may not be appropriate for lifting a rig with a monitor, wireless transmitter and battery.
4. Compare Material and Protection
Most quality cages use machined or formed aluminum, often with stainless-steel mounting hardware and rubber or polymer contact surfaces. Aluminum keeps weight manageable while providing adequate stiffness for typical mirrorless rigs.
Look for a cage that protects the corners, base and vulnerable port side without enclosing the camera so tightly that heat or cable access becomes a problem. A cage is not a substitute for a padded case, and it will not make a camera waterproof. Its main job is to distribute accessory loads and protect the body from knocks, not to provide environmental sealing.
Rig-Building Example: Calculate the Mounting and Power Load
Suppose a camera rig includes a 0.6 kg camera and lens, a 0.25 kg cage, a 0.35 kg monitor, a 0.15 kg top handle and a 0.20 kg battery plate and cables. The total is:
0.60 + 0.25 + 0.35 + 0.15 + 0.20 = 1.55 kg
That load is manageable for a robust top handle during short repositioning, but it is substantially more demanding than a camera-only setup. If you add a 0.45 kg wireless transmitter and a 0.30 kg follow-focus motor, the rig reaches 2.30 kg. At that point, use a handle with a secure locating connection or rosette, and support the rig from a baseplate or shoulder system rather than carrying it by a small accessory shoe.
The same calculation helps with power. If the camera consumes 8 W, the monitor 7 W and the transmitter 5 W, the rig needs approximately:
8 W + 7 W + 5 W = 20 W
A 98 Wh battery would provide a theoretical 98 ÷ 20 = 4.9 hours. Real runtime will be lower because of voltage-conversion losses, battery aging and changing power draw. Allowing 20% for those losses gives about 3.9 hours. This is why a cage with sensible cable routing and a compatible battery plate can be more useful than one with extra cosmetic protection.
Decision Matrix: Which Cage Fits Your Situation?
| Your priority | Best choice | Avoid |
|---|---|---|
| Smallest handheld setup | Low-profile full cage or half cage with one NATO rail | Large cage with unnecessary rod mounts |
| External monitor and microphone | Full cage with top rail, side threads and cable clamp | Cage that blocks HDMI or leaves plugs unsupported |
| Follow focus, matte box and rods | Rigid full cage paired with a proper baseplate | Lightweight cage relying on a single bottom screw |
| Frequent gimbal use | Compact cage with removable handle and low-profile sides | Heavy cage that prevents balance adjustment |
| Multiple cameras of the same brand | Accessory ecosystem with interchangeable handles and plates | Mixing proprietary mounts without checking standards |
Final Buying Checklist
- Verify the exact camera model, not just the brand or series.
- Confirm screen, battery-door, card-slot and port clearance.
- Choose mounting points based on the accessories you will actually use.
- Prefer locating points or rosettes for heavy handles and arms.
- Check whether the handle uses NATO, 1/4″-20, 3/8″-16 or a proprietary interface.
- Leave room for cable bends and strain relief.
- Calculate the complete rig weight before relying on a top handle.
- Choose one accessory ecosystem when you expect the rig to grow.
For most mirrorless filmmakers, a camera-specific SmallRig or Tilta cage offers the best balance of fit, protection and expansion. Choose 8Sinn for a cleaner low-profile build, Kondor Blue for fast NATO and cable workflows, or Wooden Camera when the cage must support a heavier professional rig. The right answer is the cage that preserves camera access while making every future accessory easier to mount, balance and power.


