
A clean chroma key in OBS depends less on chasing extreme filter values and more on controlling the source before the filter sees it. Prioritize an evenly lit green background, separation between you and the screen, a fixed camera exposure/white balance, and a correctly cropped camera source. Then use the Chroma Key filter to remove the remaining green without erasing hair, hands, glasses, headset edges, or translucent objects.
For most creators, the best starting point is OBS’s green key preset with moderate Similarity, low-to-moderate Smoothness, and enough spill reduction to remove green reflections without turning skin gray. In 2026, this remains more reliable than stacking multiple aggressive filters or trying to fix poor lighting entirely in software.
As an Amazon Associate we earn from qualifying purchases at no extra cost to you.
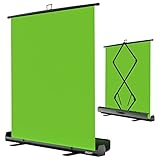


Our Top Picks
 Emart 5x6.5ft Green Screen Backdrop Kit with T-Shape5x7FT78 x 78 x 0 Inches6.2 PoundsCheck on Amazon
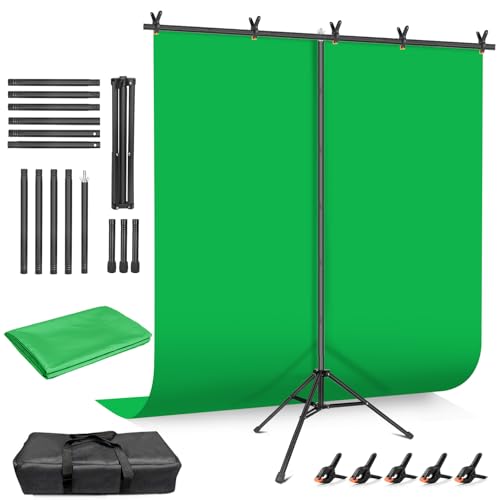 Hemmotop Wider Green Screen Backdrop with Stand8x7.5ft95.67 x 89.96 x 0.1 Inches5 PoundsCheck on Amazon
 RAUBAY 78.7 x 86.6in Retractable Pull Down GreenWider(78.7 x 86.6in)86.6 x 78.7 x 0.1 inches12.3 poundsCheck on Amazon

Top 3 picks at a glance
Quick Recommended Settings
| Setting | Recommended value | Why |
|---|---|---|
| Filter path | Camera source > right-click > Filters > Effect Filters > + > Chroma Key | Applies the key only to the camera source. |
| Key Color Type | Green | Uses OBS’s green-screen keying preset as a stable baseline. |
| Similarity | 400 | Removes the green backdrop without immediately cutting into subject detail. |
| Smoothness | 80 | Softens jagged key edges while retaining hair and clothing definition. |
| Key Color Spill Reduction | 100 | Reduces green glow on skin, hair, shoulders, and reflective gear. |
| Opacity | 100 | Keeps the non-keyed part of the camera fully visible. |
| Contrast | 0 | Avoids crushing shadow detail before evaluating the key. |
| Brightness | 0 | Prevents artificial halos caused by brightening or darkening the keyed image. |
| Gamma | 0 | Leaves camera tonal correction to the camera or a separate Color Correction filter. |
| Camera placement | At least 3 feet from the green screen when space permits | Reduces green light reflecting back onto the subject. |
Setting-by-Setting
Key Color Type: Green
Exact value: Set Key Color Type to Green. Open it from Sources, right-click the webcam or capture-card camera source, choose Filters, click + under Effect Filters, and select Chroma Key.
Trade-off: Green is usually the best option because camera sensors capture green efficiently and most people do not wear bright green clothing. However, green is a bad choice if your shirt, hat, chair accents, headset lighting, or props contain similar green tones.
What causes problems: Choosing Green while green objects are visible in the camera frame causes those objects to become transparent.
How to check: Add a bright background image or a Browser Source behind the camera. Look for holes in clothing, headset trim, plants, drink cans, or RGB accessories.
What to do: Remove green items from the frame, disable green RGB lighting, or use a blue screen and set Key Color Type to Blue.
How to undo: Return the dropdown to Green after removing the conflicting object or changing the background.
Similarity: 400
Exact value: Start at 400. Adjust in small steps of 25 to 50. A practical working range is 350 to 500 for a properly lit screen.
Trade-off: Higher Similarity removes a wider range of green shades, which helps with uneven screens. It also increases the chance of eating into hair, fingers, fabric edges, and dark shadows near green spill.
What causes problems: Green screens are rarely one perfectly uniform color. Wrinkles, dim corners, hotspots, and webcam compression create multiple shades of green.
How to check: Temporarily place a high-contrast image behind the camera. Watch the screen edge and corners for green patches. Then wave a hand beside your head and inspect your hairline for transparency.
What to do: Raise Similarity from 400 toward 450 if green remains. If facial edges or clothing disappear, lower it toward 350 and improve lighting instead.
How to undo: Set Similarity back to 400, or click the reset-arrow icon beside the slider if available in your OBS version.
Smoothness: 80
Exact value: Set Smoothness to 80. Keep most setups between 50 and 120.
Trade-off: Smoothness blends the edge between the removed background and the visible subject. More smoothing can hide rough, noisy key edges, but too much produces a soft outline and can make hair look foggy.
What causes problems: A high-resolution camera can still create jagged edges when the green screen is wrinkled, underlit, or heavily compressed.
How to check: Set OBS’s preview to a larger size, or right-click the preview and use Fullscreen Projector (Preview) on another display. Examine the outline around shoulders, hair, hands, and headphones.
What to do: Increase Smoothness from 80 to 100 if the edge flickers or looks stair-stepped. Reduce it toward 60 if your outline becomes too blurry.
How to undo: Return the slider to 80.
Key Color Spill Reduction: 100
Exact value: Set Key Color Spill Reduction to 100. A useful range is 75 to 150.
Trade-off: Spill reduction removes the green tint that bounces from the background onto your skin, hair, shoulders, and reflective surfaces. Excessive spill reduction can mute color in blond hair, pale clothing, or shiny objects.
What causes problems: The subject is too close to the screen, the screen is overlit, or a bright green screen light is pointed toward the subject instead of only at the background.
How to check: Look at the side of your face, the shoulder nearest the screen, and the edges of dark headphones. A green fringe means spill is present.
What to do: Raise the value in increments of 25 if green remains. If skin becomes gray or clothing loses color, reduce it to 75 and move farther from the screen.
How to undo: Restore 100 or use the reset icon.
Opacity: 100; Contrast, Brightness, and Gamma: 0
Exact values: Leave Opacity at 100, with Contrast, Brightness, and Gamma at 0 in the Chroma Key filter.
Trade-off: These controls can rescue a marginal key, but they are broad image adjustments. Using them aggressively in the key filter makes it harder to tell whether a problem is caused by lighting, camera exposure, or the key itself.
What causes problems: Automatic webcam exposure and automatic white balance can change when you move, altering the green screen’s brightness and color during a stream.
How to check: In your camera software, look for Auto Exposure, Auto White Balance, Auto Gain, HDR, or automatic low-light compensation. Watch the OBS preview while leaning forward and backward.
What to do: Lock exposure, white balance, and gain in the camera software first. If you need image correction, add a separate Color Correction filter above Chroma Key in the Filters list and make small changes there.
How to undo: Disable the Color Correction filter with its eye icon, or select it and click the minus button.
By Hardware Tier
Low-End Hardware: 720p or 1080p Webcam, Integrated Graphics, Older CPU
Use a simple scene. Keep the webcam at 720p30 or 1080p30 rather than forcing 60 fps, and avoid multiple duplicate camera sources. In OBS, use one camera source with one Chroma Key filter, then reuse it across scenes with Add Existing instead of creating another device instance.
Start with Green, Similarity 400, Smoothness 80, and Spill Reduction 100. If the key looks rough, improve the lighting before adding filters. Avoid Blur, Sharpen, LUT, and noise-removal filters unless you have verified they do not cause dropped frames. Check View > Stats during a test recording; rendering lag or encoding lag means simplify the scene before changing chroma settings.
Midrange Hardware: Modern Quad-Core-or-Better CPU and Dedicated GPU
Run the camera at its cleanest stable 1080p mode, usually 30 fps for a talking-head source. Lock camera exposure and white balance, then use the recommended settings as your baseline. Add a Crop/Pad filter before Chroma Key if the camera frame includes unneeded green-screen edges, light stands, or ceiling space.
To crop without permanently changing the source, right-click the camera source, choose Filters, click + under Effect Filters, and choose Crop/Pad. Crop only what the viewer will never need. This reduces the area where OBS must key noisy green pixels.
High-End Hardware: Dedicated Streaming PC, Mirrorless Camera, or 4K Camera Feed
High-end hardware improves source quality, but it does not make a bad green screen easier to key. Use the extra capability for a cleaner camera feed, controlled lighting, and a higher-quality recording rather than extreme filter stacks. If your camera outputs 4K, consider capturing at 4K only when you need room to crop or reframe; otherwise, a clean 1080p camera source is simpler and easier to manage.
Use a test scene with a detailed background, record a 30-second clip, and inspect it frame by frame in a media player. Test gestures, fast hand movement, hair movement, and reflective objects. Fine-tune Similarity in 25-point increments and Smoothness in 10-point increments rather than making large jumps.
Common Mistakes
Using Auto Exposure and Auto White Balance
What causes it: The camera continuously changes brightness and color, so the green screen shifts while you stream.
How to check: Watch the preview while moving closer to the camera or holding a bright object in frame.
What to do: Disable Auto Exposure and Auto White Balance in the camera’s companion software. Set a fixed exposure that keeps the green bright but not clipped.
How to undo: Re-enable the automatic camera controls if your room lighting changes constantly.
Standing Too Close to the Green Screen
What causes it: Green light reflects onto your body, creating spill that the filter must remove.
How to check: Look for a green outline along hair, shoulders, and the sides of your face.
What to do: Move the camera and chair forward. Aim for about 3 feet of separation when your room allows it, and light the subject separately from the screen.
How to undo: Move back if framing space is limited, then reduce spill with the Chroma Key slider.
Increasing Similarity Until Everything Disappears
What causes it: Similarity is used to compensate for uneven lighting instead of fixing the screen.
How to check: Wave your hands and inspect hair or clothing edges against a bright background.
What to do: Return to Similarity 400, light the dim parts of the screen, and raise Similarity only enough to remove remaining green.
How to undo: Reset Similarity to 400.
Keying the Wrong Source
What causes it: The filter is added to a scene, group, or capture source instead of the camera.
How to check: Toggle the eye icon beside the Chroma Key filter. If gameplay, overlays, or text disappear, it is attached to the wrong item.
What to do: Remove the filter from the wrong source, then add it directly to the webcam or camera capture source.
How to undo: Select the misplaced filter and click the minus button in the Filters window.
FAQ
What are the best OBS green screen settings to start with?
Use Key Color Type Green, Similarity 400, Smoothness 80, Key Color Spill Reduction 100, Opacity 100, and Contrast, Brightness, and Gamma at 0. Treat those values as a baseline, not a substitute for even lighting and locked camera settings.
Why does my hair disappear or look transparent?
What causes it: Similarity is too high, or green spill is reaching the hair.
How to check: Put a white or colorful image behind the camera source and look closely at the hairline.
What to do: Lower Similarity by 25 to 50 points, reduce spill reduction if color looks drained, and increase distance from the screen.
How to undo: Return to the 400/80/100 baseline.
Should I use green or blue for OBS chroma key?
Use green unless the subject wears green or uses green-lit equipment. Blue can be preferable for green clothing, but it may be less forgiving in dim rooms because many cameras show more noise in blue areas. Whatever color you choose, use a matte, evenly lit backdrop and avoid similarly colored objects in frame.
Do I need a physical green screen for OBS chroma key?
No, but a physical green screen gives the Chroma Key filter a clear, predictable color to remove. Background-removal software can work without one, yet it is more dependent on subject separation, lighting, camera quality, and processing resources. For reliable streaming, a properly lit physical screen is usually easier to troubleshoot.


