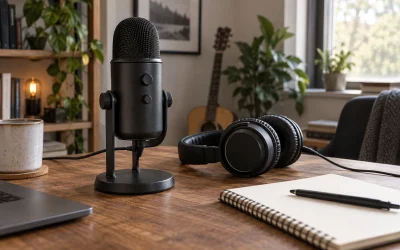
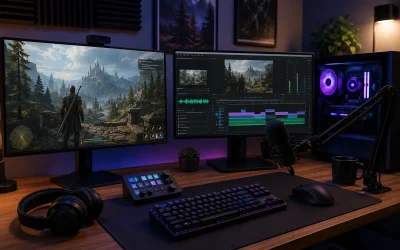
A boom arm can transmit more desk vibration than most users expect. The arm is clamped directly to the desk, so every keyboard strike, mouse movement, controller bump, chair collision, and PC fan-induced resonance can travel through the clamp, arm joints, shock mount, and microphone body. The result is usually a low thump, dull rumble, or “boing” sound that becomes obvious in voice chat, recordings, or streams.
The important distinction is whether the noise is mechanical vibration reaching the microphone or a software/audio-setting problem making normal handling noise louder. Start with a simple physical test, then isolate each part of the mounting chain. In 2026, this remains especially relevant for heavier USB microphones, which are often mounted directly to desk arms without adequate shock isolation.
Most Common Causes
| Cause | Symptom | Likelihood |
|---|---|---|
| Clamp mounted to a thin, hollow, or flexible desk section | Deep thumps when typing, leaning on the desk, or moving the mouse | Very high |
| No shock mount, or a shock mount installed incorrectly | Every desk tap appears clearly in recordings | Very high |
| Loose boom-arm joints, clamp screw, or microphone thread | Rattle, ringing, creaking, or a spring-like “ping” after movement | High |
| Keyboard, mouse, or controller contacting the desk hard | Sharp impacts and low-frequency knocks during normal gaming | High |
| Arm touching the monitor, wall, PC case, cable tray, or desk frame | Noise occurs when the monitor shakes, fans ramp up, or the desk moves | Medium |
| Microphone gain or input level set too high | Minor vibrations sound much louder than expected | Medium |
| Desk resonance from a lightweight tabletop or unstable legs | Long low rumble after a tap, often strongest near the desk center | Medium |
| Worn internal springs, damaged clamp padding, or bent arm hardware | Vibration remains after other mounting changes | Low to medium |
Diagnose Step by Step
1. Make a short local recording
Before changing hardware, record a baseline sample. In Windows, press Win + R, type mmsys.cpl, press Enter, then open the Recording tab. Select your microphone, choose Properties, open Listen, and temporarily check Listen to this device. Use headphones to avoid speaker feedback.
Alternatively, open Windows Sound Recorder from the Start menu and record 20 seconds. Speak normally, type for five seconds, tap the desk once with one finger, move the boom arm slightly, and stop recording. Listen for whether the noise is a low rumble, a metallic rattle, or a sharp impact. Disable Listen to this device when finished.
2. Test the microphone without touching the desk
Stay quiet and gently tap the microphone mount itself, not the microphone grille. Then tap the desk 12 to 18 inches away from the clamp. If the desk tap is nearly as loud as the mount tap, vibration is traveling through the arm. If only direct mount taps are loud, the issue is more likely the shock mount, mic thread, or arm hardware.
3. Isolate the clamp location
Hold the boom arm steady and press down lightly on the desk near the clamp. Then repeat near the middle of the desk and near a desk leg or frame support. A hollow or thin tabletop commonly amplifies vibration at its center. If the clamp is mounted there, move it temporarily closer to a leg, crossbar, or reinforced edge and repeat the recording test.
4. Check for contact points and cable tension
Follow the entire arm from clamp to microphone. Nothing should rest against a monitor arm, wall, PC case, speaker, cable tray, shelf, or desk frame. Also inspect the USB or XLR cable. A tightly stretched cable can act like a vibration bridge, especially if it is zip-tied to the desk or pulled taut against the boom arm.
5. Rule out gain and processing
In Windows, go to Settings > System > Sound > Input, select the microphone, and lower Input volume temporarily to 60. In Discord, go to User Settings > Voice & Video, turn off Automatically determine input sensitivity, then raise the manual threshold until ordinary desk taps do not open the input indicator.
For OBS Studio, open Settings > Audio and confirm the correct microphone is selected under Mic/Auxiliary Audio. Then, in the Audio Mixer, click the three dots beside the mic source and choose Filters. Temporarily bypass or remove aggressive gain filters while testing; excessive gain can make a mechanical problem seem worse.
Fixes by Cause
Clamp mounted to a flexible desk surface
What causes it: A thin particleboard, hollow-core, glass, or lightweight tabletop flexes under normal use. The clamp transfers that flex directly into the arm.
How to check: Tap the desk near the clamp, then near a desk leg. If the clamp-area tap produces a larger or longer rumble, the mounting location is resonating.
What to do: Move the clamp to a stronger area, ideally within a few inches of a desk leg, frame, or thick rear support. Add a flat clamp reinforcement plate above and below the desktop if the desk manufacturer allows it. A dense rubber or neoprene pad about 2 to 5 mm thick between the clamp and desk can reduce high-frequency vibration; keep it thin enough that the clamp remains fully secure.
How to undo: Remove the pad or reinforcement plate, loosen the clamp, and return the arm to its previous location. Clean any non-permanent residue with a desk-safe cleaner.
No shock mount or ineffective shock mount
What causes it: A rigid microphone clip connects the mic body directly to the boom arm. Even a shock mount can fail to isolate vibration if its elastic bands are twisted, stretched, missing, or compressed by an oversized microphone.
How to check: Hold the microphone body still and tap the boom arm below the mount. If the impact is strong in the recording, inspect whether the microphone is rigidly connected or whether the shock mount’s elastic suspension moves freely.
What to do: Install a compatible shock mount with the correct thread adapter, usually 3/8-inch or 5/8-inch. Center the microphone in the suspension so it does not touch the outer frame. Replace stretched elastic bands if your mount uses removable bands. Do not overtighten a rigid collar around the microphone body.
How to undo: Unscrew the shock mount, reinstall the original microphone clip, and retain the thread adapter for future use.
Loose joints, clamp hardware, or microphone threads
What causes it: A loose pivot, desk clamp, adapter, or microphone mounting thread can create rattles and allow the arm to resonate after a desk impact.
How to check: With the microphone removed if practical, gently move each joint one at a time. Listen for clicking or metal-on-metal movement. Check the clamp screw, arm-to-clamp connection, 3/8-inch-to-5/8-inch adapter, and microphone mount ring.
What to do: Tighten only the fasteners intended for adjustment. Most arms use a hand knob, hex screw, or tension screw at each pivot. Turn in small increments, usually one-quarter turn at a time, and test movement after each adjustment. Tighten the desk clamp until it does not shift, but stop before crushing soft particleboard. If a removable threaded adapter loosens repeatedly, apply a small amount of removable medium-strength threadlocker only to the adapter threads.
How to undo: Back off the tension screws by the same small increments. Remove threadlocker-applied adapters with normal hand pressure or appropriate tools after it has been allowed to release.
Keyboard, mouse, and controller impacts
What causes it: Mechanical keyboards, heavy mouse movement, desk-mounted steering wheels, and controllers placed down hard create direct impact energy in the tabletop.
How to check: Record while typing normally, then repeat with the keyboard resting on a desk mat, foam pad, or thick mouse mat. If the thumps decrease, the input devices are a meaningful vibration source.
What to do: Put the keyboard and mouse on a large desk mat with a dense rubber base. Add small rubber feet beneath a controller charging dock or other hard accessories. Avoid letting a steering-wheel clamp share the same unsupported section of desk as the microphone arm. If possible, position the boom arm on the opposite side of the desk from the keyboard’s hardest impact area.
How to undo: Remove the mat, feet, or relocated accessories. No settings changes are required.
Cable tension or contact with other equipment
What causes it: A cable pulled tight between the microphone and PC can transmit movement. An arm touching a monitor stand, wall, or cable tray can also create an alternate vibration path.
How to check: While monitoring audio, lift the cable slightly so it hangs freely and move the arm through its normal range. Then check whether any part of the arm contacts nearby equipment.
What to do: Leave a relaxed service loop of several inches near the microphone and another near the arm base. Secure cable only to the boom arm with soft hook-and-loop straps, not rigid zip ties pulled tight. Maintain a visible gap between the arm and nearby surfaces throughout its movement range.
How to undo: Remove the hook-and-loop straps and route the cable as before.
Excessive microphone gain or missing low-cut filtering
What causes it: High gain raises both voice level and low-frequency mechanical rumble. Noise suppression may reduce some background noise but usually cannot fully remove physical impacts without affecting speech.
How to check: Lower Windows Input volume from 100 to 60 and repeat the desk-tap test. If the rumble becomes manageable while speech remains understandable, gain was contributing.
What to do: Set microphone level for normal speech first, then move the microphone closer to your mouth—typically 4 to 8 inches for a cardioid microphone—rather than restoring excessive gain. In OBS, add a High Pass Filter through a VST if you use one, or use an EQ filter that gently reduces sub-bass rumble below roughly 70 to 100 Hz. Avoid aggressive cuts until you confirm your voice still sounds natural.
How to undo: Restore the previous Windows input level, remove the OBS filter, or reset the EQ band to 0 dB.
When to Replace or Reinstall
Replace the boom arm if its springs have lost tension, its pivots cannot stay tight, the clamp screw slips under normal load, or the arm rattles even when removed from the desk. Replacement is also sensible when the arm’s rated load is below the combined weight of the microphone, shock mount, adapter, and cable.
Reinstall rather than replace when the hardware is sound but the setup is poor. Move the clamp to a reinforced desk section, use a compatible shock mount, remove contact points, and reroute the cable with slack. If the desk itself visibly flexes, rocks, or produces a long resonant boom after a light tap, address the desk before buying a more expensive arm.
FAQ
Why does my boom arm pick up vibrations even with a shock mount?
A shock mount isolates the microphone from the arm, but it cannot fully compensate for a flexing desk, a loose clamp, a cable pulled tight, or a microphone touching the shock mount frame. Confirm that the microphone is centered and suspended freely, then test the clamp location.
Will a desk mat stop boom-arm vibration?
A desk mat can reduce keyboard and mouse impact noise, especially sharp tapping and small knocks. It will not fully fix vibration from a weak desk, loose arm joint, or rigid microphone mount. Treat it as one layer of isolation rather than a complete solution.
Should I tighten my boom arm as much as possible?
No. Tighten it only enough to prevent slipping, rattling, and unwanted movement. Overtightening can damage particleboard desks, strip adjustment screws, compress clamp pads, and make future adjustments difficult. Use quarter-turn adjustments and retest.
Can software remove desk vibrations from my microphone?
Software can reduce some rumble, but it cannot reliably repair a large mechanical thump without potentially changing voice quality. Lower gain, a modest high-pass filter, input sensitivity settings, and noise suppression can help after the physical vibration path has been reduced.