
Cooking content lives or dies on two shots: the clear overhead of your hands working, and the close-up that makes food look delicious. Everything else is supporting cast. If you build your kit around a solid overhead rig, good top-down lighting, and clean audio for narration, you can produce channel-quality cooking videos without a film crew. Here is how to prioritize the gear.
As an Amazon Associate we earn from qualifying purchases at no extra cost to you.
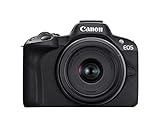
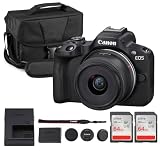

Top 3 picks at a glance
The overhead shot is your foundation
Most cooking channels are shot from directly above the cutting board or stovetop. That means you need a camera mounted looking straight down, held steady, at a height that frames a standard 18-inch work area. An overhead C-stand arm, a wall-mounted arm, or a sturdy tripod with a horizontal center column all work; the key is that it does not vibrate when you chop.
Camera options
A modern smartphone shooting 4K is genuinely excellent for overhead cooking work, and many successful channels never use anything else. If you want interchangeable lenses and better low-light performance, an entry mirrorless camera in the $500–900 range with a 24–35mm equivalent lens gives you a cleaner, more cinematic image.
Lighting food so it looks edible
Food photography lighting is soft and slightly from behind or the side, never flat from the front. One large softbox or LED panel at roughly 45 degrees, plus a white bounce card on the opposite side to fill shadows, makes ingredients look fresh and dimensional. Aim for a daylight-balanced 5600K so colors read true; warm light can make greens look tired.
| Gear | Budget range | Priority | Notes |
|---|---|---|---|
| Overhead mount/arm | $40–150 | Essential | Stability over features |
| Camera (phone or mirrorless) | $0–900 | Essential | Phone 4K is fine to start |
| Key light + softbox | $80–250 | Essential | Soft, ~45°, 5600K |
| Lavalier or USB mic | $30–150 | High | For voiceover narration |
| Second angle camera | $0–600 | Optional | Adds cutaways |
Audio: record narration separately
Kitchens are noisy — sizzling, running water, exhaust fans — so the smart move is to record clean voiceover narration after the shoot rather than relying on on-set audio. A USB condenser or a dynamic mic in a quiet room gives you crisp narration you can edit precisely. Capture natural sizzle and chopping sounds on set separately to layer back in; those ASMR moments are half the appeal of food video.
A second angle sells the story
Once your overhead rig is solid, a second camera at counter height for reaction shots and plating close-ups doubles your editing options. It does not need to match the main camera perfectly; even a phone on a small tripod adds variety that keeps viewers watching.
Storage and workflow for food footage
Cooking videos generate a lot of high-bitrate footage, especially if you shoot 4K on two angles, so plan storage before you drown in clips. A single 10-minute 4K take can be 6–10GB, and a full recipe with multiple angles and retakes easily fills 50–100GB. Record to fast, video-rated memory cards, offload to an external SSD or NAS the same day, and keep a backup copy of anything you have not edited yet. A simple folder system by recipe and date saves hours at the editing stage. Getting this pipeline right early keeps your channel sustainable instead of leaving you juggling full drives mid-project.
FAQ
Do I need a mirrorless camera or is my phone enough?
A recent phone shooting 4K is enough to launch and grow a cooking channel. Upgrade to a mirrorless camera when you want shallow depth of field, better low-light kitchens, or lens choices — not before your content and lighting are dialed in.
How do I stop my overhead shot from shaking when I chop?
Mount the camera to a wall arm or a weighted C-stand rather than a light tripod, and avoid chopping on the same table the stand sits on. Decoupling the cutting surface from the camera mount removes almost all vibration.
Bottom line
Nail the overhead rig, light food soft and slightly from the side at 5600K, and record narration in a quiet room, and you have the backbone of a professional cooking channel. Start with a phone and one softbox; add a mirrorless body and a second angle once the fundamentals look right. Great cooking video is about clear hands and appetizing light far more than expensive cameras.


