
Top 3 picks at a glance
Best Outdoor Movie Screens for Backyard Theater
The best outdoor movie screen for most backyards is a freestanding, front-and-rear-projectable frame screen in the 120–150-inch range, with an aluminum frame, a tensioned matte-white surface, and a storage bag; inflatable screens are easier to transport, while fixed outdoor installations handle wind and repeated use better.
Screen size alone does not determine the best result. A large screen can look dim with an ordinary portable projector, and a lightweight inflatable can become unstable before a rigid frame screen does. The right choice depends on viewing distance, projector brightness, wind exposure, setup frequency, and whether you need front projection, rear projection, or both.
As an Amazon Associate we earn from qualifying purchases at no extra cost to you.



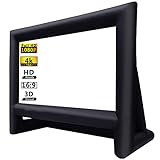
Quick comparison of the best outdoor screen types
| Screen type | Typical image sizes | Setup time | Wind resistance | Best for | Typical price range |
|---|---|---|---|---|---|
| Portable tensioned frame | 100–180 inches | 15–35 minutes | Good with stakes and ballast | Sharpest image and regular backyard use | $250–$800 |
| Inflatable screen | 100–220 inches | 5–15 minutes | Fair; requires continuous airflow and anchoring | Fast setup and large group viewing | $120–$500 |
| Tripod screen | 80–150 inches | 5–15 minutes | Fair to poor in gusts | Small lawns and occasional movie nights | $100–$400 |
| Manual pull-down outdoor screen | 100–180 inches | Permanent installation | Good if securely mounted | Patios, covered decks, and repeat use | $250–$900 |
| DIY fixed frame | Any custom size | Several hours initially | Excellent when engineered correctly | Dedicated outdoor theaters | $150–$700 |
Best overall: portable tensioned-frame screens
A tensioned frame is the strongest all-round choice when image quality matters more than the absolute fastest setup. Models such as the Elite Screens Yard Master 2 use a lightweight frame and a removable screen surface designed for outdoor front or rear projection. Comparable portable frame screens are available in 16:9 sizes from about 100 to 180 inches.
The main advantage is a flat, evenly stretched surface. Wrinkles and sagging are less visible than on a loose hanging sheet, especially during bright scenes or camera pans. A frame also gives you a predictable image boundary, which makes projector placement easier.
Look for a frame made from aluminum tubing, corner joints that lock firmly, ground stakes, guy lines, and a carrying case. A frame that is quick to assemble but has no meaningful anchoring system is not a complete outdoor solution.
What to check before buying
- Fabric: Choose a matte-white surface around 1.0 gain for broad seating areas. Higher-gain material can look brighter from the center but creates a narrower viewing sweet spot.
- Viewing angle: A wide-angle fabric is preferable when guests sit across a lawn rather than directly in front of the projector.
- Projection compatibility: If you may put the projector behind the screen, verify that the material is rated for rear projection. Some front-projection surfaces produce a dim or visibly tinted rear image.
- Black border: A border improves perceived contrast and helps disguise small alignment errors.
- Replacement fabric: Removable material is valuable because outdoor screens eventually collect dust, pollen, or moisture.
Best for fastest setup: inflatable screens
Inflatable screens are the practical choice when one person must set up a large display quickly. Their fan-supported frame can create a 120- to 220-inch image without carrying long rigid tubes. They also pack down smaller than a comparable hard frame.
The compromise is stability and noise. The fan must normally run throughout the screening, and the soft structure can move in gusts. An inflatable screen should be secured with every supplied guy line, not just the two front stakes. On a windy evening, a smaller tensioned frame is safer and usually produces a steadier image.
Choose an inflatable model with a separate projection surface rather than a permanently sewn-on sheet when possible. A detachable fabric is easier to clean and replace. Check that the blower has a protected power cable and that the storage bag has enough room for the screen after it has fully dried.
Best for a small yard: tripod screens
A tripod screen is suitable for a 80- to 120-inch image and occasional movie nights. It is usually the least complicated option: unfold the legs, raise the screen, and adjust the projector. The narrow footprint helps on patios or between garden furniture.
Tripod screens are less forgiving in wind because the elevated housing acts like a sail. Place the legs on level ground, add sandbags over the base, and lower the screen if gusts begin. Avoid attaching the screen to a fence or lightweight table; those supports can transfer movement directly into the image.
Screen size, seating distance, and projector brightness
A useful starting point is to seat viewers about 1.2 to 1.6 times the image width from a 16:9 screen. For a 120-inch diagonal screen, the image is approximately 105 inches wide, so the first seating row should be about 10.5 to 14 feet away. At 150 inches diagonal, the image is about 131 inches wide, making 13 to 17.5 feet a more comfortable range.
Projector brightness also limits practical size. A 120-inch 16:9 image has an area of roughly 42 square feet. If the screen material is close to 1.0 gain and you want approximately 30 foot-lamberts in dark conditions, the calculation is:
Required lumens = 30 × 42 = about 1,260 lumens reaching the screen.
Because outdoor projection loses light through imperfect placement, ambient light, zoom settings, and image-mode calibration, a projector rated around 2,000–3,000 ANSI lumens is a more sensible match. For a 150-inch screen, the image area is about 66 square feet; the same target becomes about 1,980 lumens at the screen, so a 3,000–4,000 ANSI-lumen projector gives more useful headroom.
Do not compare a manufacturer’s “LED lumens” claim directly with ANSI lumens without checking the measurement standard. A large screen viewed before full darkness may need more brightness than these calculations suggest.
Decision matrix: which screen fits your backyard?
| Your situation | Recommended choice | Reason |
|---|---|---|
| Usually calm, level lawn; movies every week | 120–150-inch tensioned frame | Best balance of sharpness, repeatable setup, and stability |
| One person sets up for occasional parties | 120–180-inch inflatable | Large image with fewer rigid parts to assemble |
| Patio with limited floor space | 80–120-inch tripod screen | Small footprint and simple storage |
| Frequent wind or exposed hillside | Smaller tensioned frame or fixed frame | Rigid surfaces and proper ballast move less than inflatables |
| Projector must sit behind the audience | Rear-projection-capable frame or inflatable | Keeps people from casting shadows and reduces cable crossings |
| Permanent covered deck | Outdoor-rated manual roll-down screen | Fast daily operation after secure installation |
Wind resistance and safe setup
Manufacturers rarely provide a meaningful universal wind rating because lawn surface, stake type, ballast, and gust direction change the result. Treat the supplied stakes and guy lines as essential equipment. Hammer stakes fully into firm ground, angle them away from the screen, and keep guy lines taut without bending the frame.
For a portable frame, place ballast at the base of both side supports and use at least four anchor points. Sandbags are preferable to loose household objects because they are less likely to create sharp contact points or trip hazards. If the frame begins flexing, the fabric snaps loudly, or the image visibly sways, stop the screening and lower the surface. Never leave an inflatable operating unattended overnight.
Fabric quality and storage requirements
Matte-white fabric with a neutral color balance is the safest choice for movies. Gray fabric can improve perceived black levels when there is some ambient light, but it also reduces brightness and may require a brighter projector. A high-gain surface can help a dim projector from a central seating position, yet viewers at the sides may see uneven brightness or hotspotting.
Allow every component to dry before storage. Folding a damp screen traps moisture and can cause mildew, especially around stitched edges and the carrying bag. Roll or fold the fabric according to the manufacturer’s instructions, remove grass and grit from frame joints, and store stakes separately so they do not puncture the screen. A padded bag is worthwhile for aluminum frames because bent tubing can prevent proper tension.
Setup checklist for a steadier, brighter picture
- Measure the throw distance before assembling the screen, then confirm that the projector can fill the chosen image size without digital zoom.
- Place the screen with the bottom edge at least 18–24 inches above the ground to reduce grass-level obstruction.
- Use the projector’s Movie or Cinema mode, disable keystone correction when possible, and physically level the projector instead.
- Connect the projector and speakers before darkness so cable faults do not delay the film.
- Keep the projector’s air intake clear of grass, dust, and fabric; outdoor debris can raise operating temperature.
- Run a short test clip from the actual seating area and check focus at the corners, not only in the center.
Frequently asked questions
Can I use one screen for both front and rear projection?
Yes, if the screen material is specifically rated for both. The article recommends checking projection compatibility before buying: some front-projection surfaces produce a dim or visibly tinted image when projected onto from behind. A front-and-rear-projectable screen can also help when you want the projector behind the audience, avoiding shadows and reducing cable crossings.
How can I make an outdoor screen easier to align with the projector?
Choose a screen with a predictable image boundary, such as a tensioned-frame screen, and look for a black border. The frame helps make projector placement easier, while the border improves perceived contrast and can disguise small alignment errors. A loose or sagging surface is less predictable, particularly during bright scenes or camera pans.
What should I do if wind picks up during a movie?
Stop the screening and lower the screen if the frame begins flexing, the fabric snaps loudly, or the image visibly sways. Secure the supplied stakes and guy lines before use, and add ballast at the base of a portable frame’s side supports. For an inflatable screen, use every supplied guy line; do not leave it operating unattended overnight.
Is gray screen fabric a better choice for watching outdoors?
Gray fabric can improve perceived black levels when there is some ambient light, but it reduces brightness and may require a brighter projector. Matte-white fabric with a neutral color balance is the safer general choice for movies. High-gain material can help from a central seat, though viewers at the sides may see uneven brightness or hotspotting.
How should I store the screen after movie night?
Let every component dry before putting it away. This matters especially for an inflatable screen, whose storage bag should have enough room for the screen after it has fully dried. A removable projection surface can be easier to clean and replace if it collects dust, pollen, or moisture.
Bottom line
Choose a 120- to 150-inch tensioned frame if you want the best combination of picture quality, viewing angle, fabric tension, and stability. Choose an inflatable screen when fast setup and a very large image matter more than silent operation and wind performance. For compact patios, a tripod screen is adequate, while a securely mounted outdoor roll-down screen makes the most sense for a permanent theater. In every case, match the screen size to projector brightness, anchor the structure for the weather, and store the fabric completely dry.


