
A common mistake among content creators is investing thousands of dollars in high-end dynamic microphones, only to use them in an untreated, echo-prone room. Viewers will tolerate slightly soft camera focus, but bad audio—hollow echoes, harsh keyboard clicks, and muddy room rumble—will make them click away instantly. Many beginners try to solve this by plastering their walls with cheap, ultra-thin foam tiles, only to realize their voice still sounds boomy and unnatural on stream.
True acoustic treatment is about managing sound reflections, not blocking sound from entering or leaving your room. When researching what to look for in streaming acoustic panels, you must look past flashy marketing promises and focus on physical density, thickness, and material science. This guide will cut through the acoustic jargon and show you how to optimize your streaming space in 2026 without wasting money on useless materials.
As an Amazon Associate we earn from qualifying purchases at no extra cost to you.


Top 3 picks at a glance
Decide These 3 Things First
Before browsing online catalogs or ordering bulk packs of foam, you must define the scope of your project by deciding on these three fundamental factors:
- Acoustic Treatment vs. Sound Isolation: Acoustic panels are designed to absorb sound waves inside your room to stop them from bouncing back into your microphone. They will not stop your loud gaming sessions from waking up people in the next room, nor will they block the sound of traffic outside. If you need to stop sound from entering or exiting, you need structural mass (like heavy doors, double-pane windows, or green glue drywall), not surface-level panels.
- On-Camera Aesthetics vs. Hidden Utility: If you stream with a green screen or a heavy digital background blur, the visual design of your panels does not matter. You can opt for budget-friendly gray or blue polyurethane foam. However, if your background is visible to your audience, you should consider geometric PET polyester felt tiles, fabric-wrapped fiberglass panels, or modern wooden acoustic slats that enhance your room’s production value.
- Wall Damage Tolerance: If you rent your living or streaming space, you cannot use heavy-duty spray adhesives or screw-in impaling clips, as these will destroy drywall upon removal. Renters must look for lightweight options (under 0.2 pounds per panel) that can be mounted using non-destructive double-sided tape, or plan to mount panels onto a portable backing board first.
1. Panel Thickness and Frequency Target
The thickness of an acoustic panel directly dictates which sound frequencies it can actually absorb. Sound waves of lower frequencies (bass and deep vocals) have longer wavelengths, meaning they require thicker, denser materials to be stopped. High frequencies (high-pitched whistles, keyboard clicks, and sibilant “S” sounds) have short wavelengths and can be managed by thin materials.
- 1-Inch Panels: Typically sold in bulk packs (such as 52-packs or 54-packs of 12″ x 12″ wedge tiles). These are highly economical, usually costing between $30 and $40 per pack. However, they only absorb high-frequency sounds above 1,000 Hz. They will tame the “slap back” echo of your mechanical keyboard but will do nothing to clean up the muddy, boomy characteristics of a deep voice.
- 2-Inch Panels: The ideal entry point for most streamers. A 2-inch thick panel (like a premium dense polyurethane wedge or a groove-cut 3D panel) absorbs sound down to about 250 Hz to 500 Hz. This range covers the fundamental frequencies of the human voice, making your commentary sound crisp, intimate, and dry.
- 3-Inch to 4-Inch Panels (Broadband Absorbers): Usually constructed of fabric-wrapped mineral wool or dense fiberglass. These absorb frequencies all the way down to 100 Hz and below. If you use a subwoofer, play bass-heavy music on stream, or have a naturally deep, resonant voice, you will need at least a few of these thicker panels placed in your room’s corners (where bass builds up).
2. Core Material and Density
Acoustic panels are not just “sponges.” The physical density of the material determines how much acoustic energy is converted into heat as the sound wave passes through it. If a panel is too light and airy, the sound wave passes right through it, bounces off the drywall, and returns to your microphone unaffected.
Open-Cell Polyurethane Foam: This is the classic “studio foam” material. It is incredibly lightweight and easy to cut. However, quality varies wildly. Budget foam often has a density of less than 1.0 lb/ft³ (pound per cubic foot), which is too sparse to do much good. Look for high-density polyurethane foam rated at 1.5 to 2.0 lbs/ft³ for acceptable performance.
PET Polyester Felt: A sleek, modern alternative made from compressed polyester fibers (often recycled plastic bottles). These panels are thin (usually 0.4 to 0.6 inches) but incredibly dense (up to 10 to 12 lbs/ft³). They provide excellent high-frequency absorption, are highly impact-resistant, do not crumble over time, and come in crisp, solid colors that look fantastic on camera.
Fiberglass and Rockwool: The undisputed gold standard of acoustic treatment. Rigid fiberglass (like Owens Corning 703) or mineral wool (like Rockwool Safe’n’Sound) features densities ranging from 3.0 to 4.5 lbs/ft³. These materials offer incredibly flat, even absorption across the entire frequency spectrum. Because they are irritating to the skin and lungs in raw form, they must be wrapped in acoustically breathable fabric.
3. Coverage Area and Room Calculations
You do not need to turn your streaming room into a padded cell. Over-treating a room makes it sound unnaturally dead, which can feel claustrophobic and fatiguing during long streaming sessions. The goal is to break up parallel hard surfaces.
For a standard home office or bedroom used for streaming, aiming for 20% to 30% wall coverage is the sweet spot. If your room has highly reflective surfaces like hardwood floors, concrete walls, or large windows, you may need to increase your coverage closer to 40%.
To calculate your needs, use this simple formula for a standard 10′ x 12′ room with 8-foot ceilings:
- Total Wall Surface Area: (10 + 12 + 10 + 12) x 8 = 352 square feet.
- 25% Coverage Goal: 352 x 0.25 = 88 square feet of acoustic treatment.
- If buying standard 12″ x 12″ (1 square foot) tiles, you would need approximately 88 to 90 tiles. A single 52-pack or 54-pack of budget foam will cover about 52 to 54 square feet, meaning you would need two packs to hit your optimal coverage target.
4. Installation Methods and Wall Preservation
How you mount your panels is just as important as the panels themselves. Acoustic treatment must remain flush, flat, and secure to work effectively and look professional.
Self-Adhesive Backing: Some panels come with pre-applied adhesive or included double-sided adhesive squares (often packed in quantities of 300 pieces for bulk foam). This makes installation incredibly fast. However, cheap adhesives can fail in hot, humid rooms, causing panels to peel off the wall mid-stream. Furthermore, these adhesives often cure over time, tearing away chunks of drywall paint when you try to remove them.
The Backing Board Method (Renter-Friendly): If you are using lightweight 1-inch or 2-inch foam tiles, do not glue them directly to your wall. Instead, purchase cheap, lightweight foam core boards from a craft store. Use spray adhesive to glue your acoustic tiles to the board in your desired pattern, then hang the entire board on your wall using two or three damage-free picture hanging strips. This keeps your walls pristine and allows you to pack up your treatment easily if you move.
Mechanical Fasteners (Z-Clips and Impaling Clips): For heavy, professional fabric-wrapped fiberglass panels (which can weigh 5 to 15 pounds each), adhesive is not an option. You must use metal impaling clips or Z-clips screwed directly into wall studs or dry-wall anchors. This provides a rock-solid, flush mount that will never sag or drop.
5. Price Tiers and Value Analysis
Acoustic panels scale dramatically in price based on material quality, aesthetic finish, and structural framing. Understanding these tiers helps you allocate your budget where it actually impacts your audio.
Budget Tier ($0.60 to $1.50 per square foot): This is the home of bulk polyurethane foam packs. Brands offer 52-pack or 54-pack bundles of 1″ x 12″ x 12″ wedge or pyramid foam for around $30 to $38. These are excellent for streamers on a tight budget who need to cover a lot of wall space to tame high-frequency echo, but they require patience to decompress after shipping and look highly utilitarian.
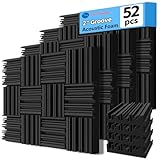
Mid-Range Tier ($3.00 to $8.00 per square foot): Here, you will find thicker 2-inch polyurethane foam (often featuring stylized 3D groove or wave designs) selling for $60 to $80 per 52-pack. You will also find dense PET polyester felt geometric tiles. This tier offers a great balance of vocal-range absorption and polished, camera-ready aesthetics.
Premium Tier ($15.00 to $35.00+ per square foot): This tier consists of professional, fabric-wrapped fiberglass or mineral wool broadband panels, wood-slat acoustic wall systems, and wooden quadratic diffusers. While a single 24″ x 48″ panel can cost $80 to $150, their absorption efficiency is so high that you only need four or five of them to outperform fifty cheap foam tiles.
Spec Checklist
Use this quick reference table to compare what you get across the three primary tiers of streaming acoustic panels:
| Specification | Budget Tier | Mid-Range Tier | Premium Tier |
|---|---|---|---|
| Average Price | $0.60 – $1.50 / sq. ft. | $3.00 – $8.00 / sq. ft. | $15.00 – $35.00+ / sq. ft. |
| Core Material | Low-density polyurethane foam | High-density polyurethane or PET felt | Rigid fiberglass or mineral wool (Rockwool) |
| Thickness | 1 inch | 1.5 to 2 inches | 2 to 4 inches (with heavy wood frames) |
| Target Frequencies | Highs only (>1,000 Hz) | Highs & Upper-Mids (>400 Hz) | Full range (Broadband, down to 80 Hz) |
| Typical Weight | 0.05 – 0.1 lbs per tile | 0.15 – 0.4 lbs per tile | 5.0 – 15.0 lbs per panel |
| Mounting Method | Double-sided tape, spray glue | Adhesive backing, mounting pins | Metal Z-clips, impaling clips, screws |
Red Flags to Watch Out For
The acoustic treatment market is flooded with low-quality products backed by misleading marketing. Watch out for these common warning signs:
- Vacuum-Compressed Foam That Won’t Expand: To save on shipping costs, budget foam panels are often compressed flat and vacuum-sealed. Cheap, low-quality foam with poor elasticity will fail to rehydrate. Even after waiting 72 hours or soaking them in water as directed, they may remain warped, flat, and completely useless.
- “Soundproofing” and “Noise-Canceling” Claims: If a product listing for a thin foam tile claims it will “soundproof your room” or “block outside noise,” the manufacturer is lying. Foam panels only absorb internal room reflections. Blocking sound requires heavy, airtight structural barriers.
- No Fire-Retardant Certification: Polyurethane foam is naturally highly flammable and can emit toxic smoke if it catches fire. If you are running hot studio lights, multiple PCs, and complex wiring, do not buy unrated foam. Look for panels that explicitly state they meet Class A (or Class 1) ASTM E84 fire standards.
- Strong Chemical Off-Gassing: Cheaply manufactured foam often arrives smelling strongly of industrial chemicals. In a small, enclosed streaming room with limited ventilation, this off-gassing can cause headaches, eye irritation, and throat discomfort over long broadcasting sessions.
FAQ
Can I just use egg cartons to acoustic treat my streaming room?
No. This is a persistent myth. Egg cartons are made of thin, lightweight cardboard. They do not have the density or thickness required to absorb sound waves. While their shape may diffuse a tiny amount of very high frequencies, they are acoustically ineffective and represent a massive fire hazard when stapled to your walls.
Where are the most important places to hang my panels?
You should prioritize your “first reflection points.” These are the spots on the walls to your immediate left and right where sound from your voice travels, bounces, and goes into your microphone. Additionally, place panels on the wall directly behind your monitors (to catch audio bouncing off your desk) and on the wall directly behind your head.
Do acoustic panels stop my mechanical keyboard from sounding so loud?
Acoustic panels will stop the sound of your keyboard clicks from echoing off the hard walls and back into your microphone, making the clicks sound shorter and less distracting. However, to truly quiet a mechanical keyboard, you should use silent switches, install rubber O-rings under your keycaps, and place a thick felt desk mat under your keyboard.
What is the fastest way to expand vacuum-packed foam panels?
If your foam panels arrive vacuum-sealed and flat, letting them air-dry can take days. The fastest method is to submerge them completely in warm water, gently wring out the excess water, and then tumble dry them on low heat in a clothes dryer for 15 to 20 minutes. They will instantly pop out to their full, intended thickness.


