
Top 3 picks at a glance

The Short Answer
For a standard streaming setup, you do not need to cover your entire room in acoustic foam. To achieve professional, broadcast-quality audio, you need to cover 15% to 25% of your wall surface area with acoustic panels. This specific coverage level is the sweet spot for neutralizing distracting flutter echoes, keyboard clicks, and vocal reverberations without making your room sound unnaturally “dead.”
If you are streaming from a typical 10′ x 10′ bedroom, this coverage translates to 48 to 60 standard 12″ x 12″ panels. If you opt for thicker, high-density 2-inch panels, you can achieve the same level of sound control with fewer panels—roughly 36 to 48 panels—because thicker panels absorb a wider range of mid-to-low vocal frequencies. In the competitive content landscape of 2026, where viewers expect crisp, studio-grade vocal clarity, spending $30 to $70 on a targeted acoustic treatment pack is one of the most cost-effective upgrades you can make to your channel.
As an Amazon Associate we earn from qualifying purchases at no extra cost to you.
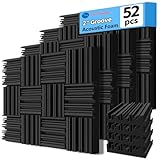


Standard Sizes
Acoustic panels for home studios and streaming rooms are highly standardized. Most entry-level and mid-range options are molded from polyurethane foam and sold in bulk packs. Understanding the physical dimensions of these panels is crucial for calculating exactly how many packs you need to purchase.
Standard panels are typically 12 inches by 12 inches square, but their thickness varies. Thickness is the most critical spec: 1-inch panels are designed to absorb high-frequency sounds (like mouse clicks and keyboard clatter), while 2-inch panels handle lower midrange frequencies (like the deep resonance of your speaking voice).
| Panel Type | Dimensions (Inches) | Dimensions (Metric) | Coverage per Panel | Average Pack Size & Price Range |
|---|---|---|---|---|
| Standard Thin Foam | 12″ x 12″ x 1″ | 30.5 x 30.5 x 2.5 cm | 1.0 sq. ft. | 52 to 54 Pack ($30 – $40) |
| Thick Broadband Foam | 12″ x 12″ x 2″ | 30.5 x 30.5 x 5.1 cm | 1.0 sq. ft. | 52 Pack ($60 – $75) |
| Medium Accent Panels | 12″ x 12″ x 1.5″ | 30.5 x 30.5 x 3.8 cm | 1.0 sq. ft. | 12 to 24 Pack ($20 – $35) |
| Large Studio Panels | 24″ x 24″ x 2″ | 61.0 x 61.0 x 5.1 cm | 4.0 sq. ft. | 6 to 12 Pack ($45 – $65) |
How to Measure Your Space
To determine the exact number of acoustic panels your streaming room requires, you must calculate your total wall surface area. Follow these four steps to find your target number:
- Measure the Walls: Measure the width and height of all four walls in your room. Multiply the width by the height for each wall to find the square footage. For example, a 10-foot wide wall with an 8-foot ceiling is 80 square feet. Repeat this for all four walls and add them together. (e.g., 80 + 80 + 80 + 80 = 320 square feet of total wall area).
- Subtract Large Openings: Subtract the square footage of large windows, doors, or built-in closets that you cannot or do not want to cover with foam. If you have a standard door (approx. 20 sq. ft.) and a window (approx. 15 sq. ft.), subtract 35 square feet from your total. (e.g., 320 – 35 = 285 square feet of treatable wall space).
- Calculate Your Target Coverage: Multiply your treatable wall space by your desired coverage percentage. For general streaming, a 20% coverage rate is ideal.
Formula: 285 sq. ft. x 0.20 = 57 square feet of coverage needed. - Determine Panel Count: Since standard 12″ x 12″ panels cover exactly 1 square foot each, your target square footage matches your panel count. In this scenario, you would need 57 panels. Buying a standard 52-pack or 54-pack would give you almost exactly what you need, with a few panels left over for targeted placement.
By Room or Use Case
The layout of your streaming space dictates not just the number of panels you need, but also where they should be placed to prevent echo from entering your microphone.
The Bedroom Streamer (Small Space, 10′ x 10′)
In a small 10′ x 10′ bedroom with standard 8-foot ceilings, sound waves bounce off nearby walls incredibly fast, creating a tight, boxy echo. However, bedrooms naturally contain sound-absorbing materials like carpets, curtains, and mattresses. Because of this built-in absorption, you can lean toward the lower end of the coverage spectrum.
For this space, we recommend 40 to 52 standard 12″ x 12″ x 1″ panels. Concentrate your layout on the two most critical zones: the wall directly behind your monitors (which catches your voice as you speak past your microphone) and the wall directly behind your head (which catches the sound bouncing back off the rear wall). Placing these in a simple checkerboard pattern covers roughly 40 to 50 square feet, which is perfect for isolating vocal frequencies.
The Dedicated Gaming/Streaming Room (Medium Space, 12′ x 12′)
A dedicated gaming room often features hard surfaces, such as desks, multiple monitors, bare hardwood or laminate floors, and minimal soft furniture. Without a bed or heavy drapes to absorb sound, mid-frequency echoes will bounce wildly, making your stream sound hollow.
To treat a bare 12′ x 12′ room, you need 52 to 72 panels. In this scenario, upgrading to thicker 2-inch panels is highly recommended to control the low-mid resonance of game audio and enthusiastic commentary. Divide your panels into three zones: a dense cluster of 16 to 24 panels directly behind your streaming desk, a grid of 12 to 16 panels on each of the side walls at ear level (the primary reflection points), and a small cluster on the back wall to prevent long-distance echoes.
The Multi-Purpose Content Studio (Large Space, 15′ x 15′ or Larger)
Large spaces have a longer echo decay time, which can make your voice sound like you are streaming from a gymnasium. If you use your studio for green-screen work, multi-person podcasts, or dynamic camera movements, sound control is even more challenging because you cannot always sit close to your microphone.
For a 15′ x 15′ space, you will need at least 80 to 120 panels. Rather than using small 1-inch foam squares, which would take hours to mount individually, you should use larger 24″ x 24″ x 2″ panels or high-density fiberglass panels. In a room of this size, focus heavily on treating the ceiling directly above your desk with a “ceiling cloud” (a hanging grid of acoustic panels) and treat opposing walls to prevent parallel reflections from bouncing back and forth across the room.
Common Sizing Mistakes
Avoid these frequent pitfalls when planning your streaming room’s acoustic treatment:
- Over-treating the Room: Covering 100% of your walls in foam is a major mistake. It strips away all high frequencies while leaving low-frequency boominess untouched. This results in a “dead,” muddy-sounding room that makes speaking feel tiring and unnatural. Stick to the 15% to 25% rule.
- Buying the Wrong Thickness: Many streamers buy cheap 1-inch foam to fix a bassy, boomy room. Thin 1-inch foam only absorbs high frequencies (above 1000 Hz). If you have a deep voice or a booming subwoofer, you need 2-inch thick panels or dedicated corner bass traps to absorb those lower frequencies (down to 250 Hz).
- Treating the Wrong Height: Acoustic panels placed near the floor or high up near the ceiling do very little to improve your microphone’s audio. Panels must be mounted at “ear level”—the horizontal plane where your mouth projects sound and where your speakers emit it.
- Confusing Absorption with Soundproofing: Acoustic foam panels do not block sound from entering or leaving your room. If you are trying to stop your family from hearing you yell at a video game, acoustic foam will not help. Foam only improves the quality of the sound *inside* the room; blocking sound requires heavy, dense construction materials like drywall, mass-loaded vinyl, or solid-core doors.
FAQ
Can I use acoustic panels to soundproof my streaming room?
No. Acoustic foam panels are designed for sound absorption, which improves the sound quality inside your room by eliminating echoes. They are too lightweight and porous to block sound from traveling through walls. To soundproof a room, you need high-mass materials that seal air gaps and physically decouple the walls.
Is 1-inch or 2-inch foam better for streaming?
For the majority of streamers, 2-inch foam is the superior choice. While 1-inch foam is effective at catching high-frequency sounds like clicky keyboard switches, 2-inch foam absorbs a much broader frequency range, including the lower mid-range tones of the human speaking voice. This makes your voice sound warmer, richer, and more professional on stream.
How many panels do I need to cover a single wall behind my monitor?
To treat the wall directly behind your desk, a grid of 16 to 24 standard 12″ x 12″ panels is usually sufficient. Arranging them in a 4×4 or 6×4 grid directly behind your microphone’s pick-up zone will catch the majority of your vocal projection before it can bounce off the hard wall behind your monitors.
Does the shape of the panel (wedge vs. pyramid vs. groove) affect how many I need?
The physical pattern molded into the foam (such as wedge, pyramid, or 3D grooves) has a negligible impact on how many panels you need. These shapes are designed to increase the surface area of the foam and diffuse sound waves, but the overall thickness, density, and placement of the panels matter far more than the visual pattern.


