
Low latency streaming with a capture card is a balancing act between speed, stability, and image quality. The goal is not to push every setting to maximum, but to minimize the time between your console or second PC rendering a frame and that frame appearing on your stream, while avoiding stutter, desync, or encoder overload. As of 2026, most capture cards can hit near-zero glass-to-glass delay if you configure buffering, color, and encoding correctly, but default drivers and software often prioritize compatibility over speed. This guide focuses on what to change first and why each choice matters for latency.
Prioritize three things: buffer control, passthrough vs. capture separation, and encoder isolation. Disabling extra buffering inside the capture software removes artificial delay. Using the card’s HDMI passthrough for your gaming monitor instead of previewing the OBS/SLOBS preview keeps your gameplay latency independent from the stream. Finally, forcing the capture card to deliver a clean, unscaled signal and letting OBS Studio handle scaling and encoding prevents double-processing that adds frames of lag. Get these right before chasing bitrate or resolution tweaks.
As an Amazon Associate we earn from qualifying purchases at no extra cost to you.




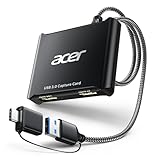


Our Top Picks

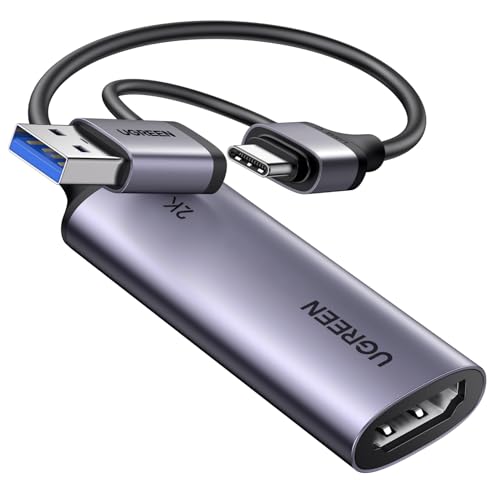
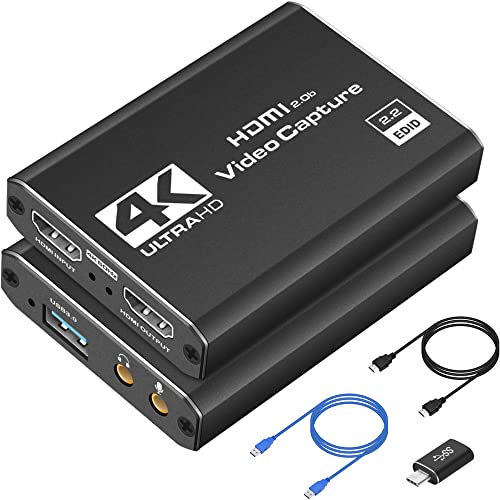


Top 3 picks at a glance
Quick Recommended Settings
| Setting | Recommended value | Why |
|---|---|---|
| Capture Software Buffering | Disabled / Low Latency Mode On | Removes driver-side frame queue that adds delay |
| Video Input Resolution/FPS | Match Source (e.g., 1920×1080 at 60Hz or 2560×1440 at 60Hz) | Prevents card from re-scaling or frame converting |
| Color Space / Range | NV12, Partial/Limited Range (or match console: Limited) | Native format for encoders, avoids color conversion lag |
| USB/PCIe Transfer Mode | USB 3.0 / PCIe Gen2 x1 or higher, connected to native controller | Avoids bandwidth bottleneck and micro-stutter |
| OBS Video Capture Source Buffering | Uncheck “Use Buffering” in Properties | Forces immediate frame delivery to OBS |
| OBS Scaling | Disable card scaling; scale in OBS via Filters > Scaling/Aspect Ratio | Single-step scaling is faster and sharper |
| Audio Input | Capture Card Audio: Disable, use direct HDMI/Analog + Sync Offset | Prevents audio drift and extra processing delay |
| Encoder | NVENC (NVIDIA) / AMF/QSV separate from capture card | Isolates encoding load from capture pipeline |
Setting-by-Setting
1. Low Latency / Buffer Mode: Enabled
Exact value: In Elgato Game Capture software go to Device Settings > Advanced > Low Latency Mode > On. For AverMedia go to RECentral > Settings > Device > Low Latency. In OBS Studio, right-click Video Capture Device > Properties > uncheck “Use Buffering” and set Buffering (ms) to 0.
Trade-off: Disabling buffering gives the lowest delay but makes the feed more sensitive to system load. If your CPU/GPU spikes you may see tearing instead of smooth delayed playback. Keep it off for latency, re-enable only if you need stability on an underpowered PC.
Fix format: What causes it: Driver queues 2-3 frames to smooth playback. How to check: In OBS, add Video Capture Device and watch Stats > Render lag. If preview feels behind passthrough, buffering is on. What to do: Uncheck “Use Buffering” and enable Low Latency Mode in vendor app, then restart OBS. How to undo: Recheck “Use Buffering” and set to Auto, or toggle Low Latency Mode Off in the vendor utility.
2. Input Resolution and Frame Rate: Match Source Exactly
Exact value: Set card to Auto or manually select 1080p60, 1440p60, or 4K60 to match your console/PC output. Path: OBS > Sources > Video Capture Device > Properties > Video Format/Resolution > Custom > 1920×1080. On console, set System > Display > Resolution to 1080p. File location for Elgato config: C:\Users\[YourName]\AppData\Roaming\Elgato\GameCapture\Settings.json controls last used resolution.
Trade-off: Matching prevents internal scaler lag, but you lose the ability to capture at a lower resolution than you play. You will rely on OBS Downscale Filter (Settings > Video > Output Scaled Resolution) instead.
Fix format: What causes it: Mismatch forces the card to scale/convert (e.g., 4K input to 1080p capture). How to check: If OBS Properties shows “Input: 3840×2160 Output: 1920×1080” on the card itself, scaling is active. What to do: Set both console and card to 1920×1080 at 60Hz before adding the source. How to undo: Return card to Auto and set console back to 4K.
3. Color Format and Range: NV12, Limited/Partial
Exact value: OBS > Video Capture Device > Properties > Video Format > NV12, Color Space > 709, Color Range > Partial. In Elgato 4K Capture Utility > Settings > Device > Color Input > Standard. On PS5/Xbox set HDMI Range to Limited, on PC set NVIDIA Control Panel > Change Resolution > Output dynamic range > Limited.
Trade-off: NV12/Partial is the native streaming format so there is no conversion delay. RGB/Full looks slightly better for text but requires conversion and can cause washed-out or crushed blacks if mismatched.
Fix format: What causes it: Card delivers RGB Full while OBS expects Partial, forcing conversion. How to check: Right-click preview > Windowed Projector, look for gray blacks or clipped whites. What to do: Set both source and OBS to Partial/Limited per paths above. How to undo: Switch Video Format back to Auto and Color Range to Full in both places.
4. Audio Clock and Sync Offset: 0ms Base, Adjust in Advanced Audio
Exact value: OBS > Edit > Advanced Audio Properties > Sync Offset for Video Capture Device: start at 0 ms, range -50 ms to 150 ms if needed. Disable card audio processing: In RECentral > Audio > HDMI Audio > Uncheck “Process Audio”, or in Elgato > Settings > Audio Input > HDMI Audio > Off if you capture chat via separate line-in.
Trade-off: Direct HDMI audio is lowest latency but can drift over long sessions if clocks differ. Using Wave Out or Line-In adds stability but you must manually sync.
Fix format: What causes it: Capture card audio clock runs slightly separate from system clock. How to check: Record a clap test (press controller button with audible click on stream), check if audio leads video in Advanced Audio Properties. What to do: Adjust Sync Offset in 20 ms steps, use key combo Ctrl + mouse drag on audio meter to fine-tune. How to undo: Reset Sync Offset to 0 ms and re-enable HDMI Audio in vendor app.
5. Connection and Refresh Rate: Native USB 3.0/PCIe Port + 60Hz Lock
Exact value: Connect USB cards to a USB 3.0/3.1 Gen 1 Type-A port (blue insert) directly on motherboard I/O, not via hub. Check Device Manager > Universal Serial Bus controllers > Confirm “USB 3.0 eXtensible Host Controller”. For PCIe cards use x1 slot or higher with PCIe 2.0+. Set Windows > Settings > System > Display > Advanced display > Refresh rate > 60 Hz for capture monitor.
Trade-off: Native ports give stable bandwidth, but you may lose a front-panel port for other devices. Locking to 60Hz prevents VRR stutter on capture, but you lose high refresh passthrough if card is not VRR-compatible (e.g., Elgato HD60 X supports 120Hz passthrough, original HD60 does not).
Fix format: What causes it: Hub or USB 2.0 fallback forces MJPEG/progressive mode. How to check: OBS log file at %appdata%\obs-studio\logs shows “USB speed: 2.0” or “using MJPEG”. What to do: Move to motherboard USB 3.0 port, reinstall driver from vendor utility. How to undo: Move back to previous port, driver will auto-negotiate.
6. OBS Video Settings: Canvas, Output, and Process Priority
Exact value: OBS > Settings > Video > Base Canvas 1920×1080, Output Scaled Resolution 1920×1080, Downscale Filter Lanczos (36 samples), FPS Common 60, Color Format NV12, Color Space 709, Color Range Partial. Settings > Advanced > Process Priority > Above Normal, Renderer > Direct3D 11, Color Format > NV12. Enable Game Mode Off in Windows > Settings > Gaming > Game Mode.
Trade-off: Above Normal priority keeps capture frames on time but can affect gameplay FPS on a single-PC setup if CPU is saturated.
Fix format: What causes it: Windows scheduler deprioritizes OBS during game load. How to check: OBS > View > Stats > Dropped Frames (Network) vs Skipped Frames (Encoding). High skipped frames means priority issue. What to do: Set Process Priority to Above Normal and close background apps with Task Manager > Ctrl+Shift+Esc. How to undo: Set Process Priority back to Normal.
By Hardware Tier
Low Tier: USB 2.0 / 1080p30 Cards (e.g., budget HDMI dongles, old Elgato HD60 S)
This tier has limited bandwidth and often forces MJPEG compression. Prioritize stability over resolution. Set capture to 1920×1080 at 30 FPS or 1280×720 at 60 FPS, Video Format MJPEG, buffering off. In OBS > Settings > Output > Streaming > Encoder > x264 Veryfast or Hardware if available, Bitrate 4500 Kbps, Keyframe 2s, Profile High. Use passthrough HDMI to TV/monitor for zero-latency play and treat OBS preview as stream-only. Disable HDR, VRR, and 1440p output on the console to avoid unsupported modes. If you see artifacting, lower canvas to 720p rather than re-enabling buffering.
Mid Tier: USB 3.0 / 1080p60 and 1440p60 Cards (Elgato HD60 X, AverMedia Live Gamer Ultra GC553)
This is the sweet spot for low latency. Enable all low latency options, set input to 1080p60 or 1440p60 with NV12. Path: Elgato 4K Capture Utility > Device > Input EDID Mode > Display, or AverMedia RECentral > Settings > EDID > Passthrough. Connect to USB 3.0 and verify in OBS Properties that format is NV12 not MJPEG. Use OBS > Settings > Video > 60 FPS, Advanced > Video > Enable “Dynamic Bitrate” off for consistent latency. For dual-PC, set capture PC encoder to NVENC H.264 CQP 18 or AMF Quality Preset Balanced. Keep HDR off unless card explicitly lists HDR10 passthrough + capture; otherwise tone-mapping adds delay.
High Tier: PCIe 4K60 HDR / 4K144 Passthrough Cards (Elgato 4K60 Pro MK.2, AverMedia Live Gamer 4K GC573, ASUS TUF CU4K30)
High tier cards have internal PCIe bandwidth to avoid compression at 4K60. Set to 3840×2160 at 60Hz or 2560×1440 at 144Hz passthrough with capture at 1080p60 or 4K60. In vendor app set Internal Input > HDMI 2.0/2.1, Color > NV12, EDID > Internal. In OBS, keep Video Capture Source at native 4K and use Settings > Video > Output Scaled Resolution 1920×1080 for stream to offload scaling to GPU shader. Enable PCIe Power Management Off: Device Manager > Imaging Devices > Properties > Power Management > Uncheck “Allow computer to turn off device”. Use GPU encoder NVENC HEVC or AV1 if platform supports it, separate from PCIe lane load. To check lane speed: GPU-Z or HWINFO > Bus Interface should show PCIe x1 2.0+ active during capture.
Common Mistakes
Mistake 1: Leaving EDID on Default/Merged. What causes it: Card advertises merged EDID that forces console to 4K even if you want 1080p low latency. How to check: Console Display settings show 4K option greyed or capture flashes when switching inputs. What to do: In vendor utility set EDID to Display or Internal 1080p, then power cycle console (hold power 10s). How to undo: Set EDID back to Default/Merged in same menu.
Mistake 2: Using OBS Preview as Gameplay Monitor. What causes it: Preview adds 1-3 frames of application render delay. How to check: Move mouse/controller; gameplay on preview lags behind passthrough TV. What to do: Play on HDMI passthrough output (card Out port to monitor) and keep OBS preview minimized. Use Projector Mode only for alignment via right-click Preview > Windowed Projector (Preview). How to undo: Disconnect passthrough and rely on preview again.
Mistake 3: Enabling HDR Capture Without Support. What causes it: Console outputs HDR10, budget card tone-maps to SDR inefficiently. How to check: Colors look washed or OBS shows “BT.2020” with heavy GPU load. What to do: On console set Settings > Screen and Video > HDR > Off, or in Windows set Settings > Display > HDR > Off, then set card Color Space to 709. How to undo: Re-enable HDR on source and set card to 2020/BT.2020 if supported.
Mistake 4: Installing Vendor App + OBS Filters That Double Buffer. What causes it: Running RECentral/4K Capture Utility in background while OBS also captures adds second queue. How to check: Task Manager shows both vendor app and OBS using Video Capture, log shows device busy. What to do: Close vendor app completely after configuring EDID/Low Latency, capture only in OBS. Disable OBS Filters > Async Delay on capture source. How to undo: Reopen vendor app and re-add source if you need its effects.
FAQ
Should I use the capture card’s scaling or OBS scaling?
Use OBS scaling. Set the card to deliver native resolution (match source) and handle all downscaling in OBS via Settings > Video > Output Scaled Resolution and right-click Source > Filters > Scaling/Aspect Ratio > Lanczos. Card scalers add a frame of latency and soften text. The only exception is USB 2.0 dongles that must use MJPEG at 720p to maintain 60 FPS, then let the card scale to 720p internally.
Why does audio slowly go out of sync over an hour?
That is clock drift between HDMI audio and motherboard audio. What causes it: Two separate clocks. How to check: Record 60 minutes, clap at start and end, compare offset in VLC (Tools > Track Synchronization). What to do: In OBS set Video Capture Device > Properties > Audio Output Mode > Capture audio only, then in Advanced Audio Properties add Sync Offset in 10-20 ms steps, or switch to WaveOut/Line-In with same offset. How to undo: Reset Sync Offset to 0 ms and set Audio Output Mode back to Output desktop audio (DirectSound).
Do I need to disable VRR / G-Sync / FreeSync for low latency?
Most capture cards do not pass through VRR, so VRR will cause flicker or capture black frames. What causes it: Card locks to fixed 60Hz while GPU varies. How to check: NVIDIA Control Panel > Display > Set up G-SYNC shows enabled on capture monitor, and OBS shows unstable FPS. What to do: Disable VRR on the passthrough monitor (NVIDIA Control Panel > Manage 3D settings > Monitor Technology > Fixed Refresh, or Xbox/PS5 > Display > Variable Refresh Rate > Off) and lock game to 60 FPS. How to undo: Re-enable G-Sync/FreeSync in control panel and set game back to uncapped.
What is the lowest latency file and log to check if settings took effect?
Check the OBS log after a test recording. What causes confusion: Settings look applied but driver fallback occurs. How to check: OBS > Help > Log Files > View Current Log, search for “video capture device” and “buffering” lines. Confirm “NV12” and “buffering: 0” and “FPS: 60”. Also open %appdata%\obs-studio\basic\profiles\[ProfileName]\basic.ini to verify [Video] BaseCX/BaseCY matches canvas. What to do: If log shows MJPEG or buffering 1, reapply Vendor Low Latency toggle and reconnect card. How to undo: Delete log adjustment; settings revert on next OBS launch if you close without saving profile.


