
Lighting a two-person streaming setup is harder than lighting a solo stream because every change affects two faces, two skin tones, and twice as much background spill. If you try to light both hosts with one bright key light, one person ends up overexposed while the other looks shadowy, and your webcam’s auto-exposure will hunt constantly. The priority for a clean, professional look in 2026 is control and consistency: soft, matched key lights for each person, color-accurate white balance locked in software, and enough separation from the background that neither host blends into a dark wall or a bright LED glow.
For two people sitting side-by-side or across a desk, you want even illumination without harsh shadows, matching color temperature between both lights, and no flicker on camera. That means using diffused LED panels or edge-lit key lights instead of bare bulbs, placing them at the same height and angle, and disabling auto settings on your cameras. Get this right and you will spend less time fixing color in OBS Studio and more time streaming.
As an Amazon Associate we earn from qualifying purchases at no extra cost to you.

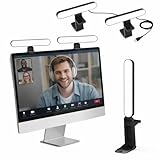
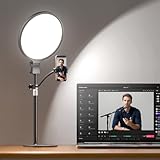


Our Top Picks
 NEEWER NG01 Dual Sided RGB LED Streaming Key16.9"x1.6"x1.3"/43x4x3.2cm5.91 x 5.91 x 26.77 inchesCheck on Amazon


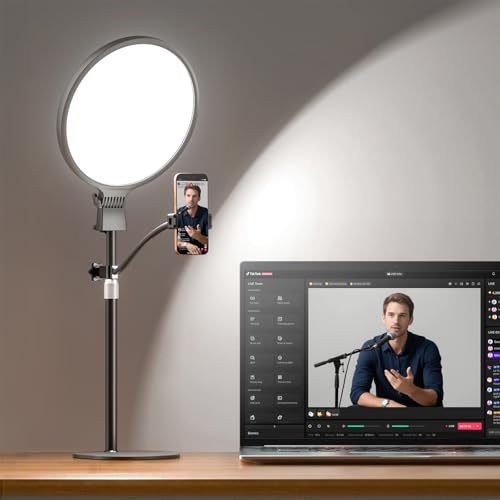

Top 3 picks at a glance
Quick Recommended Settings
| Setting | Recommended value | Why |
|---|---|---|
| Color Temperature | 5600K (Daylight) for both key lights, locked | Ensures both faces match; mixed temperatures create an orange vs. blue mismatch that is difficult to correct in post |
| Brightness / Intensity per Light | 45% to 65% on dimmable panels at 3-4 feet distance | Provides soft, even exposure without clipping highlights; allows headroom to balance two different skin tones |
| Position and Angle | 45 degrees off-center, eye-level to 10 inches above eye line, 36-48 inches away | Mimics natural window light, puts catchlights in eyes, and softens under-eye shadows for both subjects |
| Diffusion | White diffusion + honeycomb grid or softbox on each key light | Doubles apparent light size, softens skin texture and reduces spill onto the other person |
| Background / Fill Light | RGB or tunable white at 3200K to 4500K, 15% to 25% brightness | Adds separation without competing with keys; warmer tone prevents background from looking clinical |
| Camera White Balance | Manual (Custom) at 5600K, or use gray card preset | Stops auto white balance from shifting mid-stream when content on screen changes |
| Camera Exposure | Manual exposure, gain 0-6 dB, shutter 1/60 | Prevents flicker under LED lights and locks brightness for both faces |
| OBS Studio Color Settings | Right-click source > Properties > Video > uncheck Auto Exposure and Auto White Balance | Forces the settings you dialed in to stay fixed instead of being overridden |
Setting-by-Setting
Color Temperature: 5600K Locked on Both Keys
Set both key lights to exactly 5600K using the physical dial, button hold, or app slider: Elgato Key Light > Control Center app > Light > Temperature slider; Neewer FS150 / Nanlite PavoSlim > Menu > CCT > 5600K; SmallRig RC Series > Mode dial > CCT > turn dial to 5600K. Do not use auto or variable presets.
Trade-off: 5600K looks crisp and accurate on most webcams and mirrorless cameras, but can feel slightly cool in a warm room. If you prefer a cozier look you can drop both lights together to 4500K, but you must drop both equally or the mismatch will be obvious on a wide shot.
Brightness: 45% to 65% at 36-48 Inches
Use the dimmer on each panel to set intensity between 45% and 65% when the light is 3 to 4 feet from the subject’s face. In Elgato Control Center this is the Brightness percentage slider; on Nanlite and Aputure lights this is DIM 45-65. Measure distance from the diffusion face to the subject’s nose. Adjust each light individually to balance exposure if one person has lighter or darker clothing.
Trade-off: Running brighter than 70% at close range blows out foreheads and makes diffusion less effective. Running dimmer than 35% forces your camera to raise gain, which introduces noise. Stay in the middle range and move the light closer or farther by 6 inches for fine tuning.
Position: 45 Degrees Out, Just Above Eye Line
Place Light A at 45 degrees to the left of Person A and Light B at 45 degrees to the right of Person B, both aimed inward toward the center. Raise the center of the panel so it is level with the eyes or up to 10 inches above. Tilt down 10 to 15 degrees. This creates the classic loop lighting pattern on both faces. Keep both lights at the same height and distance to avoid one side being brighter.
Trade-off: Lower placement removes under-eye shadows but causes more light spill onto monitors and causes reflections in glasses. Higher placement reduces glare but deepens shadows under the brow. The eye-level plus 10 inches range is the best compromise for desktop streaming.
Diffusion and Grid: Always On
Install the included white diffusion sheet and, if available, the honeycomb grid or leave the softbox assembled. For light sticks and tube lights, add the magnetic diffuser. For Elgato Key Light and Key Light Air, keep the built-in diffuser panel attached and add the optional diffusion layer if you own it. No bare COB or exposed LED dots should be visible to the camera.
Trade-off: Diffusion cuts output by roughly one stop and grids narrow the beam, so you will need to increase brightness by 10% to 15% after adding them. The benefit is softer skin tones, fewer harsh nose shadows, and far less light bleeding from Person A’s key onto Person B’s face.
Background and Accent Lights: 15% to 25% Brightness
Set any RGB light bars, Nanoleaf panels, or LED strips behind the hosts to a fixed color. In Govee Home app > Device > Color > set to warm white 3200K to 4000K or a muted accent like deep blue HEX #1E3A8A at low saturation. In SignalRGB or OpenRGB, select your strip > Effect > Static Color > lower brightness slider to 15-25. Never set background lights to rainbow cycle or sound-reactive for a two-person talk show.
Trade-off: A brighter background looks more energetic but pulls your camera’s auto-exposure if you forget to lock it, making faces darker. A very dim background looks moody but can make webcam noise more visible. The 15-25% range gives separation without overpowering the keys.
Camera White Balance and Exposure: Full Manual
Lock these in your camera software before opening OBS Studio. For Logitech webcams: Logi Tune > select camera > Settings > White Balance > toggle off Auto > drag slider to 5600K; Exposure > toggle off Auto > set Gain to +4. For Elgato Facecam: Camera Hub > Settings > White Balance > Manual > 5600K > Shutter > 1/60. For Sony / Canon mirrorless via USB: Menu > White Balance > Custom Set > 5600K > Exposure Mode > Manual > ISO 320-640 > Shutter 1/60. Then in OBS Studio, right-click the Video Capture Device source > Properties > Video Settings > uncheck Auto and confirm your values stuck.
Trade-off: Manual locks make the image stable, but you must readjust if you change your light brightness significantly. That is intentional; it prevents the camera from making automatic changes during a stream when a bright game scene reflects onto faces.
Key Combo and File Locations for Quick Adjustments
Use OBS Studio scene filters to match two cameras without touching the lights. Press Ctrl + Shift + S to open Scene controls quickly, then right-click camera source > Filters > Add > Color Correction > adjust Contrast 0.02 to 0.05 and Gamma to balance. Your OBS profiles are saved at %appdata%\obs-studio\basic\profiles\ on Windows and ~/Library/Application Support/obs-studio/basic/profiles/ on macOS. Elgato Control Center settings sync to %appdata%\Elgato\ControlCenter\ on Windows.
Trade-off: Software color correction can fix small differences but cannot rescue bad light placement. Always fix position and temperature physically first, then use filters for final 5% matching.
By Hardware Tier
Low Tier: Two Small LED Panels and Webcams
Hardware example: Two Neewer 660 LED panels or VILTROX Weeylite Sprites with diffusers, two Logitech C920 / C922 webcams or similar 108or detail.
Configure both panels to 5600K, 55-65% brightness, 36 inches away with diffusion on. Set Logi Tune white balance to manual 5600K and exposure gain to manual. Add one $15 RGB strip behind the desk at warm white 3400K, 15% brightness for separation. If you only have one large panel, split it by placing it centered and far back at 60 inches and add white foam boards on each side as bounce fill; this is less ideal than two lights but works for tight budgets. Keep room overhead lights off to avoid mixed color.
Mid Tier: Dedicated Streaming Key Lights
Hardware example: Two Elgato Key Light Air or Nanlite PavoSlim 60C, plus one background light bar like Elgato Light Strip or Govee M1.
This is the sweet spot for two-person setups. Mount each key on its own arm or stand at equal height, apply diffusion and grid, set 5600K and 50% brightness at 42 inches. Use Elgato Control Center or Nanlink app to group both lights so one slider changes both together, then fine-tune individually by 5% to match skin tones. Set background bar to static 3800K at 20% and place it on the wall behind and between the two hosts so the beam does not hit either face. Lock camera exposure as described and add a Color Correction filter in OBS Studio only if needed.
High Tier: COB Lights with Large Softboxes
Hardware example: Two Aputure Amaran 100d / 150c or Nanlite FS-150 with 32-inch octabox or 24×36-inch softbox, plus tunable background tubes.
Install the 32-inch octabox with both diffusion layers and grid. Set COB to 5600K, DIM to 35-45% because these lights are much more powerful; distance 48-60 inches for an even larger soft source. Angle both octaboxes 45 degrees and feather them slightly so the edge of the beam lights the subject rather than the hot center, which reduces spill between hosts. Use a dedicated monitor for app control (Sidus Link for Aputure, Nanlink for Nanlite) to save a preset named “Two Person Stream” with CCT 5600K and the brightness you dialed in, so you can recall it with one tap. Add two accent tubes on the back wall at 3200K, 20% for cinematic separation.
Common Mistakes
One light for two people creates uneven exposure. What causes it: A single panel centered between hosts falls off by the inverse square law, so the person closer to the center is brighter. How to check: Take a still screenshot in OBS Studio with Pause or press F12 for a screenshot, then compare skin tones at 100% zoom. What to do: Add a second matched key light and set both to the same 5600K and within 5% brightness of each other, each 45 degrees from its subject. How to undo: If you must revert to one light, move it back to 60-72 inches, increase brightness to 75%, and place white bounce boards on the far sides to fill shadows.
Auto white balance causes color drift mid-stream. What causes it: Camera automatically compensates when game or wall colors change. How to check: Open Logi Tune or Camera Hub and see if Auto White Balance is toggled on, or in OBS Studio Properties see if Auto is checked. What to do: Toggle Auto off, set manual to 5600K, hold a white or gray card in front of both faces and click Calibrate if your app offers it. How to undo: In the same menu toggle Auto White Balance back on.
Glasses glare and harsh forehead shine. What causes it: Bare LEDs or lights placed too low and too close without diffusion. How to check: Look for rectangular reflections in glasses or hot spots on foreheads in the preview. What to do: Add diffusion and grid, raise the light 6-10 inches above eye line and tilt down 10-15 degrees, move it 6 inches farther away, or rotate glasses slightly down at the temple. How to undo: Remove the grid if the image becomes too dark, and raise OBS filter Gamma by 0.03 instead of moving the light closer.
Background RGB overpowers faces. What causes it: Saturated accent lights set above 40% brightness, especially pure red or magenta. How to check: Wave a white sheet of paper where the hosts sit and see if it picks up strong color. What to do: In Govee Home or SignalRGB set background lights to static warm white 3400K-4000K at 15-25% or desaturate vivid colors to 40-60% saturation. How to undo: In the same app raise brightness back to 40% and restore full saturation if you want a more gamer look for a different segment.
Flicker or banding on camera. What causes it: Mismatched shutter speed to local power frequency or low-quality LEDs on PWM dimming. How to check: Record 10 seconds and look for faint horizontal lines moving up the image. What to do: Set shutter to 1/60 in North America (60Hz) or 1/50 in 50Hz regions, raise light brightness above 30% to avoid low-end PWM flicker, and disable Auto Exposure. How to undo: Return shutter to Auto in camera app if you move to natural light.
FAQ
Should both lights be identical models?
Yes if possible. Two identical panels at the same CCT and brightness will match naturally. If you own mismatched lights, set both to 5600K manually and use a white card test: hold the same white card under each light and adjust until the card looks identical on camera, then lock the settings and save them as a preset in your control app so you do not have to guess next time.
How do I handle very different skin tones?
Do not change color temperature to compensate. Keep both lights at 5600K and adjust brightness individually by 5% to 10% so the darker skin tone gets slightly more light. In OBS Studio, add a Color Correction filter to one camera source only and raise Gamma by 0.02 to 0.04 and Contrast by 0.01 to 0.02 until both faces have similar perceived exposure. Place the person with darker clothing or skin slightly closer to their key if needed, by 4 to 6 inches.
Can we use one camera for two people?
You can with a wide-angle webcam or mirrorless lens at 24mm, but you will need larger soft sources farther away to keep coverage even. Place the single wide shot camera at center, set manual white balance 5600K and manual exposure, then ensure both key lights are equidistant from their subject. For better quality, use two cameras cropped tight and switch scenes in OBS Studio with Studio Mode (Ctrl + Shift + M) or use an automatic scene switcher.
What menu path locks settings so OBS Studio does not reset them?
In OBS Studio, right-click the Video Capture Device > Properties > Deactivate > Configure Video > uncheck Auto Exposure, Auto Focus, and Auto White Balance > click Apply. In Windows, also check Device Manager > Imaging devices > your camera > Properties > Driver tab > ensure no utility is forcing defaults at boot. Your manual values are stored in the OBS profile at %appdata%\obs-studio\basic\profiles\[Your Profile]\basic.ini. Back up that file after you dial in the look so you can restore it after reinstalls.


