
If you type on a mechanical keyboard while streaming or recording with OBS Studio, you already know the problem: every keypress lands in your mic track like a tiny hammer. The good news is that OBS’s built-in filtering, combined with a few smart choices about mic placement and gain staging, can reduce keyboard clatter dramatically without making your voice sound like a phone call. This guide focuses on the settings that actually matter — noise suppression choice and strength, gate thresholds, and how to chain filters in the right order — because most of the audible keyboard noise comes from transients that slip past a poorly tuned gate, not from a lack of filtering overall.
What to prioritize, in order: get the correct noise suppression method for your CPU and voice first, then set a gate so the suppression isn’t working alone, then fine-tune suppression strength until typing is inaudible but your voice’s quiet consonants survive. Chasing keyboard noise with aggressive settings is the most common way streamers end up with choppy, underwater audio, so every recommendation below includes the trade-off.
As an Amazon Associate we earn from qualifying purchases at no extra cost to you.


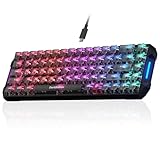

Our Top Picks

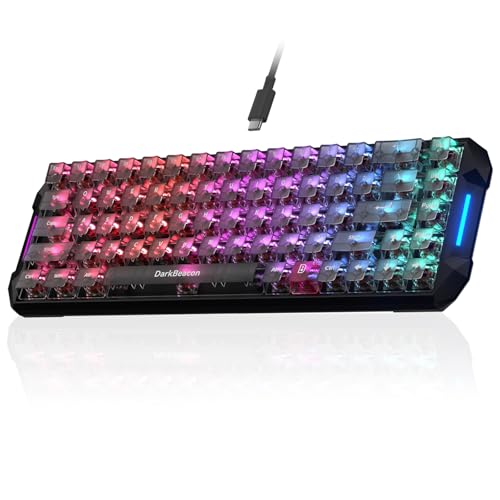

Top 3 picks at a glance
Quick Recommended Settings
| Setting | Recommended value | Why |
|---|---|---|
| Filter order (top to bottom) | Noise Suppression → Noise Gate → Compressor → Limiter | Suppression first removes steady hiss so the gate can key off your voice; gate next blocks transients; compressor and limiter even out levels without re-opening the gate on key clacks. |
| Noise Suppression method | NVIDIA Audio Effects (RTX GPU) or RNNoise (any system) | NVIDIA’s AI model handles broadband keyboard transients best; RNNoise is the best CPU-only option. Speex is a last resort. |
| Suppression strength | Start at -30 dB (NVIDIA) / 0.00 (RNNoise); raise until typing is gone | Stronger settings eat quiet speech; tune upward gradually. |
| Noise Gate: Close Threshold | -45 to -38 dB | Blocks keypress transients that fall below your quietest speech. |
| Noise Gate: Open Threshold | About 4–6 dB above Close | Prevents rapid open/close flicker that sounds like stuttering. |
| Noise Gate: Attack / Release | Attack 5–10 ms, Hold 150–300 ms, Release 100–200 ms | Preserves natural word starts and lets the gate close between sentences so keyboard noise is gated, not suppressed. |
Setting-by-Setting
All of these live in the same place: right-click your mic source in the Audio Mixer, choose Filters, and click the + icon under Audio Filters. Add them in the order listed.
Noise Suppression Method
What to set: In the Filters window, add Noise Suppression. OBS offers three methods: Speex, RNNoise, and NVIDIA Audio Effects (only appears on NVIDIA RTX GPUs with current drivers, and requires the microphone source to be routed through OBS normally, not through a capture card’s audio).
Exact value: Choose NVIDIA Audio Effects if you have an RTX card; otherwise choose RNNoise. Avoid Speex unless your CPU is a decade old.
Trade-off: NVIDIA’s model is the most effective against broadband, percussive sounds like mechanical switches, but it costs a small amount of GPU headroom — noticeable if you’re also running NVENC encoding and DLSS frame generation at the limit. RNNoise is nearly as good for steady noise and moderately good at transients, costs almost nothing, and runs everywhere. Speex is tuned for steady fan/hiss noise and does very little for key clacks.
Suppression Strength
What to set: If you’re using NVIDIA Audio Effects, set Suppression Strength. NVIDIA drivers (starting with the 55x series) expose this in OBS as a dB value plus a quality/intensity preset.
Exact value: Start at -30 dB with the default preset. Speak normally, type during the test, then raise in 5 dB steps (-35, -40, -45, up to a maximum of -100 dB) until typing disappears.
Trade-off: Above roughly -50 dB, the model starts clipping soft consonants (“s”, “f”, “t” sounds) and can produce a slightly robotic tail on the end of words. If your viewers say you sound muffled, back off 10 dB and close the gap with the Noise Gate instead.
Noise Gate: Thresholds
What causes the problem: The gate is a volume-based switch. If Close Threshold is set too low (e.g., -60 dB), loud mechanical switches — especially clicky Blues and box Jades — exceed it and slam straight through.
How to check: In the gate filter’s properties, watch the level meter while typing without speaking. Note the peak the keyboard reaches (it’s shown by the moving marker). Then note your quietest normal speaking level.
What to do: Set Close Threshold just above the keyboard’s peak (typically -45 to -38 dB) and Open Threshold 4–6 dB above that (typically -40 to -32 dB).
How to undo: Restore both to OBS defaults (Open -40 dB, Close -50 dB) by clicking the value fields and retyping the defaults, or remove and re-add the filter.
Trade-off: Thresholds that are too high clip the ends of sentences and quiet asides. If you trail off at the end of sentences, lower the Close Threshold 2–3 dB and compensate with a slightly stronger suppression setting.
Noise Gate: Attack, Hold, and Release
What to set: Attack Time 5–10 ms, Hold Time 150–300 ms, Release Time 100–200 ms.
Why: Attack that’s too slow chews the first consonant of a sentence; hold that’s too short makes the gate clamp shut in the micro-pauses between words; release that’s too long lets keyboard noise bleed through during the decay.
Trade-off: Long hold times (above ~400 ms) keep the gate open through short bursts of typing if you type while talking. Keep hold at 300 ms or less if you speak over your typing.
Compressor and Limiter (Supporting Cast)
What to set: Add a Compressor with Ratio 4:1, Threshold around -18 dB, Attack 6 ms, Release 60 ms, Output Gain 0 dB. Then add a Limiter with Threshold -6 dB and Release 60 ms.
Trade-off: Compression raises the level of everything under your voice — including residual keyboard noise the gate let through. Keep the ratio moderate and put the limiter last so peaks never clip. If keyboard noise becomes more audible after adding the compressor, lower Output Gain and raise mic input gain at the Windows level instead (Settings → System → Sound → Input properties, or your audio interface’s hardware gain knob).
Gain Staging Before Filters
What causes most untreatable keyboard noise: the mic’s input gain is cranked so high that the keyboard sits only 5–10 dB below your voice, which no filter can separate cleanly.
How to check: Open the mixer meter in OBS. Your speech should peak around -12 to -6 dB; typing alone should ideally sit below -30 dB. If typing peaks above -20 dB, your gain is too hot relative to your mouth distance.
What to do: Lower the gain until typing falls below -30 dB, then move the mic closer to your mouth (a fist-to-elbow distance, roughly 15–20 cm) and add a dynamic mic if possible — dynamics like an SM58-style capsule reject room and desk noise far better than condensers. A boom arm that lifts the mic off the desk and away from the keyboard path helps more than any filter setting.
How to undo: Restore the gain slider to where it was and note the old level first — the mixer slider position is your undo button.
By Hardware Tier
Low-End (No Dedicated GPU, Older 4-Core CPU)
Use RNNoise for suppression — it’s a tiny neural model that costs almost nothing. Set the gate as above and rely on gain staging and mic distance rather than aggressive suppression. Avoid running the suppression on every source: apply it only to the mic filter chain. If OBS drops frames on this hardware, drop the suppression strength rather than the frame rate.
Mid-Range (Modern 6–8 Core CPU, GTX/RTX 30-Series or Equivalent)
RNNoise remains the safe default; if you have an RTX 30-series card, switch to NVIDIA Audio Effects at -30 dB — the GPU cost is negligible at this tier. Chain the full filter stack (Suppression → Gate → Compressor → Limiter) and tune the gate to carry more of the load, keeping suppression strength moderate so your voice stays natural. Enable the gate’s side-chain-style tuning habit: adjust thresholds while watching the mixer meter live in a test recording (Settings → Output → Record, then review the file at %USERPROFILE%\Videos).
High-End (RTX 40/50-Series or Better)
Use NVIDIA Audio Effects with strength tuned per-mic — some setups benefit from -40 dB or higher. At this tier your encoder headroom is comfortable, so you can also run the suppression plus a separate Expander filter (Ratio 2:1, Threshold -40 dB) beneath the gate for gentler ducking of keyboard noise instead of a hard gate cut. If you record a multitrack source-separate audio file, keep the keyboard bleed on the mic track suppressed but leave your desktop audio tracks untouched — the filters here apply per-source, not globally.
Common Mistakes
Stacking multiple suppression filters. Adding RNNoise and NVIDIA Audio Effects to the same source doubles processing artifacts and produces a metallic voice. Use one suppression filter; if you must layer, put the gate between them and test with a recording before going live.
Tuning with the wrong distance. Setting thresholds while leaning into the mic, then typing while sitting back, guarantees failure. Tune at your real streaming posture.
Chasing keyboard noise with suppression instead of physics. If typing peaks within 10 dB of your voice at the mic, no filter setting will separate them cleanly. Fix it at the source: closer mic, lower gain, shock mount, or a quieter switch — tactile or linears are dramatically quieter than clickies.
Applying filters to the wrong source. Filters are per-source. If your mic comes in via a capture card or an audio interface’s second channel, right-click the exact source that’s actually in your scene. Checking the Advanced Audio Properties (Edit → Advanced Audio Properties) confirms which device feeds which mixer channel.
Forgetting the hardware mute or monitoring path. If you hear yourself through headphones with latency, you’re monitoring the raw mic, not the filtered output. OBS filters do not apply to hardware monitoring — route monitoring through OBS (Edit → Advanced Audio Properties → Audio Monitoring → Monitor and Output) if you want to hear the filtered result.
FAQ
Does noise suppression in OBS add latency to my microphone?
A small amount. RNNoise adds a few tens of milliseconds; NVIDIA Audio Effects runs on the GPU with similarly low overhead. For talking-head streaming this is imperceptible, but if you’re doing rhythm games or audio-reactive content, route the raw mic to your game setup and keep the filtered version for the stream.
Why does my voice sound robotic or underwater after enabling suppression?
Your suppression strength is too aggressive or you’ve stacked two suppression filters. Drop the strength in 5 dB steps until artifacts disappear, and make sure only one suppression filter is in the chain. If it persists, the model is clipping your consonants — raise the gain slightly and let the gate handle more of the separation.
Is NVIDIA Broadcast better than OBS’s built-in suppression?
NVIDIA Broadcast offers similar noise removal plus extras like room echo removal, but it routes through a virtual microphone device, which adds a layer of setup and occasional driver conflicts. OBS’s built-in NVIDIA Audio Effects filter uses the same underlying model directly inside OBS with fewer moving parts — start there, and only add Broadcast if you also want its camera features.
Should I switch switches instead of tuning settings?
It genuinely helps. Moving from clicky switches (Cherry MX Blue, Kailh Box Jade) to quiet tactiles or linears (Browns, Reds, or silent variants like MX Silent Red / Boba U4T with dampening) can drop typing noise 10 dB or more at the mic — which is a bigger, cleaner win than any filter setting. The best 2026-era setups pair a quiet switch with a modest gate, not a maxed-out suppression chain.


