
Our Top Picks
 Logitech for Creators Litra Glow Premium LED Streaming3.6" x 3.6" x 1.1"1.71 x 3.56 x 14.41 Inches0.85 poundsCheck on Amazon
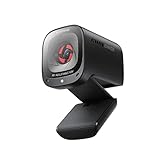
 Logitech Brio Ultra 4K HD Webcam for Streaming(Pack of 1)1.02 x 4.02 x 1.02 inches0.1 poundsCheck on Amazon

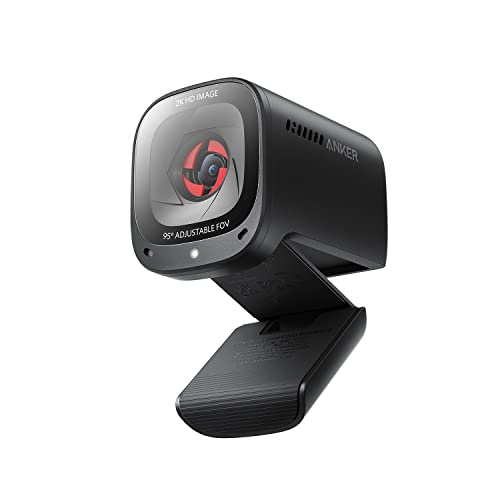
Top 3 picks at a glance

Intro: What to Prioritize in a Low Light Room
A webcam in a dim room is fighting physics. The sensor needs light, and when it doesn’t get enough, it compensates by stretching exposure time and amplifying the signal — which is why low light footage looks smeary, sluggish, and noisy all at once. Before touching anything else, prioritize in this order: actual light first, manual exposure second, gain/noise reduction third, and software enhancement last. No settings menu will fully rescue a webcam pointed at a dark wall, but a single cheap lamp combined with manual exposure control will outperform any amount of digital wizardry. The reason is simple: auto-exposure in low light causes the camera to constantly hunt, pumping brightness up and down as you move, which is far more distracting than a slightly dim but stable image.
This guide covers Logitech G HUB, OBS Studio’s camera properties, Windows Camera settings, and the universal DirectShow options panel used by most USB webcams. Everything applies to streaming, video calls, and recording alike, since the exposure pipeline is identical regardless of what app consumes the feed.
As an Amazon Associate we earn from qualifying purchases at no extra cost to you.

Quick Recommended Settings
| Setting | Recommended value | Why |
|---|---|---|
| Exposure mode | Manual | Stops the brightness “pumping” caused by auto-exposure hunting in dim rooms |
| Exposure time | -4 to -6 (Logitech scale) or 1/30s | Longest shutter that avoids visible motion blur at 30 fps |
| Gain | 20–40% (start at 30) | Boosts brightness without the heavy noise of maxing exposure alone |
| White balance | Manual, 4000–4500K for warm bulbs | Prevents the orange/gray cast typical of indoor lighting |
| Frame rate | 30 fps | Locking 30 fps allows longer exposure per frame than forcing 60 |
| Backlight compensation | Off | Causes erratic brightness shifts when a monitor is in frame |
| Noise reduction | Medium (software) or 1–2 (OBS plugin) | Cleans gain noise without smearing facial detail |
| Anti-flicker | 50 Hz or 60 Hz to match your region | Eliminates banding from mains-powered lights |
Setting-by-Setting
Exposure Mode: Manual
Exact value: In Logitech G HUB, open your camera, click the gear/Settings icon, and switch Exposure from Auto to Manual. In OBS, right-click your webcam source, choose Properties, untick Auto next to Exposure, then click Configure Video (or Custom on some devices) to open the UVC driver panel. On generic webcams, launching the DirectShow panel via a tool like Logitech Camera Settings or the webcam vendor’s utility exposes the same Expose dropdown — set it to Manual.
Trade-off: Manual exposure means your image won’t adapt if you flip on a ceiling light mid-call — you’ll need to nudge the value yourself. The payoff is a rock-steady image with no pumping.
Exposure Time / Brightness
Exact value: On Logitech’s -7 to 0 scale, start at -5 and adjust toward -4 (brighter) or -6 (darker) until your face is evenly lit. On webcams that show real shutter speeds, use 1/30 for 30 fps output; never set it longer than your frame rate allows, or you’ll get frame drops. How to check: Wave a hand in front of the lens — if the hand leaves obvious ghost trails, exposure is too long. Trade-off: Longer exposure = brighter image but motion blur every time you move; shorter = crisp but dark and noisy.
Gain
Exact value: Set 30% as your starting point, range 20–40%. Gain is electronic amplification of the sensor signal — it brightens without needing more light, but amplifies sensor noise with it. How to check: Look at a plain dark area of your room in the feed; if it crawls with colored speckle, gain is too high. What to do: Dial gain to the lowest value that keeps your face readable, then add light rather than gain. How to undo: Return gain to Auto or 0% and re-enable auto-exposure to restore default behavior.
White Balance
Exact value: Switch from Auto to Manual and set 4500K if you use warm household bulbs, 5600K for daylight LEDs, or around 4000K for a mix. Trade-off: Manual WB removes the slow color drift that auto white balance causes in low light, but if you change your room’s bulbs, the saved value will be wrong and skin tones will shift orange or blue until you re-set it.
Backlight Compensation and Anti-Flicker
Exact value: Backlight compensation: Off. It’s designed to brighten subjects against bright backgrounds, and in a dim room with a monitor behind you it fires constantly, causing brightness pulses. Anti-flicker: set to 60 Hz (North America, 120 Hz LED environments) or 50 Hz (most of Europe/Asia). Wrong anti-flicker settings produce horizontal rolling bands in the dark, when the camera amplifies mains hum that bright scenes would hide. How to undo: Re-enable backlight compensation if you relocate to a bright window-facing desk.
Noise Reduction and Sharpening
Exact value: If your webcam driver exposes noise reduction, set it to Medium. In OBS, leave in-camera noise reduction at Low/Medium and instead add the built-in Video Delay (Buffer)-free filter chain: right-click the source → Filters → add Sharpen at Strength 3–5 to claw back detail lost to denoising. Avoid maxing both — stacking strong denoise plus strong sharpening creates the plasticky “wax face” look. Trade-off: More noise reduction = cleaner but softer; the sharpen filter restores edge definition cheaply.
By Hardware Tier
Low Tier: 720p/1080p Budget Webcams (Logitech C270/C920 class, generic UVC cams)
Small sensors starve fastest in the dark, so light placement matters more than any setting. Put a single lamp behind the monitor, at face height, roughly arm’s length away. In settings, use Manual exposure at -5, gain 30%, WB manual at your bulb’s temperature, backlight comp off, anti-flicker matched to your region. Cap output at 30 fps — forcing 60 fps on these sensors halves available light per frame and wrecks image quality. If the vendor offers no manual panel, OBS’s per-device properties are your fallback.
Mid Tier: 1080p60 Webcams (Brio 500, Insta360 Link-class, Elgato Facecam)
These cameras have larger sensors and decent manual software (Elgato’s Camera Hub is particularly granular). Lock exposure manually — in Camera Hub, disable Auto under Exposure and set ISO-equivalent gain around 25–35%. Stay at 30 fps unless your room has at least two light sources. On pan-tilt AI-tracking models, disable HDR mode (it forces multi-frame blending that smears motion in dim rooms) and turn off auto-framing if it triggers exposure re-hunts while you move. Add OBS’s Sharpen filter at strength 4.
High Tier: Mirrorless/DSLR via Capture Card or Large-Sensor 4K Webcams (Sony Alpha as webcam, Facecam Pro)
Large sensors gather real light, so you can afford cinematic settings. Set the camera to M or S (shutter priority) mode, shutter at 1/50–1/60s, aperture wide open (e.g., f/1.8 on a nifty-fifty), and keep ISO auto with a ceiling of ISO 3200–6400. For Sony bodies, use the Imaging Edge Webcam or Creators’ App USB stream route and set Picture Profile to a flat profile, then grade slightly in OBS via a LUT filter. For 4K webcams, run 4K input downscaled to 1080p output in OBS — the downscale averages out sensor noise for free. Cap exposure compensation around +1 EV; beyond that, highlights on skin clip.
Common Mistakes
Mistake 1: Fixing darkness purely with exposure/gain. What causes it: assuming settings replace light. How to check: noise speckle across dark areas, blur when you move. What to do: add one 4000–5000K lamp behind the monitor before raising gain past 40%. How to undo: lower gain back to Auto once light is adequate.
Mistake 2: Leaving auto-exposure on. What causes it: it’s the default on nearly every app. How to check: brightness visibly “breathes” when you lean or a monitor shows bright content. What to do: switch to Manual per the steps above. How to undo: tick Auto again in the same panel.
Mistake 3: Forcing 60 fps in a dark room. What causes it: spec-sheet chasing. How to check: dark, noisy, ghosted footage despite decent settings. What to do: drop to 30 fps so each frame gets double the light. How to undo: select 60 fps in your capture app when lighting improves.
Mistake 4: Wrong anti-flicker frequency. What causes it: shipped default not matching local mains power. How to check: rolling horizontal bands visible on dark backgrounds. What to do: set 60 Hz for the Americas/120 Hz lighting, 50 Hz elsewhere. How to undo: revert to Auto or Off.
Mistake 5: Stacking max denoise + max sharpening. What causes it: trying to erase low-light noise entirely. How to check: skin looks like smooth plastic with haloed edges. What to do: denoise Medium, sharpen 3–5. How to undo: remove the OBS Sharpen filter and reset driver noise reduction to default.
FAQ
Why does my webcam look grainy even after raising exposure?
Because the brightness you’re seeing is mostly amplified noise. Exposure time and gain both brighten, but in a genuinely dark room the sensor signal is so weak that gain amplifies junk. Raise exposure to the blur threshold (-4/-5 on Logitech, 1/30s elsewhere), cap gain near 40%, then add a physical light. Grain beyond that point is a lighting problem, not a settings problem.
Should I use 30 fps or 60 fps in a low light room?
30 fps, almost always. Each frame gets roughly twice the exposure time, meaning twice the captured light and half the required gain. The motion smoothness of 60 fps is worthless if the image is dark and smeary. Switch to 60 fps only after you’ve added proper lighting, and verify your webcam’s driver actually supports 60 fps at your chosen resolution (many only do 1080p60 on mid/high tier hardware).
How do I stop my webcam from auto-adjusting brightness during calls?
Set the camera’s exposure to Manual at the driver level — not just inside one app. In Logitech G HUB: camera → Settings → Exposure → Manual. In OBS: source Properties → untick Auto. On Windows, the Camera app settings can also override; check Settings → Bluetooth & devices → Cameras → [your webcam] and disable auto exposure there if present. Manual exposure persists system-wide once set at the driver level.
What’s the cheapest way to light a dim room for webcam use?
One adjustable LED desk lamp or budget key light placed behind your monitor at face height, angled at your face — never behind you pointing at the camera. A 4000–5000K bulb gives neutral skin tones and pairs with a manual white balance around 4500K. Even a single 800-lumen lamp eliminates 80% of the noise and blur issues described in this guide, letting your exposure settings work with the sensor instead of against it.


