
If you’ve plugged an XLR condenser mic into an audio interface and it sounds thin, noisy, or distorted, the problem is almost never the mic itself. It’s almost always a settings problem: gain staged wrong, phantom power off, a buffer size that doesn’t match how you’re monitoring, or a preamp being pushed past its clean range. Condensers are sensitive, which is a blessing and a curse — they pick up detail your dynamic mic never would, and they also pick up every mistake in your signal chain.
This guide prioritizes four things, in order. First, phantom power and correct input type, because without 48V the mic simply won’t work properly. Second, gain staging — the single biggest determinant of whether your recordings sound professional or not. Third, latency-appropriate buffer settings so you can actually perform while monitoring. Fourth, only after all that, cleanup settings like high-pass filters and noise gates. Fixing things in this order saves hours of frustrated re-recording.
As an Amazon Associate we earn from qualifying purchases at no extra cost to you.





Our Top Picks
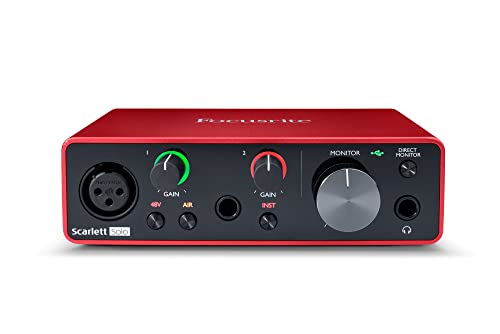 Focusrite Scarlett Solo 3rd Gen USB-C Audio InterfacePack of 11.71 x 5.65 x 3.77 inches0.77 poundsCheck on Amazon
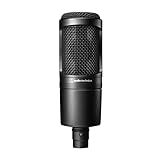
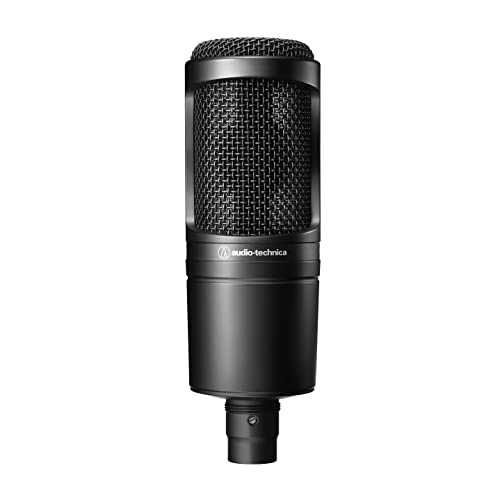 Audio-Technica AT2020 Cardioid Condenser Studio XLR Microphone09.6 x 9.6 x 2.6 inches1.3 PoundsCheck on Amazon


Top 3 picks at a glance
Quick Recommended Settings
| Setting | Recommended value | Why |
|---|---|---|
| Phantom power (48V) | On | Condensers require it to operate; dynamics usually don’t. |
| Input gain (peak) | -18 to -12 dBFS on peaks | Keeps the preamp clean while leaving headroom for loud passages. |
| Buffer size (recording) | 128–256 samples | Low enough latency to perform comfortably without CPU dropouts on a typical system. |
| Buffer size (mixing) | 512–1024 samples | Frees CPU for plugins when real-time monitoring doesn’t matter. |
| Sample rate | 48 kHz, 24-bit | The modern standard for video-adjacent and streaming work; 24-bit gives massive dynamic headroom. |
| High-pass filter | On, 80–100 Hz | Cuts rumble and plosives without touching voice fundamentals. |
| Pad switch (loud sources) | Off for voice; -10 or -20 dB for shouting, drums, close-miked brass | Prevents input clipping that gain reduction alone can’t fix after the preamp stage. |
| Polar pattern | Cardioid (on the mic) | Rejects rear-room noise; the default for solo voice work. |
Setting-by-Setting
Phantom Power (48V)
Set it to on. Every XLR condenser needs 48 volts on pins 2 and 3 to charge its capsule and power its internal electronics. On most interfaces — Focusrite Scarlett, Audient iD series, MOTU M series — this is a physical switch labeled “48V” or “+48V.” On some budget interfaces it’s buried in the control panel software under an Input or Mic section. The trade-off: never toggle 48V while headphones or monitors are at listening volume, because the switch produces an audible thump, and vintage or unbalanced gear patched inline can be damaged. If you also use ribbon mics, check its documentation first — a handful of vintage ribbons dislike phantom power.
Gain (the setting that matters most)
Target your peaks between -18 and -12 dBFS. Enable direct monitoring or record a ten-second test where you speak at your actual performance volume, then read the peak in your DAW’s meter. If peaks hit -6 dBFS or above, turn gain down. If your quietest syllables sit below -30 dBFS, turn it up. The trade-off: cheap interfaces have noisy preamps, and pushing gain past roughly 70–80% of the knob’s travel on a budget unit introduces hiss that you’ll fight forever. If you can’t reach healthy levels without maxing gain on a quiet mic (common with low-output condensers like an SM7B-style dynamic, less so with condensers), an inline booster such as a Cloudlifter or Triton FetHead between mic and interface solves it. Conversely, a loud condenser two inches from your mouth needs very little gain — resist the urge to run the knob high out of habit.
Buffer Size / Sample Buffer
For recording, use 128 or 256 samples; for mixing, switch to 512 or 1024. The path depends on your driver: on Windows with ASIO, open the interface’s own control panel (system tray icon, e.g., “Focusrite USB Audio Control Panel” or “MOTU M Series”) and adjust the buffer or “safety buffer” there — the DAW’s buffer field is usually grayed out. In Reaper, go to Options → Preferences → Audio → Buffering. In Ableton Live, it’s Live → Preferences → Audio → Buffer Size. On macOS, Core Audio handles it in the DAW’s audio preferences directly. The trade-off is pure math: lower buffer means less input latency (more responsive direct monitoring) but higher CPU load; push too low and you get clicks, crackles, and dropouts. If you hear dropouts at 128, move to 256 — the latency difference is only a few milliseconds.
Sample Rate and Bit Depth
Set 48 kHz / 24-bit, and make it match everywhere: interface control panel, DAW project settings, and (if you’re using software like OBS) the app’s audio settings. Mismatches cause crackling and pitch problems, because Windows resampling is poor. In OBS, that’s Settings → Audio → Sample Rate, set to 48 kHz. The trade-off: 44.1 kHz is fine for music-only work, but there’s no audible downside to 48 kHz for voice, and it avoids conversion when publishing to video platforms. Bit depth matters more than sample rate for headroom — 24-bit means a -18 dBFS recording is trivially recoverable in post, which is exactly why conservative gain staging is safe.
High-Pass Filter and Pad
Enable the high-pass filter at 80–100 Hz — either the physical HPF switch on the mic or interface, or an EQ plugin as the first insert in your chain. This removes desk rumble, HVAC noise, and plosive energy that eats headroom. The trade-off: going higher than ~120 Hz starts thinning the chest resonance of a typical voice, so sweep it — lower it until rumble returns, then back off. Use the pad (-10 or -20 dB, usually a switch on the mic body) only for loud sources like shouting, screaming gameplay reactions, or close-miked percussion. The trade-off: the pad costs you signal-to-noise ratio, so it’s off by default for normal voice work.
Monitoring Path
Use the interface’s direct monitoring (Focusrite calls it “Direct Monitor,” MOTU uses the loopback/mix app, Universal Audio uses Console) instead of listening through the DAW while recording. DAW monitoring routes your voice through the computer and back, adding latency; direct monitoring taps the preamp before the USB stage, so you hear yourself instantly. The trade-off: with direct monitoring you won’t hear your DAW’s plugins (compression, EQ) on your own voice while recording — that’s normal, and usually preferable to a 15 ms echo in your cans.
By Hardware Tier
Budget (under ~$150 interfaces)
Units like a Scarlett Solo or entry Behringer UMC. Set buffer to 256 samples — don’t chase 64 on these; the drivers aren’t stable enough. Keep gain below about 75% of travel to stay in the cleaner range of the preamp, even if that means getting closer to the mic (4–6 inches with a pop filter). Rely on the onboard HPF and do compression in post rather than expecting clean hardware processing. Expect to lean on noise reduction plugins more, since the preamp noise floor is higher.
Mid-range ($150–$600 interfaces)
Audient iD4/iD14, MOTU M2/M4, second- and third-generation Scarlett 2i2 territory. You can run 128 samples safely and typically get usable gain up to 85%+ of the knob. Take advantage of the bundled control panel DSP — the MOTU M series’ onboard mix lets you build a zero-latency monitor mix with EQ. Stage peaks at -18 dBFS and you’ll have very little cleanup to do in post.
High-end ($600+ interfaces and dedicated preamps)
Universal Audio Apollo Twin, Audient iD24 and up, RME Babyface Pro FS. RME drivers in particular let you run 64 samples all day on a healthy system. With premium preamps you have real headroom to be aggressive: stage peaks around -15 dBFS with confidence, and use the DSP mixing software (Console, TotalMix FX) to monitor with compression and EQ while recording at near-zero latency. Some units also offer switchable impedance — around 2 kΩ tends to flatter large-diaphragm condensers, while lower values subtly change the tone.
Common Mistakes
Dead signal from phantom power off. What causes it: condenser gets no 48V, producing silence or a faint hiss. How to check: watch the input meter while tapping the mic body gently — no movement means no power. What to do: flip the 48V switch (software path: your interface’s control panel → Inputs → 48V on) and re-seat the XLR cable; also verify you’re in the mic input, not the line/instrument input. How to undo: switch 48V off before unplugging to avoid thumps.
Distortion despite low gain. What causes it: clipping in the mic’s capsule or pad stage, or double gain (interface preamp plus a software boost like Windows’ mic level at 100+). How to check: watch for red peak indicators on the interface hardware at low knob settings; in Windows, check Settings → System → Sound → Input properties for a “Mic Boost” or level above 100. What to do: engage the -10/-20 dB pad, drop OS mic boost to 0/+10 dB, and let the interface preamp do the work. How to undo: remove the pad when the source gets quieter.
Crackling and dropouts. What causes it: buffer too low for the CPU, or sample rate mismatch between the interface panel and the DAW. How to check: watch the DAW’s CPU/performance meter (in Reaper: the meter in the lower-right corner; in Ableton: Preferences → Audio shows current load) and confirm both sample-rate readouts match. What to do: raise buffer one step (128 → 256 → 512), close background apps, and on Windows update to the manufacturer’s ASIO driver rather than generic “ASIO4ALL” if the vendor offers one. How to undo: lower the buffer when the session is lighter.
Hiss you can’t remove. What causes it: preamp gain maxed on a quiet mic, a noisy USB hub, or gain staging far too low followed by heavy digital boost in post. How to check: record ten seconds of room silence at your normal settings and look at the noise floor — consistently above about -60 dBFS with a budget interface at high gain suggests preamp hiss. What to do: get closer to the mic so you need less gain, connect the interface directly to a rear USB port (no hubs), and re-record rather than boosting a bad capture. How to undo: lower gain back once the source is closer.
FAQ
Can I use an XLR condenser mic without 48V phantom power?
No, not usefully. Some interfaces offer a lower phantom voltage (24V or 12V), and a few condensers run on it, but output drops and the sound degrades. Set 48V and leave it on whenever the condenser is connected.
Should I set gain high and back off, or set it low and boost later?
Set it correctly at the interface — peaks around -18 to -12 dBFS — and rely on 24-bit headroom. Digital boosting in post amplifies the noise floor along with the signal, so a quiet recording can be fixed, but never for free.
Why does my recording sound different from what I hear while monitoring?
Direct monitoring bypasses your DAW’s plugin chain, so you hear the dry signal while performing. If you want to hear processing, use the DAW’s input monitoring and raise the buffer to 256–512 samples to keep latency tolerable — or use your interface’s DSP software (Console, TotalMix FX) for processed zero-latency monitoring.
Is 96 kHz worth it for voice recording?
For voice, no. It doubles file sizes, increases CPU load, and offers no audible benefit for speech content — 48 kHz at 24-bit is the standard that podcasts, streaming, and video pipelines expect, and by 2026 every major platform handles it natively. Save 96 kHz for specialized sound-design work.


