
A sharp 1080p stream is not about maxing every slider to 100. For a clean, professional webcam image you need to prioritize light, correct exposure, and stable encoding over raw resolution. Webcams ship with auto settings that hunt constantly for focus and brightness, which creates softness, grain, and pulsing. The goal is to lock manual values so the image stays consistent frame to frame, then let your encoder preserve that detail without wasting bitrate. In early 2026 most platforms still transcode 1080p at 4500 to 6000 Kbps, so clarity comes from controlling noise and motion blur before the signal ever hits OBS Studio.
The order that matters most is: lighting position first, then manual exposure and white balance, then sharpness and focus, then color tuning, and finally encoder output settings. Get the first two right and you can run lower sharpness and gain, which reduces artifacts that make 1080p look like upscaled 720p. This guide gives you exact values and menu paths you can apply in under 15 minutes and undo in seconds if you need to roll back.
As an Amazon Associate we earn from qualifying purchases at no extra cost to you.


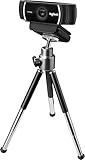
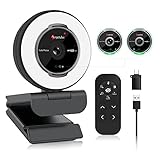
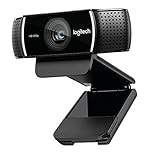
Our Top Picks


Top 3 picks at a glance
Quick Recommended Settings
| Setting | Recommended value | Why |
|---|---|---|
| Resolution / FPS | 1920×1080 at 30 FPS | 30 FPS needs less light than 60 FPS and allows lower gain for a cleaner image at 6000 Kbps |
| Autofocus | Off, manual focus at 35-55 on slider | Prevents focus hunting and breathing during movement |
| Auto Exposure | Off | Locks brightness to avoid pulsing when you move or game scene changes |
| Exposure | -5 to -7 (Logitech) / 1/60 sec shutter | Eliminates motion blur while keeping skin tones natural under key light |
| Gain / ISO | 0 to 8 (max 15) | Low gain prevents grain and color banding that softens 1080p |
| White Balance | Manual 4500K to 5500K, Auto off | Stops color shifting and keeps whites consistent |
| Brightness | 128 to 140 | Centers histogram without crushing shadows |
| Contrast | 120 to 135 | Adds definition without clipping highlights |
| Saturation | 105 to 115 | Slight boost compensates for flat log color without oversaturation |
| Sharpness | 90 to 128 (out of 255) | Enough edge detail without ringing or halo artifacts |
| Backlight Compensation | Off | Prevents overexposure when window is behind you |
| Anti-Flicker / PowerLine Frequency | 60 Hz in US | Removes banding under LED and fluorescent lights |
| OBS Video Settings | Base and Output 1920×1080, Downscale Filter Lanczos 36 samples | Avoids soft scaling from mismatched canvas and output |
| OBS Encoder | x264 CRF 21 or NVENC / AMF / QuickSync at 6000 Kbps CBR, Keyframe 2 sec | Maintains detail for webcam ROI without bitrate spikes |
Setting-by-Setting
Resolution and Frame Rate: 1920×1080 at 30 FPS
What causes it: Many webcams default to 1280×720 or to 1920×1080 at 60 FPS with auto downscaling in OBS Studio, which either softens the image or forces high gain in dim rooms.
How to check: In OBS Studio go to Settings > Video and confirm Base (Canvas) Resolution and Output (Scaled) Resolution both read 1920×1080. Right-click your Video Capture Device source > Properties > Video Format and check Resolution/FPS Type is set to Custom and shows 1920×1080, MJPEG or NV12 at 30 FPS. Press Ctrl + Shift + Esc to open Task Manager and see if CPU is spiking from rescaling.
What to do: Set Device Properties to Custom, Resolution 1920×1080, FPS 30, Video Format MJPEG if your webcam supports it for sharper 1080p. In Settings > Video set FPS to 30. If you must stream gameplay at 60 FPS, keep the canvas at 60 but leave the webcam at 30 by right-clicking the source > Properties > uncheck Use Preset and set FPS to 30.
How to undo: Return Properties > Resolution/FPS Type to Device Default and in Settings > Video set FPS back to Common FPS Values > 60.
Focus: Manual, Value 35 to 55
What causes it: Continuous autofocus hunts when you lean in, hold a product, or have background movement, creating repeated soft frames.
How to check: Open your webcam tool: Logitech G HUB > Select webcam > Camera Controls, or Logi Tune > Adjustments, or Windows Camera > Settings > Pro controls. If Autofocus toggle is on and the slider moves on its own, hunting is active.
What to do: Turn off Autofocus or Auto Focus. Drag Manual Focus slider to 35 to 55 while looking at OBS preview at 100% scale. Sit at your normal streaming distance, hold a text page at face level, and stop when eyes and text edges are crisp. For Logitech C920/C922/Brio, tick the lock icon. For Elgato Facecam, use Camera Hub > Focus > Manual > 45-60.
How to undo: Toggle Autofocus back to On or press Reset to Default in the camera app. In OBS, right-click Video Capture Device > Properties > Configure Video > Camera Control tab > check Auto for Focus.
Exposure and Gain: Auto Off, Exposure -5 to -7, Gain 0 to 8
What causes it: Auto exposure brightens the image by raising gain in dim light, which adds luma noise that the encoder smears, making 1080p look grainy.
How to check: In OBS > Video Capture Device > Properties > Configure Video > Camera Control tab, see if Low Light Compensation or Auto Exposure is enabled. Check histogram: Right-click source > Filters > Add LUT or use Logi Tune exposure preview. If exposure value jumps when you open a white browser window, auto is on.
What to do: Set Exposure to Manual and set the slider to -5 to -7 on Logitech scale, equivalent to 1/60 to 1/90 second. Set Gain to Manual 0 to 8. Add a key light at 45 degrees, 18 to 24 inches away, at 800 to 1200 lumens. If image is too dark, increase light distance or brightness, not gain. Set Value range -7 to 0 in Logitech, 8 ms to 16 ms in Elgato Camera Hub.
How to undo: Re-enable Auto Exposure and Auto Gain in Configure Video > Camera Control, or click Default in G HUB. Remove Filters if you added them.
White Balance: Manual 4500K to 5500K
What causes it: Auto white balance shifts color temperature whenever your game scene or RGB lights change, turning skin pink then yellow between frames.
How to check: Record 10 seconds in OBS with Studio Mode off, then scrub. If wall color drifts, auto white balance is active. Path: G HUB > White Balance shows Auto, or OBS Configure Video > Camera Control > White Balance Auto checked.
What to do: Uncheck Auto and set slider to 4500K for warm room bulbs, 5200K for neutral softbox, 5500K for daylight. Hold a white sheet of paper in front of lens and adjust until paper looks white, not blue or orange, on the preview. In Elgato Camera Hub values are 3200 to 7000K, use 4600 to 5400K.
How to undo: Check Auto again or press the Auto WB button. In OBS, Configure Video > Camera Control > Auto for White Balance.
Brightness, Contrast, and Saturation: 128-140 / 120-135 / 105-115
What causes it: High brightness with low contrast crushes or washes out the image, while high saturation clips reds and makes compression artifacts more visible.
How to check: In OBS > Properties > Configure Video > Video Proc Amp tab, note defaults are often Brightness 128, Contrast 128, Saturation 128. Open filters: Right-click source > Filters > Color Correction and see intensity.
What to do: Set Brightness to 128 to 140, Contrast to 120 to 135, Saturation to 105 to 115. Do this in the hardware control first, not in OBS filters, so it is baked before encoding. Use range 0 to 255 for Logitech, -100 to 100 for Windows Camera. Small steps of 4 to 5 at a time and check histogram.
How to undo: Click Default in Video Proc Amp or drag sliders back to 128. In OBS Filters, remove or disable Color Correction.
Sharpness: 90 to 128
What causes it: Factory sharpness at 150 to 255 adds artificial halos around edges that waste bitrate and sharpen noise along with detail.
How to check: Zoom OBS preview to 100% with Alt + F for Fullscreen Projector (Preview). Look at hair and collar edges. If you see white outlines, sharpness is too high.
What to do: Set Sharpness to 90 to 128 on a 0 to 255 scale. For Logitech Brio use 90, for C920 use 110 to 128. For Elgato Facecam use 0 to 2 out of 5. Test by toggling between 90 and 128 and picking the lower value that still keeps eyelashes distinct.
How to undo: Reset to Default which is usually 128, or set to 128 manually in Configure Video.
Encoder and OBS Output: 6000 Kbps CBR, Keyframe 2 Seconds
What causes it: Mismatched canvas scaling or variable bitrate lets the platform re-encode your already soft webcam region more aggressively.
How to check: Go to OBS Studio > Settings > Output > Output Mode Advanced > Streaming tab. Check Encoder, Bitrate, Rate Control, and Keyframe Interval. Then Settings > Video > check Downscale Filter. View log at %appdata%\obs-studio\logs\latest.log with Ctrl + O to open logs folder.
What to do: Set Output Mode to Advanced, Encoder to x264 or Hardware NVENC H.264 / AMF H.264 / QuickSync H.264. Set Rate Control to CBR, Bitrate 4500 to 6000 Kbps for 1080p, Keyframe Interval 2 seconds, Preset Quality or P5 Medium, Profile High. In Settings > Video set Downscale Filter to Lanczos 36 samples if Base and Output differ. Set Color Format NV12, Color Space 709, Color Range Partial.
How to undo: Switch Output Mode back to Simple and Rate Control to default, or restore profile via Profile > Show Profile Folder and delete current profile.
By Hardware Tier
Low Tier: Laptop 720p Webcams, Older Logitech C270 / C310
Prioritize light over settings because small sensors need gain to reach exposure. Place a single 10 inch ring light or desk panel directly behind monitor at eye level, set hardware to MJPEG 1280×720 at 30 FPS if 1080p is noisy, then upscaled in OBS with Lanczos. Disable RightLight, Auto Focus, and Low Light Compensation in Configure Video > Camera Control. Use Exposure Manual -6, Gain 0 to 5 max, White Balance Manual 4800K, Sharpness 100. In OBS Settings > Output set 4500 Kbps CBR. This avoids heavy grain that would make a stretched 1080p look worse than a clean 720p window scaled to 1080p.
Mid Tier: Logitech C920 / C922 / C930, Razer Kiyo, Elgato Facecam
These can hold true 1080p 30 FPS with manual controls. Use Camera app: Logitech G HUB > Camera > Advanced > turn off Auto Exposure and Auto White Balance. Set 1920×1080 MJPEG 30 FPS, Exposure -5, Gain 4 to 8, White Balance 5200K, Brightness 134, Contrast 128, Sharpness 110. Add two-light setup: key at 45 degrees and fill at 25% brightness to lower contrast without raising gain. In OBS, keep Base and Output matched at 1920×1080 to avoid resampling, and enable Studio Mode to compare before and after.
High Tier: Logitech Brio 4K, Elgato Facecam Pro, Insta360 Link, DSLR via Cam Link
Downscale the high resolution sensor to super-sampled 1080p instead of streaming native 4K. Set device to 1920×1080 or 3840×2160 at 30 FPS with product mode off, then in OBS use 1920×1080 output. Use shutter priority: 1/60 sec, ISO/Gain lowest native, Aperture f/2.8 to f/4 if using DSLR, White Balance manual 5000K to 5600K with gray card. Sharpness stays low at 80 to 100 because the optics are already sharp. Use NVENC P5 or AMF Quality at 6000 Kbps CBR, Keyframe 2, with Look-ahead off to avoid latency. Store profiles in %appdata%\obs-studio\basic\profiles\ for quick switching and back them up.
Common Mistakes
Leaving everything on Auto: What causes it is trusting factory auto algorithms that re-evaluate every frame. How to check is to wave a hand quickly in front of lens and watch if brightness pulses in OBS preview. What to do is switch Exposure, Gain, and White Balance to Manual using Configure Video > Camera Control. How to undo is to re-check Auto boxes and click Default.
Over-sharpening to fake detail: What causes it is raising Sharpness to 200 plus to compensate for soft focus. How to check is to view text on a hoodie at 100% preview and look for ringing. What to do is lower Sharpness to 90 to 128 and refocus manually. How to undo is set Sharpness back to 128.
Streaming bright room with Backlight Compensation on: What causes it is the webcam exposing for a window behind you. How to check is OBS Configure Video > Video Proc Amp > Backlight Compensation checked and face is dark. What to do is turn it Off, close blinds, and place key light in front. How to undo is re-enable Backlight Compensation.
Using 60 FPS in a dim room: What causes it is halving exposure time, forcing gain up. How to check is Device Properties shows 60 FPS and image is noisy even at Brightness 128. What to do is set custom FPS to 30 in Video Capture Device > Properties. How to undo is select 60 again in same menu.
Adding OBS Color Correction on top of hardware tweaks: What causes it is double processing that clips levels. How to check is Filters list shows Color Correction with Contrast above 0.10. What to do is remove Filters > Color Correction and do all tuning in hardware Proc Amp. How to undo is press Ctrl + Z or re-add Filter > Color Correction.
Upscaling 720p source to 1080p canvas: What causes it is setting Video Capture Device to 1280×720 while canvas is 1920×1080 with Bilinear scaling. How to check is Settings > Video shows Downscale Filter Bilinear and source stretched. What to do is set device to 1920×1080 or use Lanczos scaling, or keep source at 1:1 and crop. How to undo is revert Resolution Type to Device Default.
FAQ
Should I use 1080p 60 FPS for a sharper stream?
Only if you have strong key lighting at 1000 lumens or more within two feet. At 60 FPS the shutter must be 1/60 or faster, which needs twice the light of 30 FPS. In a normal room, 30 FPS lets you keep gain under 8 and exposure at -5 to -7 for cleaner edges. Set FPS in Video Capture Device > Properties > FPS 30. To revert, set FPS back to 60 in the same dropdown and raise light intensity.
Why does my webcam look sharp in the camera app but soft on stream?
The camera app shows uncompressed preview while OBS re-encodes at your bitrate with scaling. Check Settings > Video to ensure Base and Output are both 1920×1080 and Settings > Output > Bitrate is 4500 to 6000 Kbps CBR. Also check that Video Capture Device > Properties > Resolution is Custom 1920×1080, not Device Default which may fall back to 720p. If still soft, lower Sharpness to 110 to reduce bitrate waste on halos and increase key light instead.
Do I need to install Logitech G HUB or Elgato Camera Hub?
No, OBS can control most settings via Properties > Configure Video > Camera Control and Video Proc Amp, which writes directly to the driver. External hubs are only helpful for saving presets and for features like auto framing on Brio Link. If you use a hub, disable its auto settings so it does not fight OBS. Config files are stored at %appdata%\obs-studio\plugin_config\obs-v4l2sink or Logi Tune at %appdata%\LogiTune\. To undo hub changes, uninstall the hub or click Restore Defaults.
What is the fastest way to reset if my image looks worse?
Press the reset path in both places. In G HUB or Camera Hub click Default or Reset All. In OBS right-click Video Capture Device > Properties > Configure Video > Camera Control > Default for each slider, then Video Proc Amp > Default. Delete Filters with right-click source > Filters > select filter > Remove. This returns to factory 128 values. Save your working values first by taking a screenshot with Win + Shift + S of the slider panel so you can restore them.


