
The best in ceiling speakers for music and home theater are the ones that match your room depth, amplifier, listening area, and moisture exposure—not simply the model with the largest woofer.
For most mixed-use rooms, a 6.5-inch two-way speaker with an angled or aimable tweeter is the safest choice. It provides useful bass without demanding a large cutout, spreads dialogue and music across several seats, and usually fits standard residential ceiling cavities. Choose a moisture-resistant model for bathrooms, covered patios, and kitchens; choose a shallow speaker when joists, ductwork, or insulation leave limited space.
As an Amazon Associate we earn from qualifying purchases at no extra cost to you.
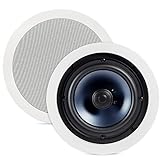
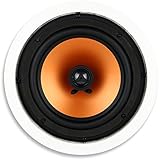

Top 3 picks at a glance
Best in-ceiling speakers by listening situation
| Room or priority | Best design target | Models worth considering | Why it fits |
|---|---|---|---|
| Music in a living room | 6.5–8-inch woofer, coaxial tweeter, wide dispersion | KEF Ci160QR, Polk RC80i | Even coverage and less need to sit directly beneath the speaker |
| Home theater height channels | 6.5-inch woofer, aimable tweeter, controlled directivity | RSL C34E, Sonance MAG6R | Better ability to aim effects toward the seating row |
| Large room or louder playback | 8-inch woofer, robust voice coil, higher power handling | KEF Ci200QR or another high-output 8-inch coaxial design | More acoustic output and lower distortion at the same listening level |
| Bathroom, covered patio, or humid kitchen | Moisture-resistant construction and sealed or protected components | Polk RC80i or a marine-rated in-ceiling speaker class | Better resistance to humidity; still requires suitable wiring and installation |
| Shallow or obstructed ceiling | Compact-depth, low-profile back structure | Shallow-depth architectural speaker class | Reduces the chance of hitting ductwork, plumbing, or joists |
What separates a good speaker from a merely adequate one?
Woofer size and construction
A 6.5-inch woofer is the most versatile size. It normally offers enough midbass for vocals, guitars, and movie effects while fitting many standard ceiling openings. An 8-inch woofer can sound fuller and play louder, but it needs a larger cutout and may be a poor choice in a small room where listeners sit close to the speaker.
Look for a polypropylene, mica-reinforced, or similar moisture-tolerant cone when durability matters. Kevlar, woven composite, and aluminum cones can also provide useful rigidity, but cone material alone does not determine sound quality. The surround, crossover, enclosure volume, and installation are equally important.
In-ceiling speakers are usually not subwoofer replacements. A ceiling speaker that reaches into the 50–60 Hz region may sound satisfying for music, but movie LFE and deep electronic bass are better handled by a powered subwoofer. Relieving the ceiling speakers of deep bass also gives the amplifier more headroom for dialogue and effects.
Tweeter type and aimability
Most architectural speakers use a coaxial layout, placing the tweeter in the center of the woofer. This preserves a compact installation and generally produces more consistent coverage than separate woofer and tweeter locations.
A fixed dome tweeter is acceptable when the speaker will be centered over the listening area. An aimable tweeter is more useful when the ceiling position is dictated by joists, lighting, or an existing opening. RSL C34E, for example, uses an angled design intended to direct sound toward the seating area rather than straight down.
Silk or textile tweeters tend to produce a smoother top end, while aluminum or other rigid tweeters can provide more apparent detail and output. Neither is automatically superior. For bright rooms with hard floors and bare walls, a smoother tweeter and adjustable treble control can be easier to live with.
Dispersion controls are more important than maximum wattage
Dispersion describes how widely sound spreads. A wide-dispersion speaker can cover several seats evenly, while a narrower or more controlled design can deliver stronger dialogue and effects to a specific row.
For background music, place speakers so their coverage areas overlap moderately. For a theater, use aimable tweeters or angled baffles to point left and right height channels toward the main listening positions. Avoid placing a speaker directly beside a listener’s head; even a good speaker can sound unbalanced at very short distance.
Some speakers include a treble switch or contour control. Start at the neutral setting. Use a small cut, such as -2 dB if available, when the room sounds sharp; boost only when the speaker is heavily absorbed by insulation or the room sounds unusually dull. Equalization cannot fix a speaker that is badly aimed or placed too close to one seat.
Ceiling depth, cutout size, and installation difficulty
The visible grille is not the main measurement. Before buying, check the required cutout diameter, mounting depth, clamp range, and clearance around the back of the speaker. A speaker may have a slim grille but still require several inches of cavity depth.
| Ceiling condition | Practical target | Installation risk |
|---|---|---|
| Open joist bay with no obstructions | Standard 6.5- or 8-inch speaker; verify depth from the manufacturer | Low |
| Ceiling cavity around 3–4 inches deep | Shallow architectural model only | Medium to high |
| Insulation immediately behind drywall | Speaker with an enclosed back box or suitable acoustic enclosure | Medium |
| Concrete ceiling or minimal void | Surface-mounted or on-wall alternative | High for in-ceiling installation |
| Existing opening | Match the new speaker’s cutout, not its outside diameter | Medium |
Installation is easiest in new construction, before drywall is fitted. In a finished ceiling, use a stud finder, inspection camera, or a small exploratory hole before cutting the full opening. Confirm the absence of electrical cables, plumbing, HVAC ducts, and structural framing. Do not assume that a clear-looking area on the ceiling is safe to cut.
For a typical retrofit, the sequence is:
- Measure the joist bay and verify speaker depth and cutout requirements.
- Mark the location with the supplied template, keeping equal distances from side walls where possible.
- Inspect behind the proposed opening before cutting.
- Run rated speaker cable with enough slack for connection, but avoid loose coils that can rattle.
- Connect polarity consistently: amplifier positive to speaker positive and negative to negative.
- Set the speaker into the opening and tighten the dog-leg clamps evenly.
- Fit the grille and test at low volume before closing access or reinstalling trim.
Moisture resistance and paintability
“Moisture-resistant” does not mean waterproof. A suitable speaker for a humid bathroom or covered outdoor area should have treated cones, corrosion-resistant hardware, and a grille designed to tolerate humidity. Outdoor installations also need protection from direct rain, standing water, and extreme temperature changes.
Use a speaker specifically described for the intended environment rather than assuming an indoor architectural model is suitable outside. Follow local electrical rules for cable routing in walls and ceilings.
Most in-ceiling speaker grilles can be painted. Remove the grille first, mask the driver and baffle, and apply several very light coats rather than one heavy coat. Thick paint can block grille perforations, add audible resistance, or clog the tweeter’s protective mesh. Do not paint the cone, surround, or tweeter dome. If the grille is magnetic, keep paint away from the magnet and contact surfaces.
How much amplifier power do you need?
Nominal speaker wattage is not a target volume setting. A useful planning example shows why. Suppose two 8-ohm speakers have a sensitivity of 88 dB at 1 watt and the listening position is 3 meters away. Distance loss is approximately 20 log10(3), or 9.5 dB. One speaker therefore produces about 78.5 dB from 1 watt at the seat.
To reach a 95 dB peak from that speaker requires roughly 16.5 dB more output. Each doubling of power adds about 3 dB, so the estimate is approximately 45 watts. Allowing headroom for music and movie peaks makes an amplifier capable of around 75–100 watts per channel into the speaker’s impedance a sensible pairing.
This is an estimate, not a guarantee: room reflections, speaker compression, equalization, and whether multiple speakers share the load all change the result. Avoid connecting speakers below the amplifier’s rated impedance. If using four speakers on one stereo amplifier, use the amplifier’s impedance-safe wiring mode or an impedance-matching selector when required.
Choosing between the leading designs
KEF Ci160QR and Ci200QR
KEF’s Uni-Q coaxial approach is aimed at consistent dispersion across a wide listening area. The Ci160QR is the more practical 6.5-inch choice for typical rooms, while the Ci200QR’s 8-inch format favors larger spaces and higher output. These are good candidates when even music coverage matters more than the lowest installation cost. Check the required cavity depth and cutout carefully before selecting the larger model.
RSL C34E
The C34E is designed around an angled, three-way architectural layout, making it particularly relevant for home theater installations where the ceiling speaker must direct sound toward the seats. Its geometry can be more useful than a conventional downward-firing coaxial speaker when the mounting location is not directly above the listening area.
Polk RC80i
The RC80i is a practical 8-inch, two-way architectural speaker with a moisture-resistant design suited to many indoor humid locations. It is a sensible choice for broad background coverage and rooms where a larger woofer is helpful, provided the ceiling has enough space for its opening and depth.
Sonance MAG6R
The MAG6R belongs to the 6.5-inch architectural category and emphasizes a clean, low-profile installation. It is a strong fit when the grille appearance and coordinated architectural system matter. Confirm the exact amplifier load, depth, and grille-painting instructions for the version being purchased.
Final buying decision
Choose a 6.5-inch aimable model for most home theaters, especially when seats are not directly below the ceiling locations. Choose an 8-inch model for a larger room or higher playback levels, but budget for a subwoofer if movie bass matters. Choose a moisture-resistant design for humid spaces, and choose a shallow-depth model only after measuring the cavity rather than relying on the speaker’s external profile.
The best in ceiling speakers disappear visually, but they should not disappear from the planning process: correct placement, safe clearance, consistent polarity, and suitable amplification usually make a larger audible difference than upgrading from one reputable speaker brand to another.
Frequently asked questions
Can in-ceiling speakers replace a subwoofer?
No. In-ceiling speakers are usually not subwoofer replacements, even when they reach into the 50–60 Hz region. They may sound satisfying for music, but movie LFE and deep electronic bass are better handled by a powered subwoofer. Relieving the ceiling speakers of deep bass also gives the amplifier more headroom for dialogue and effects.
Where should I place in-ceiling speakers in a room?
Place speakers so their coverage areas overlap moderately for background music, and avoid positioning one directly beside a listener’s head. In a theater, aimable tweeters or angled baffles can direct left and right height channels toward the main listening positions. Where possible, keep speaker locations equally distant from the side walls.
How can I check whether it is safe to cut my ceiling?
Before cutting, confirm that the proposed location is clear of electrical cables, plumbing, HVAC ducts, and structural framing. In a finished ceiling, use a stud finder, inspection camera, or small exploratory hole to inspect behind the surface. Do not assume an apparently clear area is safe to cut.
What cable and wiring practices should I use for ceiling speakers?
Run rated speaker cable with enough slack for connection, while avoiding loose coils that can rattle. Connect polarity consistently by attaching amplifier positive to speaker positive and negative to negative. Follow local electrical rules for cable routing in walls and ceilings. Also avoid connecting speakers below the amplifier’s rated impedance.
How do I paint an in-ceiling speaker grille without damaging it?
Remove the grille first, mask the driver and baffle, and apply several very light coats instead of one heavy coat. Thick paint can block grille perforations, add audible resistance, or clog the tweeter’s protective mesh. Do not paint the cone, surround, or tweeter dome. If the grille is magnetic, keep paint away from the magnet and contact surfaces.


