
Perching a webcam precariously on the top bezel of a thin monitor is an accident waiting to happen. At best, you end up with an unflattering upward camera angle, distracting vibrations every time you type, and glare from overhead office fixtures. At worst, an accidental tug on a USB cable sends your $70 to $200 device crashing onto the desk, cracking the lens element or snapping the plastic hinge. Even modern bezel-less monitors can suffer pressure damage or dead pixels if clamped too aggressively by stock monitor mounts.
Learning how to mount a webcam on a tripod stand creates a rock-solid, professional video setup. Whether you are using a compact tabletop tripod, an articulating boom arm like the InnoGear Webcam Stand Arm ($21.99), or a flexible reach option like a 30-inch gooseneck clamp mount ($19.49), securing your camera correctly improves ergonomics, eye contact, and video quality. Follow this guide to properly mount, balance, and position your camera without damaging the delicate hardware.
As an Amazon Associate we earn from qualifying purchases at no extra cost to you. Product prices and availability are accurate as of the date shown and are subject to change.
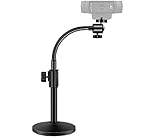

What You Need
| Item | Why | Optional? |
|---|---|---|
| Webcam with 1/4″-20 Thread (or Adapter) | The industry-standard mounting socket required to screw the device onto standard photography hardware. | No |
| Tripod Stand or Desk Mount Arm | Provides stable elevation; ranges from mini 3-leg tabletop tripods (6–10 inches) to extended desk-clamp arms. | No |
| Universal Webcam Clamp Adapter | Holds clip-only webcams that lack a built-in female screw thread. | Optional (needed only for older/budget webcams) |
| Cable Ties or Hook-and-Loop Straps | Secures the USB cable along the stand to prevent weight drag and accidental tipping. | Yes |
| Microfiber Cleaning Cloth | Wipes away fingerprints from the lens and mount during installation. | Yes |
Step-by-Step: How to Mount Your Webcam
1. Locate and Inspect the Thread Socket (Estimated Time: 1–2 minutes)
Unplug your webcam from your computer before handling it. Flip the webcam upside down and examine the base of the integrated monitor clip. Most mainstream models (such as the Logitech C920, C922, C930e, and Brio 4K) feature a metal or reinforced plastic 1/4″-20 UNC female thread recessed into the underside of the folding foot.
If your webcam does not have a threaded hole, you will need a universal spring-loaded smartphone/webcam clamp (costing $6 to $12). Screw this clamp onto the tripod first; it will grip the body of your camera securely from the sides.
2. Set Up and Anchor the Tripod Base (Estimated Time: 3–5 minutes)
Before attaching the camera, stabilize your base so it cannot tip over during assembly:
- For traditional mini-tripods: Splay the three legs fully outward until they lock at their widest footprint (typically 6 to 9 inches wide). Ensure all rubber feet make flush contact with your desk surface.
- For desk-clamp arms: Position the C-clamp bracket around a sturdy section of your desk edge (supporting desktop thicknesses from 0.5 to 2.2 inches). Tighten the hand screw firmly until the bracket cannot wobble or slip, but avoid over-torquing on soft particleboard or hollow-core desks.
- For weighted gooseneck stands: Bend the flexible 30-inch shaft into a slight “S-curve” rather than a straight vertical line. A gentle curve distributes the center of gravity more effectively over the weighted base or desk clamp.
3. Align and Thread the Webcam (Estimated Time: 2–3 minutes)
Hold the webcam in one hand and locate the 1/4″-20 male screw on the tripod’s ball head or mounting plate. Align the screw perpendicular to the socket on the bottom of the webcam. Slowly turn the tripod’s locking wheel (or rotate the webcam clockwise) until the threads catch smoothly.
Hand-tighten the connection until snug. Do not overtighten. Webcams weigh between 4 and 9 ounces; excessive torque can strip the plastic housing around the brass thread insert. Once seated, tighten the ball-head adjustment knob on the tripod to lock the swivel mechanism in place.
4. Set Proper Height and Camera Framing (Estimated Time: 3–4 minutes)
In 2026, home office ergonomics prioritize eye-level positioning to reduce neck strain and create direct eye contact during virtual meetings. Position your tripod directly behind or immediately adjacent to your main display screen.
Adjust the tripod height so the camera lens aligns horizontally with your eye line or sits just above it, tilted downward roughly 5 to 10 degrees. If using a desktop tripod, set it on a monitor riser or shelf if the legs do not provide enough vertical height on their own.
5. Secure Cables and Manage Tension (Estimated Time: 2 minutes)
Plug the USB cable back into your computer or docking station. Leave a generous 2-to-3-inch loop of slack near the camera head so you can pan or tilt the unit without pulling the cord taut. Fasten the rest of the cable along the tripod shaft or boom arm using hook-and-loop straps. This prevents cable drag from tilting the camera off-axis over time.
Mistakes to Avoid
- Cross-Threading the Mount: If the screw resists after half a turn, stop immediately. Back the screw out and realign. Forcing a cross-threaded steel screw into a soft brass or plastic webcam socket will permanently ruin the mount.
- Placing Tripods on High-Vibration Surfaces: Setting a lightweight tripod directly next to a mechanical keyboard will transmit sharp vibrations straight into your video feed. Place the tripod behind the keyboard on a dense desk mat, or clamp an arm to a secondary shelf.
- Over-Extending Articulated Arms: Extending an articulated arm or gooseneck horizontally to its maximum 30-inch limit creates leverage that can loosen desk clamps or cause camera droop. Keep bends closer to 45-to-60-degree angles for structural rigidity.
- Ignoring Weight Limits: Compact desktop tripods are rated for light loads (typically 1 to 2.5 lbs). Never mount heavy DSLR cameras or add bulky ring lights onto basic webcam stands without checking the manufacturer load rating.
How Often to Adjust and Maintain Your Setup
Check the mechanical stability of your webcam stand once a month. Desk vibrations and routine movement gradually loosen thumb screws, ball-head collars, and C-clamps. Give the mounting screw and desk clamp a quick quarter-turn check to ensure everything remains rigid.
Every three months, inspect the USB cable connection for stress crimping where it bends around the tripod joints. Use a dry microfiber cloth to dust the tripod base and clean smudges off the camera lens.
When to Replace Your Mount Hardware
Most dedicated webcam stands and boom arms (ranging from $15 to $35) provide years of reliable service, but you should replace your mounting gear if you notice any of the following:
- Stripped Thread Sockets: If the webcam wobbles freely even when the screw is fully engaged, the thread grooves are worn down and risk dropping the camera.
- Worn Ball-Head Collars: If the camera slowly droops downward over several hours despite tightening the tension wingnut to its limit, the internal friction pad has worn out.
- Bending Clamp Brackets: If the metal C-clamp on a desk arm shows signs of bowing or cracking along its welded joints, replace the arm immediately before it snaps off your desk edge.
Frequently Asked Questions
What screw size do webcam tripods use?
The universal standard for consumer and professional webcams is a 1/4″-20 UNC thread (1/4-inch diameter with 20 threads per inch). This is the exact same thread size found on standard photography tripods, light stands, and action camera mounts.
Can I mount a webcam that doesn’t have a screw hole?
Yes. If your webcam has a fixed monitor clip without a threaded base, buy an inexpensive universal smartphone/camera bracket ($6 to $12). These brackets screw onto your tripod’s 1/4″-20 mount and use padded, spring-loaded jaws to hold the webcam body firmly in place.
Should I choose a mini desktop tripod or an articulated clamp arm?
Choose a mini desktop tripod if you need portability, travel frequently, or have deep desk space behind your monitor. Choose an articulated boom arm or gooseneck clamp if you have limited desk real estate, use sit-stand desks, or want to position the camera directly above large monitors without taking up desk space.
How do I eliminate desk vibration showing up on my webcam feed?
If aggressive typing shakes your video, isolate the mount. Mount the camera on a dedicated monitor shelf, clamp your boom arm to a wall stud or separate side table, or place your tabletop tripod on a thick neoprene desk pad (3mm to 5mm thick) to absorb typing shocks.


