
You’ve finally saved up for a decent microphone and camera, hit record, and heard it back: that hollow, echoey room tone that makes even a $400 mic sound like a phone call. So you go shopping for a fix, and almost immediately you run into a wall of confusing terminology. Some listings say “acoustic foam,” others promise “soundproofing,” and the terms get used interchangeably by sellers who honestly shouldn’t. The real decision a streaming buyer faces isn’t foam versus panels at all — it’s treating your room’s echo versus blocking sound from traveling. They’re two different problems with very different price tags, and picking the wrong one means spending money without fixing what you actually hear on stream.
Here’s the honest framing: acoustic foam and acoustic panels absorb sound inside your room, which cleans up your audio. True soundproofing — mass, decoupling, sealed barriers — stops sound from leaving or entering, which is a construction project, not an Amazon order. Most streamers need the first thing and assume they need the second. This guide walks through where each option genuinely wins, what it costs over five years, and which one fits your specific living situation.
As an Amazon Associate we earn from qualifying purchases at no extra cost to you. Product prices and availability are accurate as of the date shown and are subject to change.


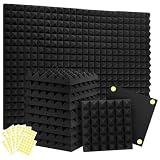
Top 3 picks at a glance
Quick Verdict
For the vast majority of streamers, acoustic foam or fabric-wrapped acoustic panels are the right buy. They tame echo, reverb, and that “empty room” sound for $30–$150, they install in an afternoon with adhesive tabs, and they make an audible difference in your stream audio immediately. True soundproofing (mass-loaded vinyl, double drywall, sealed doors) costs $500 to $5,000+ and only makes sense if your problem is noise complaints, roommate conflicts, or a neighbor’s bass bleeding into your recordings. Treat your room first; soundproof only if the problem is sound getting in or out.
Side by Side
| Factor | Acoustic Foam Panels | Soundproofing / Higher-Density Acoustic Panels |
|---|---|---|
| Primary job | Absorbing mid/high frequencies, killing echo inside the room | Blocking sound transfer (true soundproofing) or broadband absorption (dense panels) |
| Comfort of install | Very easy — adhesive tabs, no tools, one afternoon for a 10×10 room | Moderate to hard — dense panels need stronger mounting; true soundproofing may require construction |
| Durability | 5–8 years; foam can crumble, yellow, or dent if bumped | 10–15+ years for fabric panels; construction-grade soundproofing lasts decades |
| Price range | $25–$80 for a typical streamer setup | $100–$400 for dense acoustic panels; $500–$5,000+ for real soundproofing |
| Maintenance | Dust with a soft brush or vacuum on low; can’t be washed | Fabric panels can be lightly vacuumed; some covers are removable |
| Space needed | Minimal — 1″ panels sit nearly flush; 2″ panels protrude 2 inches | Thicker panels protrude 2–4 inches; soundproofing adds wall thickness (1–2+ inches per layer) |
| Look | Recognizable “studio” wedge or pyramid texture; black or gray dominates | Fabric-wrapped panels look like finished wall art; more design-friendly |
| Resale / removal | Adhesive tabs remove cleanly from most painted walls; foam isn’t resalable once mounted | Panels can be unmounted and resold; construction changes stay with the home |
| Best for | Streamers, podcasters, gamers fixing room echo on a budget | People with noise complaints, shared walls, or street noise bleeding in |
Where Acoustic Foam Wins
Budget is the obvious one. A kit like the Focusound 52-pack of 1-inch x 12-inch x 12-inch wedge panels runs about $36.99 and includes 300 double-sided adhesive tabs, which covers a full streaming wall and a good chunk of a second wall for less than the cost of a decent boom arm. The 24-pack of 2-inch pyramid panels from the same brand sits between $27.98 and $34.99 depending on pack size and included adhesive, so even stepping up to thicker foam barely dents your wallet.
Foam also wins on install friction. There’s no framing, no screws, no landlord conversation — you peel a tab, press the panel, and you’re done. For renters and dorm-dwellers, that’s the entire decision. And there’s a real acoustic benefit to the classic wedge and pyramid shapes: the angular surface increases the effective surface area absorbing sound, particularly in the speech frequencies (roughly 500 Hz to 4 kHz) where stream voice clarity lives. A 2-inch panel absorbs noticeably more low-mid frequency energy than a 1-inch panel, which is why 2-inch or thicker foam is the usual recommendation for rooms with a boomy, hollow character.
Finally, foam wins on aesthetics-as-branding. If you want your background to read “streamer setup” at a glance — the textured studio wall behind the RGB lighting — foam delivers that look for pennies on the dollar compared to custom fabrication.
Where Soundproofing Panels for Streaming Wins
If your problem is sound traveling — your voice leaking into a roommate’s Zoom call, traffic rumble bleeding into your recordings, a shared wall with a home theater — absorption products can’t fix it, no matter how much you mount. Dense, mass-loaded solutions win here. Mass-loaded vinyl (typically 1 lb per square foot) added behind a second layer of drywall, sealed solid-core doors, and weatherstripped door gaps do what foam physically cannot: block transmission.
In the “panels” category, high-density options also beat basic foam on broadband performance. A dense fiberglass or rockwool panel in a fabric wrap, 2 to 4 inches thick, absorbs meaningfully lower into the frequency spectrum — down into the 125–250 Hz range where foam starts to struggle. That matters if you record voiceover, music, or anything with bass presence. These panels also look more like home decor than studio equipment, so they win in shared living spaces where a full wedge wall would feel out of place. And durability is simply on another level: a fabric-wrapped panel still looks new at year eight; foam at year eight is usually yellowed and dented.
Cost Over 5 Years
Acoustic foam is remarkably cheap to own. A $35 kit covering one to two walls may need partial replacement around year 5–7 as adhesive fails and edges soften — budget roughly $15–$25 for a refresh pack. Adhesive tabs cost $8–$12 if you rearrange. Total 5-year cost for a typical streaming setup: $50–$90.
Fabric-wrapped dense acoustic panels run $100–$250 for a four-to-eight panel setup and essentially don’t degrade in that window. Total 5-year cost: $100–$260, with the panels likely resalable for 40–50% of purchase price afterward.
True soundproofing is the outlier. Even a modest DIY project — mass-loaded vinyl on one shared wall plus a solid-core door and sealing — runs $400–$800 in materials. Professional decoupled wall construction runs $2,000–$10,000. It’s permanent, which means it adds value to the property rather than subtracting from a deposit. Total 5-year cost: $400 on the very low end, realistically $1,500+ for meaningful results.
Which One for Your Home
Small apartment or studio
Go foam, and go 2-inch if your space is under 150 square feet — small rooms accumulate low-mid buildup, and 1-inch foam won’t touch it. A 24-pack of 2-inch pyramid panels at around $34.99 covers the wall behind your mic plus first-reflection points beside your desk. Mount foam on the wall your microphone faces; that does more for your stream audio than covering the wall behind you.
Family home with kids or pets
Exposed foam is a magnet for small hands and claws — it dents permanently and sheds crumbs when picked at. Choose dense fabric-wrapped panels mounted higher on the walls, or combine foam above reach height with a thick rug and curtains below. If noise traveling to sleeping kids is the actual complaint, this is the rare case where a soundproofing step (a solid-core door with a door sweep, roughly $60–$150 installed DIY) beats adding more absorption.
Rental
Adhesive-mounted foam is the clear winner. Kits like the Focusound panels ship with double-sided adhesive specifically so you avoid screws and nails, and quality tabs release from painted drywall without peeling it if you pull slowly at a low angle. Skip anything requiring construction, and photograph the walls before mounting so you can document condition at move-out. A $28–$37 kit is a disposable expense compared to a lost deposit.
Long-term home you own
If you’re building out a dedicated streaming or recording room, invest in density: 2-inch foam on the reflection points plus a few 4-inch thick bass absorption panels in the corners. If you share walls with a garage, busy street, or home theater, this is where soundproofing earns its cost — mass-loaded vinyl behind a second drywall layer on the noise-facing wall permanently raises the quality ceiling of everything you record. By 2026, buyers increasingly expect dedicated content-creation rooms, so construction-grade treatment can even be a selling point rather than an expense.
FAQ
Does acoustic foam actually soundproof a room?
No — and this is the most common misconception in the category. Acoustic foam absorbs sound inside the room, reducing echo and reverb in your microphone. It does not meaningfully block sound from entering or leaving. Sellers who label foam “sound proof” are describing a wish, not a function. If your goal is cleaner stream audio, foam does the job; if your goal is a neighbor not hearing you, it won’t.
How many panels do I need for a streaming setup?
Aim to cover roughly 15–25% of your total wall surface, concentrated at the reflection points: the wall directly in front of you, the walls to your left and right at desk height, and the wall behind the microphone. For a typical 10×12 room, that’s 20–35 square feet of coverage — about 30 of the 12×12-inch panels, or one large 52-pack kit with room to spare.
Should I choose 1-inch or 2-inch foam?
1-inch panels (like 1x12x12 wedges) handle speech frequencies well and sit flush against the wall, which matters in tight spaces. 2-inch panels absorb lower into the spectrum and noticeably reduce room boominess. If your room sounds hollow or you record music as well as voice, choose 2-inch. If you only need cleaner voice chat in a carpeted room, 1-inch is sufficient.
Will panels behind my monitor do anything, or should they go behind me?
Your microphone picks up sound in roughly the direction it points, so the surfaces your mic faces matter most. Panels behind your monitor (between you and the mic’s “line of fire” into the room) help, but the wall directly behind you — which the mic points into — is often the biggest reflector. Cover both if you can, prioritizing the wall behind you first.


