
If your microphone slowly sinks mid-recording or your boom arm flops over the moment you let go, the problem is almost always tension, not the arm itself. Most boom arms ship with spring tension set for lightweight mics in the 0.5 to 1 pound range. A heavy dynamic microphone or a large-diaphragm condenser like a Blue Yeti (which weighs about 2.6 pounds with its desk mount) needs significantly more counterforce. Learning how to adjust boom arm tension for heavy microphone setups correctly takes about ten to twenty minutes and saves you from drooping mics, stripped threads, and desk-cluttering tape-and-rubber-band fixes.
Done badly, tension adjustment causes real damage. Overtighten the knobs and you can crush the internal spring housing or strip the plastic threads that hold the pivot joints. Undertighten and the arm drifts during takes, picking up handling noise as the mic moves relative to your mouth. Worse, an unbalanced heavy mic can yank itself free of a loose desk clamp and hit the floor — a costly outcome if you are running a $300-plus condenser. The steps below work for spring-loaded boom arms and scissor-style arms alike.
As an Amazon Associate we earn from qualifying purchases at no extra cost to you. Product prices and availability are accurate as of the date shown and are subject to change.
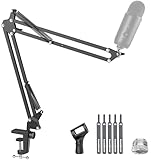

What You Need
| Item | Why | Optional? |
|---|---|---|
| Phillips screwdriver and a set of Allen (hex) keys, 2–5 mm | Most pivot screws and tension collars use Phillips heads or hex bolts; scissor arms often use small hex screws at each knuckle. | No |
| Thread-locking compound or a small drop of nail polish | Keeps adjusted tension screws from vibrating loose over weeks of daily repositioning. | Yes |
| Household oil or a silicone-based lubricant | A single drop on stiff pivot points makes fine tension adjustments smoother and prevents creaks. | Yes |
| Soft cloth or towel | Protects your desk surface while you work and catches small screws. | No |
| Microphone and shock mount, fully assembled | You must adjust tension with the actual weight installed; a bare arm will always feel too loose afterward. | No |
Step-by-Step
1. Mount the arm solidly and attach the mic (2 minutes)
Clamp the arm base to a desk edge at least 0.75 inches thick — thinner or overhanging desktops flex under a heavy mic. Hand-tighten the clamp screw firmly, then attach your microphone and shock mount. If you are using an arm like the InnoGear boom arm, which is rated for mics up to roughly 3 pounds and includes the standard 5/8-inch thread with a 3/8-inch adapter, confirm the mic is threaded on snugly before adjusting anything. Adjusting tension without the mic installed is the single most common error.
2. Identify the tension points (2 minutes)
Telescoping spring arms (the InnoGear style) usually hide two or three tension points: a large collar nut where each arm section meets, and a pivot screw at the main elbow joint. Scissor arms like the FIFINE CS1 place a tension screw at each of the two or three X-shaped knuckles plus one at the base. Loosely wiggle each joint to find which screws control which axis of movement.
3. Tighten the main pivot screws (3–5 minutes)
Support the arm with one hand so it cannot drop. Turn each tension screw clockwise a quarter turn at a time, alternating between joints. After every two quarter-turns, let go and watch the arm. Your goal: the mic stays exactly where you position it, at every angle, including fully extended. Heavy mics typically need one to two full turns beyond the factory setting, but go slowly — the difference between “holds position” and “will not move” is often less than half a turn.
4. Balance the spring, not just the friction (3 minutes)
On telescoping arms, slide the arm sections so the springs bear most of the mic’s weight rather than the pivot friction alone. With a 2 to 3 pound mic, fold the arm so the rear counterweight section extends slightly and the front section retracts a bit; this shifts the balance point closer to the pivot. Position the mic at your typical speaking angle — about 6 to 10 inches from your mouth — and check that it neither rises nor sinks over ten seconds.
5. Test with movement (3 minutes)
Swing the mic through its full range three or four times, the way you would during a real session. It should move with light, even resistance and stop dead when released — no coasting, no sagging, no creaking. If a joint still droops, add another quarter turn. If the arm feels stiff or you hear plastic straining, back off a quarter turn and instead redistribute weight as in step 4.
6. Lock it in (1–2 minutes)
Apply a small drop of threadlocker to each tension screw you adjusted, then confirm the desk clamp is torqued down. Give the boom a firm but gentle tug test: a properly set-up arm holding a 3 pound mic should not shift when bumped.
Mistakes to Avoid
- Adjusting without the mic attached. Tension is a balance between spring force and mic weight. Setting it “by feel” on an empty arm guarantees sag once the mic goes on.
- Using pliers or excessive force on plastic knobs. Most budget arms under $30, including the ones listed above, use ABS plastic collars. Finger-tight plus a quarter turn with a screwdriver is the limit.
- Ignoring the desk clamp. A perfectly tensioned arm on a loose clamp becomes a lever that walks across the desk. Check the clamp before blaming the joints.
- Overtightening one axis only. If the vertical pivot is tight but the elbow is loose, the arm will fold sideways instead of sagging. Tighten all axes evenly.
- Exceeding the weight rating. Scissor arms in the $20 range, like the FIFINE CS1, are typically happiest holding 1.5 to 2.5 pounds. Pair a heavier condenser with an arm rated for at least 3 pounds.
How Often
Recheck tension every four to six weeks if you reposition the arm daily, or every two to three months for a set-and-forget studio. Springs naturally relax over time, especially in the first month of use. A ten-second test — position the mic, release, wait ten seconds — tells you instantly whether a quarter-turn touch-up is needed. Also recheck after any temperature swing; cold rooms stiffen springs slightly, which usually works in your favor, while warm, humid rooms can loosen plastic friction collars.
When to Call a Pro or Replace
Replace the arm if: tension screws turn freely without changing resistance (stripped threads), a spring is visibly stretched or kinked, the arm sags even at maximum tension with a mic under 2 pounds, or plastic joints show hairline cracks near the screw seats. At $20 to $30 for a quality replacement, repair rarely makes sense. Consult an audio technician only if you run a broadcast-grade arm with proprietary counterweight systems, or if your microphone’s own mount is damaged — that is a mic problem, not a tension problem.
FAQ
Why does my heavy mic still sag after I tighten everything?
The arm is likely under-rated for the weight. A Blue Yeti with shock mount can approach 3 pounds, which pushes past what many scissor arms handle. Either redistribute the counterweight as described in step 4, or upgrade to an arm explicitly rated for 3 pounds or more.
Can I add extra springs to increase tension?
Not on most consumer arms — the spring housings are sealed and sized for one spring. Adding friction via tighter screws is the correct method. If that is insufficient, the arm is at its weight limit.
Does overtightening damage the microphone?
No, tension screws affect only the arm. The risk is to the arm itself: stripped plastic threads, cracked joints, and a clamp that marrs your desk. The mic is only at risk if the arm fails and drops it.
Scissor arm or spring boom arm for a heavy microphone?
Spring-loaded telescoping arms generally handle more weight because their springs can be repositioned along the arm sections. Scissor arms are more compact and better for tight desks, but check the weight rating carefully — most budget models top out around 2 to 2.5 pounds. As of early 2026, both styles remain widely available under $30, so matching the rating to your mic costs nothing extra.
