
A microphone buzz caused by an XLR ground loop can make an otherwise clean recording sound amateurish, and the wrong “fix” can create bigger problems than noise. Simply disconnecting a safety ground, using a cheater plug, or randomly swapping cables may reduce hum temporarily while increasing shock risk or hiding a failing piece of equipment. The reliable approach is to identify where the unwanted ground path is entering the audio chain, correct simple connection issues first, and use proper transformer isolation only when it is actually needed.
Ground-loop buzz is usually a steady low-frequency hum, often around 60 Hz in U.S. electrical systems, sometimes with a higher-pitched buzz layered over it. It commonly appears when a microphone, mixer, audio interface, powered speaker, computer, and other connected equipment are powered from different outlets or connected through multiple grounded paths. Balanced XLR connections reject much of this interference, but damaged cables, improperly wired gear, unbalanced adapters, and conflicting power connections can still let noise through.
As an Amazon Associate we earn from qualifying purchases at no extra cost to you. Product prices and availability are accurate as of the date shown and are subject to change.

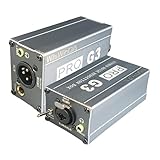
What You Need
| Item | Why | Optional? |
|---|---|---|
| Known-good balanced XLR cable, 6 to 15 feet | Lets you rule out a broken shield, loose connector, or poorly wired cable. | No |
| Headphones or powered monitor speaker | Helps you hear exactly when the buzz begins or disappears during testing. | No |
| Power strip or surge protector, 6 to 12 outlets | Allows connected audio gear to share one properly grounded wall outlet. | Usually |
| XLR isolation transformer or dual-channel hum eliminator | Breaks an unwanted audio ground path while passing the balanced audio signal. | Sometimes |
| Examples: Pyle Compact Mini Hum Eliminator Box | A passive 2-channel unit with XLR and 1/4-inch TRS input/output and 1:1 isolation transformers; typical listed pricing is about $29. | Sometimes |
| Flashlight and microfiber cloth | Useful for inspecting XLR pins, cable ends, and jack panels for debris or damage. | Yes |
| Multimeter | Can help a qualified user check cable continuity and outlet condition, but it is not required for basic troubleshooting. | Yes |
Step-by-Step
1. Confirm that the noise is a ground-loop issue (5 to 10 minutes)
Start with the simplest possible signal chain: microphone, one XLR cable, and one mixer, recorder, interface, or powered speaker input. Turn the volume down before connecting or disconnecting anything, then raise it gradually.
Listen for the character of the noise. A ground loop is typically a constant hum or buzz that remains even when no one is speaking into the microphone. If the noise changes when you touch the cable shell, move your laptop charger, turn on a dimmer switch, or connect a second powered device, that is a strong clue that grounding or electrical interference is involved.
Do not assume every buzz is a ground loop. Crackling often points to a worn cable or dirty connector. A buzz that appears only when a phone is nearby may be radio-frequency interference. A high-pitched whine that changes with computer activity can come from a USB connection, power supply, or graphics hardware.
2. Test the microphone and XLR cable one piece at a time (10 minutes)
Replace the existing XLR cable with a known-good balanced cable. Use a standard three-pin XLR-to-XLR cable, not an XLR-to-1/4-inch instrument cable or a chain of adapters. Inspect the original cable first: pins should be straight, the latch should hold securely, and the connector housing should not wobble.
Then try the microphone through the replacement cable. If the buzz vanishes, retire or repair the old cable. If it remains, plug the microphone into another XLR input on the same device. A noisy individual preamp channel can sound remarkably similar to a ground loop.
If available, test a second microphone. Dynamic microphones do not need phantom power, while condenser microphones often require 48 V phantom power. Turn phantom power off before connecting or removing a microphone, then enable it only when your microphone requires it. Phantom power itself should not cause a healthy balanced XLR system to buzz, but it can expose a wiring fault in damaged or incorrectly configured equipment.
3. Put interconnected audio equipment on one outlet (5 to 15 minutes)
Power the mixer or interface, powered monitors, computer, display, and external audio gear from the same grounded wall outlet using a quality power strip or surge protector. This reduces voltage differences between chassis grounds, a common source of loops.
Keep the strip’s load within its rating. Most household strips are rated for 15 amps and 1,875 watts at 125 volts, but check the label on yours. Audio equipment usually draws far less than that, yet heaters, air conditioners, and other high-wattage appliances should never share the same strip.
After consolidating power, listen again. If the buzz drops significantly, leave the audio system on the shared outlet arrangement. Do not defeat the round grounding pin on a three-prong plug. Never use a two-prong “cheater” adapter as a noise cure, and never remove a ground pin from a power cord.
4. Disconnect external devices to find the loop path (10 to 20 minutes)
With the microphone still connected, remove one nonessential connection at a time. Common culprits include laptop USB hubs, HDMI-connected displays, cable TV boxes, wireless receiver power supplies, phone chargers, DJ controllers, and devices connected to both a computer and a mixer.
After each disconnection, listen through headphones or monitors. When the buzz stops, reconnect the last item to confirm that it is the trigger. That device may not be defective; it may simply create a second ground path through its power cord, USB shield, coaxial cable, or audio cable.
For example, a laptop connected to an interface by USB and to a display by HDMI can introduce noise once the display is connected to another outlet. Keeping the computer, display, and interface on one outlet often resolves the issue. If the problem returns only when a cable TV or coaxial connection is attached, ask a qualified technician to inspect that service ground rather than attempting to alter it yourself.
5. Add a proper XLR transformer isolator if the loop remains (10 minutes)
If the equipment is functioning properly but a particular connection still creates hum, install a passive XLR ground-loop isolator between the noisy source and the receiving device. A transformer isolator breaks the direct electrical ground connection while transferring the audio signal magnetically.
Connect the isolator inline: source XLR output to isolator input, then isolator output to mixer, interface, powered speaker, or recorder input. Keep cable runs tidy and avoid coiling excess cable tightly around power bricks. Place the isolator where it can be reached for testing, rather than burying it behind furniture or inside a crowded equipment cabinet.
A compact two-channel model is useful for stereo equipment or two microphones. The Pyle Compact Mini Hum Eliminator Box, for example, is a passive two-channel option with XLR and 1/4-inch TRS connections, listed around $28.99. Other XLR/6.35 mm TRS/3.5 mm isolators can be useful for mixed home stereo and audio-player setups, but choose connections that preserve a balanced XLR path whenever possible.
Test with one channel first. If the buzz is gone and vocal level sounds normal, connect the second channel if needed. Be aware that some transformer isolators may slightly alter level or tonal character, especially with inexpensive units. For critical studio work, compare the sound before and after installation.
6. Rebuild the final setup neatly and retest (10 minutes)
Once the noise is gone, reconnect only the equipment you need. Route XLR cables separately from AC power cords where practical. Crossing at a 90-degree angle is preferable to running audio and power cables parallel for several feet. Keep power adapters and laptop chargers at least 6 to 12 inches away from microphone cables, preamps, and interface inputs.
Label cables if your setup includes several devices. In 2026, many home recording and entertainment systems still combine older XLR gear with USB, HDMI, and networked components, so a simple label such as “interface to monitors” can save considerable troubleshooting time later.
Mistakes to Avoid
- Removing a safety ground: Never lift, cut, or bypass the grounding pin on powered equipment. It is a safety feature, not a noise-control switch.
- Using an unbalanced adapter unnecessarily: An XLR-to-TS adapter can defeat balanced noise rejection and make the issue worse.
- Buying an isolator before testing cables: A $15 to $40 replacement XLR cable may solve the problem more cleanly than adding another box.
- Connecting and disconnecting with levels high: Turn down monitor and headphone volume first to avoid loud pops and possible speaker damage.
- Ignoring outlet or power-cord damage: Loose outlets, warm plugs, frayed cords, and repeated breaker trips are electrical safety concerns, not ordinary audio problems.
- Assuming all buzz comes from grounding: LED dimmers, fluorescent fixtures, Wi-Fi gear, mobile phones, and failing power supplies can all introduce interference.
How Often
You should not need to “fix” a stable XLR ground loop repeatedly. Once you have identified the offending connection and corrected the power layout or added an appropriate isolator, the setup should remain quiet unless equipment changes.
Inspect XLR cables and connectors every 3 to 6 months in a frequently used home studio, media room, or karaoke setup. Check sooner if cables are stepped on, packed for travel, or frequently plugged into wall plates and floor boxes. Retest the system whenever you add a computer, display, powered speaker, wireless receiver, or new power strip.
When to Call a Pro or Replace
Call a qualified electrician if you notice tingling from metal equipment, sparks, burning smells, discolored outlets, hot plugs, breakers that trip, or an outlet that does not hold a plug securely. Stop using the affected equipment until it has been inspected.
Contact an audio technician if the buzz persists with a single microphone, known-good XLR cable, and one powered device on a verified safe outlet. The microphone, preamp, mixer channel, interface, or powered monitor may have an internal fault.
Replace XLR cables with bent pins, loose shells, intermittent sound, exposed wire, or connectors that no longer latch. Replace low-cost adapters that fit loosely or convert balanced XLR to unbalanced connections without a clear need. If an isolation box removes the hum but causes severe level loss, distortion, or intermittent audio, choose a better-built transformer isolator designed for your signal type.
FAQ
Can an XLR cable itself cause a ground-loop buzz?
Yes. A damaged shield, poor solder joint, loose pin, or incorrectly wired cable can compromise the balanced connection and introduce hum. Always test with a known-good XLR cable before buying additional equipment.
Will phantom power cause a ground loop?
Normally, no. Proper 48 V phantom power is sent equally through XLR pins 2 and 3 and is designed for balanced microphones. However, a damaged cable, faulty microphone, or incorrectly wired adapter can create noise or other problems when phantom power is enabled.
Should I use a ground-lift adapter on the power plug?
No. Do not use a ground-lift adapter or remove a three-prong safety ground to stop buzz. Use a transformer audio isolator, improve the shared power arrangement, or have the electrical system checked instead.
Where should an XLR ground-loop isolator go?
Place it inline on the connection that introduces the buzz, usually between the source device’s XLR output and the destination device’s XLR input. Test one connection at a time so you know which signal path needs isolation.
