
That colored glow behind every polished streamer is usually just RGB LED strip lighting, and it is one of the cheapest ways to make a plain room look like a studio on camera. Done well, strip lights add depth, separate you from the background, and set a mood; done badly, they flicker on camera or wash your face in an unflattering tint. Here is how to buy and place them for a background that reads great on stream.
As an Amazon Associate we earn from qualifying purchases at no extra cost to you.


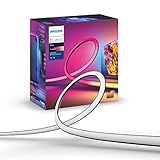

Top 3 picks at a glance
What makes a strip camera-friendly
The key spec most buyers ignore is flicker. Cheap strips driven by low-quality controllers can strobe under a camera’s shutter, showing bands or pulsing on stream. Look for strips with a stable driver, and if you shoot at higher framerates, favor ones known to run flicker-free. Density (LEDs per meter) also matters: higher density gives a smooth glow instead of visible dots.
LED density and diffusion
A strip with 60 LEDs per meter looks continuous; a 30-per-meter strip shows individual points unless diffused. For background glow bounced off a wall, either works. For strips visible in frame (behind a monitor, along a shelf), higher density and an aluminum channel with a frosted cover look far more premium.
Types of RGB lighting compared
| Type | Effect | Price | Best use |
|---|---|---|---|
| Basic RGB strip | Single color at a time | $10-25 | Wall wash behind desk |
| Addressable RGBIC | Multiple colors/effects | $25-60 | Dynamic gradients, in-frame |
| RGB light bars/tubes | Directional accent | $40-100 | Corner and edge lighting |
| Smart bulbs (background lamps) | Soft pools of color | $15-40 each | Depth and mood |
RGBIC vs plain RGB
Addressable “RGBIC” strips can show several colors and gradients along one strip, which looks modern and lets you sync effects. Plain RGB is one color at a time and is fine, and cheaper, for a simple wall wash. If you want that flowing multi-color look, pay for addressable.
Placement for depth, not glare
Keep colored light off your face. Its job is the background, while a neutral key light (around 5000 to 5600K) handles you. Mount strips behind your monitor, under a shelf, or along the back wall so the glow bounces off the wall toward the camera. Aim for color on the background and clean white on the subject, that separation is what looks professional.
Color choices that flatter
Cooler blues and teals read as clean and techy; warm oranges and purples feel cozy. Avoid saturating the whole scene one color, which flattens depth. A two-tone scheme (for example, teal on one side, magenta on the other) creates the layered look most viewers associate with a good setup.
Control and consistency
App or Stream Deck control lets you switch scenes and dim on the fly. Set the brightness so the background supports rather than competes with your facecam, usually well below your key light. Lock in a look and keep it consistent so your brand feels stable episode to episode.
FAQ
Why do my LED strips flicker on camera but look fine to my eyes?
Cheap PWM dimming pulses faster than your eyes notice but can beat against the camera’s shutter. Run the strip at full or near-full brightness, or buy a flicker-free strip with a better driver, and match your shutter to avoid banding.
Can RGB strips replace a key light?
No. Colored light on your face looks unnatural and hurts webcam and face-tracking performance. Use RGB for the background and a separate neutral key light for yourself. They are complementary, not interchangeable.
Bottom line
Choose a flicker-free strip with decent LED density, go addressable RGBIC if you want gradients, and place the color on your background while a neutral key light handles your face. Add a two-tone scheme for depth and app or Stream Deck control for convenience, instant studio vibe for the price of a pizza.


