
Thick desks create a very specific microphone-arm problem: the clamp may look strong enough, but it may not open wide enough, sit flat against the underside, or clear a desk apron, cable tray, or beveled edge. Buyers often focus only on arm reach or microphone compatibility, then discover that the clamp’s maximum opening is 2 inches while their desktop is 2.5 inches thick.
Another common mistake is assuming a “metal clamp” is automatically heavy-duty. The important details are the clamp throat depth, screw size, pad design, mounting-plate thickness, and the desk material itself. A 3-inch solid wood top handles concentrated clamping force very differently from a 3-inch hollow-core, particleboard, or glass desktop. The right choice is a clamp and arm system that fits your desk without crushing it, slipping during adjustments, or permanently marking the finish.
As an Amazon Associate we earn from qualifying purchases at no extra cost to you. Product prices and availability are accurate as of the date shown and are subject to change.

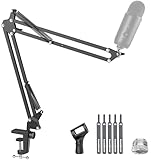


Top 3 picks at a glance
Decide These 3 Things First
- Measure the usable clamping area, not just desktop thickness. Measure the top and bottom of the desk where the clamp will sit. Note the desktop thickness, the distance from the edge to any apron or drawer rail, and whether there is a rounded, beveled, or angled edge.
- Weigh the complete microphone setup. Add the microphone, shock mount, pop filter, cable, and any adapter. A basic USB microphone may weigh 1.5 to 3 pounds assembled; a broadcast-style dynamic microphone with accessories can reach 3 to 5 pounds.
- Choose a mounting style before comparing arms. A standard C-clamp is the easiest option for most desks. A through-desk grommet mount is often more secure for very thick or unusually shaped tops, provided you are willing to drill a hole or use an existing cable grommet.
Size: Match Clamp Capacity to the Actual Desk Edge
Start with the desktop thickness at the exact installation point. Many entry-level microphone-arm clamps open to around 1.8 to 2.1 inches. That works for a typical 0.75- to 1.5-inch desk, but it will not fit many substantial worktops. Thick desks commonly measure 2 inches, 2.25 inches, 2.5 inches, or more once a solid top, desk mat, and edge profile are included.
For a desk measuring 2.5 inches thick, look for a clamp rated for at least 3 inches of opening. Do not buy a clamp with a stated 2.5-inch maximum and expect a comfortable fit: finish thickness, padding, slight manufacturing variation, and an imperfectly square desk edge can consume the last 1/8 inch. A useful rule is to leave at least 0.25 inch of extra clamp capacity.
Also measure the clamp throat depth: the horizontal distance from the desk edge to where the pressure screw contacts the underside. A shallow throat of 1.25 inches may miss a usable flat surface if the desk has a 1.5-inch apron beneath its edge. For desks with aprons, drawers, or structural rails, a throat depth of 2 to 3 inches is much more forgiving.
Check clearance above the desktop as well. Some low-profile arms use a broad mounting base that needs a flat area of roughly 3 by 4 inches. If your desk has a raised lip, monitor shelf, or unusually narrow rear edge, that footprint matters. Before ordering, make a simple cardboard template using the listed clamp dimensions.
Material: Protect the Desk While Supporting the Load
For the clamp body, powder-coated steel, cast aluminum, or a steel-and-aluminum combination is preferable to thin stamped metal or mostly plastic construction. Steel generally offers the most resistance to flex at the clamp, while aluminum can keep a larger low-profile arm lighter and easier to reposition.
The desk material is equally important. Solid wood, plywood, and high-quality laminated tops usually tolerate a microphone clamp well when padded. Particleboard and MDF can work, but avoid overtightening: the underside can dent, crumble, or swell if the finish is damaged. On a hollow-core desk, the clamp may compress the outer skin rather than grip a solid structure. A reinforcement plate is a smart precaution in that situation.
Look for wide, non-marring contact pads made from rubber, silicone, or dense foam. A pad around 1.5 to 2 inches wide spreads force better than a small bare metal foot. If the supplied pad feels thin, add a firm rubber or hardwood protection block, approximately 3 by 3 inches and 1/8 to 1/4 inch thick, between the clamp and desk. Avoid soft felt alone; it can compress and let the arm rotate.
Glass desks deserve extra caution. Even if a manufacturer says its clamp is suitable for glass, use only a setup specifically designed for that purpose, with broad protective pads and a conservative load. Never clamp onto chipped glass, a glass edge, or a surface with unknown support construction.
Construction: Evaluate the Clamp, Base, and Arm as One System
A thick-desk setup needs more than a wide-opening screw. Inspect the full load path: clamp body, vertical socket, arm pivot, extension joints, and microphone thread adapter. The clamp should sit squarely against the top and underside of the desk, with no rocking when tightened.
Choose a clamp with a substantial threaded screw rather than a narrow, lightly built tension knob. A screw diameter around 8 to 10 mm is common on more robust designs. A large hand knob or T-handle gives better control than a small wing nut, especially when reaching under a deep desktop.
For a conventional spring-arm design, check the stated load range rather than only the maximum number. If your complete setup weighs 3 pounds, an arm rated from 2 to 4 pounds is generally a better match than one rated only “up to 5 pounds” with no minimum. An arm set for a much lighter microphone can rise on its own; one overloaded by even a few ounces may sag at the elbow or drift downward.
Low-profile arms place the microphone below the monitor sightline and often use tighter joints rather than exposed springs. They can be excellent for streaming and video calls, but their larger bases and multiple pivots deserve close attention on thick desks. The FIFINE BM88 category of low-profile arm, for example, is the sort of design where clamp dimensions and rear-desk clearance can matter as much as stated microphone capacity.
Verify thread compatibility. Most microphone mounts use a 5/8-inch threaded connection, while many accessories use 3/8-inch threads. A quality arm often includes a 3/8-to-5/8-inch adapter. Make sure the adapter is included if your shock mount needs it.
Comfort and Performance: Plan for Reach, Noise, and Daily Adjustment
The best clamp is not useful if the arm cannot place the microphone comfortably. For seated desk work, most users need a horizontal reach of 25 to 32 inches and a vertical range of roughly 15 to 30 inches. Position the microphone 4 to 8 inches from your mouth for most spoken-word setups, then select an arm that can reach that spot without being stretched to its limit.
Mount the clamp on the side or rear corner that lets the arm fold away when not in use. A rear-mounted arm can preserve desk space, but it needs enough clearance behind the desktop for the arm’s base and cable routing. Side mounting is often easier on desks pushed tight to a wall.
For movement noise, prioritize secure joints, internal or external cable channels, and a clamp that cannot twist. Cable clips are not merely cosmetic: a loose cable can tug on the microphone and transfer bumps into recordings. Leave a gentle 2- to 3-inch service loop near moving joints so the cable does not pull taut when the arm extends.
A heavier arm may be more stable, but it is not always more pleasant to use. For frequent camera-on meetings, choose smooth one-handed adjustment and a low-profile silhouette. For a fixed podcast or voiceover station, prioritize rigidity and a higher weight rating over quick repositioning.
Price Tiers: Spend for Fit and Stability, Not Just Extra Reach
Budget: $9 to $25. Basic replacement clamps and entry-level scissor arms fit this category. The SUNMON-style metal desk clamp at about $8.99 and basic NEEWER-style mounting clamps around $13.99 are examples of the low-cost approach. Expect simpler pads, narrower clamp openings, and less refined adjustment. This tier can work well for a lightweight 1- to 2-pound microphone on a standard desk, but confirm dimensions carefully before buying for a thick top.
Mid-range: $25 to $55. This range includes many usable boom arms, such as InnoGear-style models around $24.99. Expect better springs or pivot tension, more dependable cable management, and broader microphone compatibility. For a 2- to 3-inch desktop, this is often the value sweet spot if the clamp explicitly offers enough opening and has a solid metal base.
Premium: $55 to $150 or more. Premium low-profile and heavy-duty arms offer cleaner movement, stronger joints, higher real-world convenience, and often both clamp and grommet mounting options. At approximately $56.99, the FIFINE BM88 sits near the entry point for this class. Spend here if your microphone package weighs more than 3 pounds, you adjust the arm daily, or the desk is expensive enough that superior pads and mounting hardware are worthwhile.
Warranty: Read the Terms That Matter for a Moving Product
Look for at least a 12-month warranty on the arm and clamp assembly. For a product with springs, hinges, and threaded parts, coverage should address manufacturing defects such as failed tension joints, stripped clamp threads, or a cracked mounting socket. A 24-month warranty is a meaningful advantage when prices are otherwise close.
Read exclusions before assuming desk damage is covered. Most manufacturers will not cover dents, scratches, compressed particleboard, or damage caused by overtightening. Keep the packaging until you confirm the clamp fits. Return policies commonly run 30 days, but a clamp can show fit problems immediately, so test it carefully during the first week.
Delivery and Assembly: Avoid Installation Surprises
Most microphone arms arrive in a box about 16 to 22 inches long and weigh 3 to 8 pounds packaged. Standard delivery is usually straightforward, but inspect the box for bent arm segments or loose hardware before installation. A bent clamp screw or distorted base can create wobble that no amount of tightening will solve.
Assembly should take 10 to 20 minutes. You typically need no tools for a C-clamp setup, though a hex key may be included for pivot adjustments. For a grommet installation, plan on a properly sized hole—often around 0.4 to 0.8 inch, depending on the mount—and verify that the underside remains accessible.
Install with the microphone removed. Tighten the clamp until it is firm and does not rotate under gentle hand pressure; do not crank it down. Then attach the arm, add the microphone, route the cable, and test every position you expect to use. Recheck clamp tension after the first few days, especially on wood or composite tops that may compress slightly.
Spec Checklist
| Spec | Budget | Mid | Premium |
|---|---|---|---|
| Typical price | $9-$25 | $25-$55 | $55-$150+ |
| Recommended clamp opening | Up to 2 inches | 2.5-3 inches | 3 inches or more |
| Clamp throat depth | 1-1.5 inches | 1.5-2.5 inches | 2-3 inches |
| Practical mic setup weight | 1-2 pounds | 2-4 pounds | 3-5 pounds or more |
| Mounting options | Clamp only | Clamp, occasional grommet option | Clamp and grommet hardware |
| Warranty target | 30 days to 1 year | 1 year | 1-2 years |
Red Flags
- No maximum clamp-opening measurement is listed.
- The advertised weight capacity does not specify whether it includes a shock mount or accessories.
- The clamp has bare metal contact points or very thin peel-and-stick pads.
- A 2.5-inch-thick desk is being paired with a clamp rated for exactly 2.5 inches.
- The desk underside has an apron, rail, or cable tray that prevents the pressure pad from sitting flat.
- The arm sags, rises, or rotates at the base after correct adjustment.
- The product description uses “universal” but does not mention 3/8-inch and 5/8-inch thread compatibility.
FAQ
How thick can a desk be for a microphone arm clamp?
It depends on the clamp, not the arm itself. Many standard clamps fit desks up to about 2 inches thick, while heavy-duty models may accommodate 3 inches or more. Choose a clamp with at least 0.25 inch more opening than your measured desktop thickness.
Can I use a microphone arm on a 3-inch-thick desk?
Yes, if the clamp is rated beyond 3 inches and the underside is flat enough for the pressure pad. If an apron blocks the clamp, use a compatible grommet mount or relocate the arm to an unobstructed section of the desk.
Will a microphone clamp damage a wood desk?
It can if overtightened or used without protective pads. Use a clamp with wide rubber pads, tighten only until stable, and consider a 3-by-3-inch protective block on soft wood, veneer, MDF, or particleboard.
Is a grommet mount better than a desk clamp for a thick desk?
A grommet mount is often more secure and avoids relying on clamp opening width, but it requires an existing hole or drilling one. A well-sized, padded C-clamp is simpler and works well when the desk edge is solid, flat, and accessible.


