
A loose microphone boom arm is more than just a minor workspace annoyance. When your boom arm sags, wobbles, or drifts out of place, it directly impacts your audio quality, your productivity, and the safety of your expensive equipment. If you continuously try to force a slipping arm into position, you risk permanently damaging the mounting joint, stripping the tension screws, or cracking your desk.
Forcing a loose clamp onto a thin desk—especially one made of hollow-core particle board or glass—can cause the desk material to fracture under localized pressure. A sudden collapse can drop a $100 to $300 studio microphone directly onto your keyboard, resulting in broken gear and interrupted streams or podcast recordings. Fortunately, fixing a loose microphone boom arm desk mount is a straightforward DIY task that takes less than 20 minutes. Here is how to secure your setup for maximum stability.
As an Amazon Associate we earn from qualifying purchases at no extra cost to you. Product prices and availability are accurate as of the date shown and are subject to change.

What You Need
Before you begin, gather the necessary tools and protective materials. Having these items on hand will prevent you from stripping the hardware or damaging your desk surface during the repair process.
| Item | Why You Need It | Optional? |
|---|---|---|
| Allen Keys (Hex Wrenches) | Used to tighten the internal tension screws and pivot joints on most modern boom arms (typically 3mm to 5mm sizes). | No |
| Screwdriver (Phillips or Flathead) | Required for tightening the base clamp bracket screws and external joint screws. | No |
| Silicone or Rubber Padding | Placed between the metal clamp and the desk to increase grip and protect the wood from indentation. | Yes (Highly Recommended) |
| Desk Reinforcement Plate | Distributes the weight of the clamp over a wider surface area (usually 3 by 4 inches) to protect fragile or thin desk materials. | Yes (Required for glass or MDF desks) |
| Dry Lubricant Spray | Eliminates squeaking in internal springs without attracting dust or causing slipping. | Yes |
Step-by-Step
Follow these steps in order to diagnose, reinforce, and stabilize your loose microphone boom arm without risking damage to your desk or gear.
Step 1: Inspect the Connection Points and Assess the Desk Material
Estimated Time: 3 minutes
Begin by identifying exactly where the looseness is originating. Gently wiggle the boom arm and look closely at three main areas: the desk clamp itself, the insertion point where the arm sits inside the clamp riser, and the individual articulation joints. Take note of your desk material. Solid wood desks can handle direct clamp pressure, but if your desk is made of hollow-core fiberboard (typically 0.5 to 1.5 inches thick) or glass, the loose movement is likely caused by the desk material compressing or slipping under the load.
Step 2: Remove the Gear and Reinforce the Desk Surface
Estimated Time: 7 minutes
Unclip your microphone, shock mount, and cables from the arm to prevent them from falling. Loosen the C-clamp entirely and remove it from the desk. If you notice indentation marks, wood shaving dust, or compression in the desk surface, you need to add reinforcement. Cut a small piece of non-slip rubber padding or a silicone coaster to fit the footprint of the clamp. For MDF, particleboard, or glass desks, place a steel reinforcement plate (typically measuring around 3 by 4 inches) on both the top and bottom surfaces of the desk. This distributes the heavy cantilevered weight of the microphone over a broader area, preventing the clamp from tilting or sinking into the wood.
Step 3: Reinstall and Secure the Base Clamp
Estimated Time: 5 minutes
Position your reinforcement plates and rubber pads, then slide the C-clamp back onto the edge of the desk. Hand-tighten the under-desk screw knob until it is snug. Once hand-tight, turn the knob or lever an additional half-turn to secure it. Do not use pliers or wrenches to force the clamp tighter, as this can strip the threads of the clamping bolt or crack the desk. If your clamp uses a top-down hex bolt instead of an under-desk knob, use the correct size hex key to tighten it firmly until the base cannot be rotated or wobbled by hand.
Step 4: Tighten the Arm Pivot and Rotation Screws
Estimated Time: 5 minutes
Insert the metal peg of the boom arm back into the base clamp socket. If the arm wobbles inside the hole, locate the small thumb screw or hex screw on the side of the clamp collar. Tighten this screw until it gently grips the peg. It should be tight enough to prevent the arm from leaning or shaking, but loose enough to allow you to rotate the arm horizontally without unscrewing the base. If your boom arm model features a plastic sleeve insert inside the socket, check to ensure it hasn’t cracked or worn down; replace it if necessary.
Step 5: Adjust Tension Springs and Elbow Joints
Estimated Time: 5 minutes
Reattach your microphone and shock mount so the arm is under its natural working load. If the arm still sags or drifts upward, you must adjust the spring tension. For external spring designs, locate the thumbscrews at the elbow and wrist joints and tighten them clockwise. For internal spring designs, use an Allen wrench to turn the tension adjustment screws located at the base of the arm and at the middle joint. Turn the screws clockwise in small quarter-turn increments until the arm holds its position perfectly at any angle without drifting up or down.
Mistakes to Avoid
- Overtightening the C-Clamp: Applying excessive force to the clamping mechanism can easily warp metal brackets, strip the threads of the clamping bolt, or crush hollow-core desks, creating a permanent dip in your workspace.
- Neglecting the Weight Limits: Most budget boom arms are rated for loads between 1.5 lbs and 3.3 lbs. Exceeding this weight limit with heavy microphones, metal shock mounts, and heavy-duty pop filters will cause the internal springs to stretch and sag permanently.
- Using the Wrong Size Tools: Using a metric hex key on an imperial bolt (or vice versa) will strip the screw heads, making future tension adjustments impossible without drilling out the hardware.
- Tightening Joints While Adjusting the Arm: Always loosen the joint knobs slightly before changing the angle or height of your microphone. Forcing the arm into a new position while the joints are locked tight will wear out the internal friction pads and lead to premature looseness.
How Often to Maintain Your Setup
As we head into 2026, desktop setups continue to evolve toward minimalist, high-efficiency designs, making a sagging microphone arm look particularly outdated and messy. To keep your workstation looking sharp and functioning properly, perform a quick maintenance check every two to three months.
Over time, the natural micro-vibrations from typing, bumping the desk, and daily adjustments will gradually back out the screws and loosen the base clamp. Take two minutes every quarter to check the tightness of the under-desk clamp knob and give the joint screws a quick quarter-turn if you notice any play. If you move your arm frequently throughout the day, check the joints monthly.
When to Call a Pro or Replace
While most loose boom arms can be fixed with a simple tightening routine, there are times when the hardware is simply too worn out to save. If the metal threads on your desk clamp are stripped, or if the main casting of the joint has cracked under pressure, the arm is no longer safe to use. Similarly, if the internal tension springs have stretched out completely from years of carrying a heavy microphone, no amount of screw tightening will restore its holding power.
Because boom arms are highly specialized and under continuous mechanical tension, attempting to repair broken internal springs yourself can be dangerous. Instead, it is highly recommended to replace the unit.
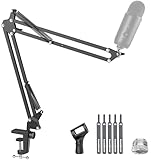
If you need a reliable, budget-friendly replacement that offers robust stability, consider the InnoGear Boom Arm Microphone Mic Stand (priced around $24.99), which is excellent for standard setups utilizing Blue Yeti or Fifine microphones. For those seeking a modern, low-profile aesthetic that sits beneath your monitors and keeps your sightlines clear, the FIFINE BM88 Low Profile Microphone Boom Arm Stand (priced around $56.99) provides a heavy-duty, clean, and incredibly stable alternative that mounts securely to any desk edge.
FAQ
Why does my microphone boom arm keep sliding out of its desk clamp?
This usually occurs because the plastic sleeve inside the metal clamp socket has worn down, cracked, or fallen out. Without this protective sleeve, the metal peg of the arm cannot seat securely against the metal clamp housing, leading to a loose, wobbly fit. Additionally, check if the set screw on the side of the clamp needs to be tightened against the peg.
How do I stop my boom arm from sliding on a slippery metal or glass desk?
Metal and glass surfaces lack the natural friction of wood, allowing clamps to slide easily. To resolve this, place a thin sheet of textured rubber, a silicone grip pad, or a piece of neoprene drawer liner between the clamp and the desk surfaces. This increases grip, prevents sliding, and cushions the glass from high-pressure points.
Are internal spring boom arms better than external spring models?
Internal spring boom arms generally offer a cleaner look, quieter operation, and better long-term tension consistency because the springs are protected from dust and physical damage. External spring models are easier to adjust manually and are often more budget-friendly, but they are more prone to squeaking and catching on cables over time.
Can I fix a stripped thread on my boom arm desk clamp?
If the threads on the clamp’s tightening bolt or the clamp body itself are stripped, the safest solution is to replace the clamp assembly. While you can technically use a tap-and-die set to cut larger threads and install a larger bolt, purchasing a universal replacement desk clamp is highly affordable, safer, and saves significant time.


