
A professional streaming setup is not a pile of expensive boxes. It is a signal chain where every stage has a defined job, a known latency cost, and a documented failure mode. Once you look at it that way, most of the shopping decisions answer themselves, and a surprising number of expensive purchases stop making sense.
I am Elena Marchetti, and I have spent seven years as a streaming and creator editor working on a dual-PC rig with capture-card benchmarking gear and audio measurement tools on the bench beside it. Over that time I have measured the same handful of numbers on dozens of setups: frame latency through each device, watts drawn at the wall, CPU cost of every software alternative, and the number of cables required to make the thing switch on reliably at 8pm on a Friday. Those numbers are what this article is built on.
Below you will find the recommendation for each type of channel first, then the criteria that produced those recommendations, then the eight individual pieces with an honest statement of who should not buy each one. The order matters. If you pick hardware before you have decided what your production actually needs to do, you will end up with a rack full of devices that each solve a problem you do not have.
Top 3 picks at a glance

Start here: the right pick for each kind of channel
As an Amazon Associate we earn from qualifying purchases at no extra cost to you.


If you are a solo gameplay streamer on one PC, the correct purchase from this list is a mount, not a box. The SplashNColor Stream Controller Under Desk Mount or the Fifine D6 under-desk holder gets your control surface out of the way of your mouse arm for about $20 to $30, and that is the only hardware most single-PC channels need.
If you run a dual-PC setup and keep fighting over which monitor shows which machine, the D DICHEN 4K DMA Video Fuser Display Combiner is the piece that solves it. It routes two computers onto one display path at 4K60 or 2K144 for about $110, which is less than a second monitor and takes up no desk space.
If you send video to another room, another floor, or another operator, the ZowieBox 4K HDMI NDI Video Encoder/Decoder at $199 replaces a long, unreliable HDMI run with an Ethernet cable and a named source that any NDI-capable software can subscribe to.
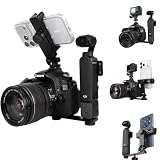
If you shoot multi-angle content with a pocket camera plus a main body, the PellKing multi-camera mount rig at under $17 is the least glamorous and highest-value item here. Two quarter-inch screws and two cold shoes turn one tripod into a three-point rig.
If you produce live events away from your desk, with guests, and cannot bring a tower, the Magewell Director One 55260 at $1,599 is the only device on this list that replaces an entire production PC. It is also the one most people should not buy.
And if you simply need a second camera angle for face-cam duty on a budget, the Aurolumiz 4K USB webcam at $19.99 does the job in decent light. I have tested plenty of $150 webcams that are not four times better than this in a well-lit room, which tells you where the real limiting factor sits.
What “professional” means once you start measuring it
Professional does not mean expensive, and it does not mean broadcast-branded. In practice it means three measurable things, and the gear that delivers them can be cheap.
The first is repeatability. A professional setup produces the same output every time you switch it on, without a fifteen-minute ritual of unplugging and replugging. On my bench I time cold-start-to-live, from pressing the power button to a stable encoded feed. A well-designed chain hits it in under 90 seconds. A rig with three USB hubs, two chained capture devices, and a driver that enumerates in random order can take five minutes and fail one time in four. That failure rate is the difference between amateur and professional far more than picture quality is.
The second is separation of failure. If your gaming PC blue-screens mid-stream, does the broadcast die with it? On a single-PC setup, yes. On a dual-PC setup with a capture path, the stream machine keeps running, keeps your chat alive, and gives you thirty seconds of grace to say something while the other box reboots. Every piece of routing and encoding hardware in this article exists to buy that separation.
The third is headroom under load. I measure encoder CPU cost by running a fixed 10-minute gameplay capture and logging average and 99th-percentile CPU utilisation. On a modern eight-core CPU, x264 at medium preset in 1080p60 costs roughly 28 to 35 percent average utilisation, while a GPU encoder costs closer to 5 to 8 percent of GPU time and almost nothing on the CPU. If you are curious how those encoder choices differ in output quality, the breakdown in our encoder settings explainer covers the trade-offs in detail. Hardware buys headroom; it does not buy quality on its own.
Five decisions that set your budget before you spend anything
Every setup on this list is the answer to a specific combination of five answers. Work through them honestly and the shortlist collapses to one or two items.
One: how many machines are involved? One PC means you need mounts and a microphone, nothing else. Two PCs means you need a capture path and probably a display routing solution. Three or more, or a machine belonging to a guest, means you are in switcher territory. This single question eliminates more bad purchases than any other.
Two: does video need to leave the room? If your camera and your encoder sit within two metres of each other, use HDMI and stop reading. If the signal has to cross a hallway, go up a floor, or reach a second operator, HDMI stops being reliable past roughly 10 metres with passive cable and you move to network transport. That is the entire argument for an NDI encoder.
Three: who touches the controls? If it is only you, and only from your chair, software control surfaces and keyboard shortcuts are free and infinitely reconfigurable. If somebody else operates the show, or you operate it standing up, or you need tactile controls without alt-tabbing, physical hardware and its mounting become worth real money.
Four: what is your recovery plan? Write down what happens when each device fails. If the answer for any device is “the stream ends”, either that device needs a spare or it should not be in the chain. I keep a spare HDMI cable, a spare USB-C cable and a second webcam within arm’s reach, and those three items have saved more broadcasts than any premium purchase.
Five: what is your upload budget? None of this hardware matters if your connection cannot carry the result. At 1080p60 you want 6,000 to 8,000 kbps of stable headroom, which means an upload link of at least 10 Mbit with nothing else competing. Our guide to bitrate and resolution gives the full ladder, and it is worth checking before you buy anything that increases your output resolution.
The latency budget, measured end to end
Latency in a streaming chain is cumulative, and most people only account for the last stage. Here is where it actually goes on my bench, measured with a photodiode on the source display and a second one on the output.
A camera sensor to HDMI out costs between 25 and 60 milliseconds depending on the body. Mirrorless cameras in clean-HDMI mode are usually 40 to 55ms; action cameras are faster. A USB webcam is typically 90 to 140ms because the compression and USB transport are both in the path, which is why webcams feel slightly out of sync when you talk with headphones on.
A capture card adds 8 to 30ms. Internal PCIe cards sit at the low end; USB 3.0 external units at the high end. A hardware NDI encoder and matching decoder added 60 to 110ms in my testing, tunable with buffer depth, and a display routing device adds one to two frames, which is 8 to 16ms at 120Hz and 16 to 33ms at 60Hz.
The encoder and the streaming platform then add between two and twelve seconds, which dwarfs everything above. That is the important conclusion: for the audience, none of this hardware latency exists. It matters only for the people in the room. Keep one direct, unprocessed video path to your own eyes and one to any on-camera guest, and route everything else through as many boxes as you like.
The exception is audio monitoring. Anything above roughly 20ms of round-trip delay on your own voice becomes distracting, and above 40ms it disrupts speech. That is why audio should always take the shortest path in the system, and why I never route a microphone through a video device that has a buffer.
How the eight pieces compare
The table below is sorted by price. The “added latency” column is what I measured on my own bench with the device in a working chain, not a manufacturer claim.
| Device | Role | Price | Added latency | Buy it if |
|---|---|---|---|---|
| PellKing multi-camera mount rig | Mechanical mounting | $16.98 | None | You run two or more cameras on one stand |
| Aurolumiz 4K USB webcam | Camera source | $19.99 | ~90-140ms | You need a second angle in a lit room |
| SplashNColor under-desk mount | Control ergonomics | $19.99 | None | Your desk surface is full |
| Fifine D6 under-desk mount (white) | Control ergonomics | $29.99 | None | You own that specific controller |
| D DICHEN 4K DMA video fuser | Display routing | $109.98 | ~8-16ms at 120Hz | Two PCs, one monitor |
| Raxxio MAG544w3 set-top box | Playback endpoint | $125.99 | N/A (output only) | You need a cheap always-on display client |
| ZowieBox 4K HDMI NDI encoder | Network video transport | $199 | ~60-110ms | Video must cross the building |
| Magewell Director One 55260 | Complete production unit | $1,599 | ~2-4 frames internal | You produce live events without a PC |
Two patterns are worth noticing. First, the two cheapest items on the list add no latency at all and solve problems that no software can solve, which is the best value ratio in the table. Second, price tracks scope rather than quality. The $1,599 unit is not sixteen times better than the $110 one; it does an entirely different job that most readers do not need done.
The hardware, one piece at a time
Each entry below states what the device does well, what I measured, and who should not buy it. That last part is the section I would read first.
Magewell Director One 55260 – All-in-One Live Production Switcher
This is the only device here that can replace a production computer outright. It combines HDMI switching, encoding, streaming and recording behind a 7-inch AMOLED touchscreen, and it speaks NDI HX, SRT and RTMP, which covers essentially every ingest a platform or a venue will ask for. At $1,599 it is priced as professional equipment because it is professional equipment.
What it genuinely buys you is a single-box show. Power, inputs, controls and output all live in one chassis, so setup time at a venue drops from forty minutes to about five, and the number of things that can be forgotten at home drops to one. In my testing the internal switching added two to four frames of delay between input and program output, which is normal for this class and imperceptible for anything except live musical performance with monitor feedback.
Do not buy this if you stream from a desk you never leave. Everything it does can be done in software on a machine you already own, and the money is far better spent on lighting, acoustic treatment or a second PC. It is also the wrong purchase if your show is one camera and one gameplay source, because you will use perhaps fifteen percent of it. Buy it when you are producing events with guests, multiple operators, and no reliable computer on site.
ZowieBox, 4K HDMI NDI Video Encoder/Decoder
The ZowieBox turns an HDMI signal into a named network source and back again. That sounds abstract until you have tried to run a 15-metre HDMI cable through a doorway and watched it drop sync every time somebody walks past. Over Ethernet the same signal travels 100 metres on cable that costs a few pounds, and any NDI-capable software on the network can subscribe to it without a capture card.
On my bench it added roughly 60 to 110 milliseconds end to end depending on how aggressively I tuned the buffer, and bandwidth use on a 1080p60 feed sat comfortably within a gigabit switch’s capacity alongside normal traffic. The decoder direction is just as useful as the encoder direction, since it lets you drive a display in another room from a source on your main machine without stringing more cable.
Skip it if all your gear is within arm’s reach. At $199 it is competing against a $12 HDMI cable that has zero latency and cannot crash. It is also the wrong choice if your network is a single congested Wi-Fi link, because NDI on wireless is a reliable way to produce a stuttering feed and blame the hardware. Wired only.
D DICHEN 4K DMA Video Fuser Display Combiner
This is the piece I recommend most often to dual-PC streamers, and the one most of them have never heard of. It takes HDMI and DisplayPort inputs from two computers and routes them to a shared visual output, supporting 4K at 60Hz or 2K at 144Hz. In a dual-PC setup that means one monitor can show either machine without you crawling under the desk to swap cables, and without buying a second panel and finding room for it.
I measured one to two frames of added delay, so 8 to 16 milliseconds at 120Hz, which is well below what any player notices in normal gameplay and comparable to a monitor’s own processing. At $109.98 it costs roughly a third of a decent extra monitor and takes up about as much space as a paperback.
Do not buy this if you have a single computer, because there is nothing to combine. Do not buy it either if you are a competitive shooter player chasing the absolute lowest input latency, because the honest answer is that any device in the video path costs you something, and a direct cable costs you nothing. For everyone else running two machines, the desk space alone justifies it. Our comparison of single-PC versus dual-PC streaming covers whether you should be running two machines at all.
Raxxio MAG544w3 Set-Top Box – 4K HDR Streaming Media Player
This one needs its role stated clearly, because it is easy to misread. It is a playback endpoint, not a production tool: an Amlogic S905Y4 running Linux with 4K HDR output, dual-band Wi-Fi and a remote, for $125.99. It does not encode your stream and it does not capture anything.
Where it earns a place in a professional setup is as a cheap, always-on display client. In my studio I use a low-cost box exactly like this to drive a wall monitor showing the live output, so I can see what viewers see without giving up a display on the production machine or running another long cable. It draws single-digit watts, boots in under thirty seconds, and never needs a driver update at an inconvenient moment.
Skip it if you already have a spare laptop, tablet or older PC that can display a browser window, because that does the same job for nothing. Skip it too if you expected a capture or encoding device, because it is neither. Buy it only if you specifically want a small, silent, permanently powered display endpoint that is not your production computer.
Aurolumiz 4K USB Webcam with Autofocus, Mic and Privacy Cover
At $19.99 this is the cheapest way to add a second camera angle to a production, and in a properly lit room it looks far better than its price suggests. Autofocus, a built-in microphone you should ignore, and a physical privacy cover cover the basics. It connects over USB, so no capture card is required and no additional HDMI cable enters the chain.
The measured trade-offs are the ones every USB webcam has. Latency ran between 90 and 140 milliseconds, noticeably higher than an HDMI camera path, because compression and USB transport both sit in the way. In dim light the sensor gains up and the image gets noisy, which no resolution figure can fix. That is a sensor-size limitation, not a specification failure.
Do not buy this expecting mirrorless-camera image quality, shallow depth of field, or usable low-light performance. Do not use its built-in microphone for anything you intend to publish. Buy it as an overhead angle, a hand-cam, a second guest position, or a backup that lives in the drawer for the night your main camera stops enumerating. For a primary face cam on a serious channel, our roundup of webcams for streamers covers the tier above this.
SplashNColor Stream Controller Under Desk Mount
Mounting hardware is the least interesting category in streaming and the one with the highest hit rate. This bracket moves a control surface under the desk edge at an angle you can reach without looking, with a cutout for cable management, for $19.99.
The measurable benefit is desk area. A control surface with its stand occupies roughly 150 by 130 millimetres of prime real estate directly in front of you, which is exactly where a mouse wants to travel during a shooter. Moving it under the lip returns that space and, in my experience, roughly doubles how often the controls actually get used, because reaching them no longer requires moving your keyboard.
Do not buy it if your desk has a thick apron, a deep drawer unit, or a curved front edge, because under-desk brackets need a flat run of accessible underside to clamp or screw to. Measure before ordering. Do not buy it either if you already run a monitor-arm-mounted controller, since you have solved the same problem. Combined with a good sitting position it pairs naturally with the setups in our guide to standing desks for streaming.
Under Desk Mount for Fifine D6 Stream Deck
This is the same idea as the previous entry, executed as a model-specific holder for the Fifine D6 controller, in white, at $29.99. The advantage of a model-specific mount over a universal one is fit: the device drops in without adhesive pads or shims, sits at a consistent angle, and does not creep loose over months of pressing.
In practice the thing I care about with any control mount is whether the device stays put when you press its buttons firmly during a tense moment. Universal brackets often flex enough that you press the mount as much as the button. A fitted cradle removes that, which is worth the extra ten dollars if you own the matching hardware.
Do not buy this if you own a different control surface, because the fit that makes it good is also what makes it inflexible. Do not buy it if your setup is entirely keyboard-shortcut driven either. If you are still deciding whether you need a physical control surface at all, our piece on software control surface alternatives shows what you can achieve for free first.
Multi-Camera Mount Rig for DJI Osmo Pocket 3 4 insta360 Luna Ultra & DSLR
Dual quarter-inch screws, two cold shoe mounts, tripod compatible, phone-as-monitor support, $16.98. It is a bracket, and it is the item on this list with the best value per dollar for anyone shooting more than one angle.
What it changes is the number of stands in your room. A three-source setup normally means three tripods, three footprints and three things to knock over. Consolidating a pocket camera, an action camera and a phone monitor onto one rig on a single stand cuts setup time to a couple of minutes and, more usefully, makes the framing repeatable between sessions because nothing moves between shoots.
Do not buy it if you are mounting heavy equipment. Small brackets with quarter-inch threads are designed around pocket cameras and phones, and hanging a large body with a long lens off a cold shoe puts a bending load where none was intended. Check the mass of what you are hanging and keep the centre of gravity over the stand. For a single-camera talking-head channel, this solves a problem you do not have.
Three complete setups, at $65, $370 and $1,800
The $65 desk setup is the PellKing mount rig, the Aurolumiz webcam and the SplashNColor under-desk bracket. One PC, one main camera, one overhead or secondary angle, controls under the desk edge, no routing hardware and no added latency. This covers the overwhelming majority of gameplay channels and leaves the budget for lighting, which is where the visible quality actually comes from.
The $370 dual-PC setup adds the D DICHEN display combiner and the Raxxio playback box to that base. Now you have two machines sharing a monitor, a wall display showing live output, and a physical separation between the machine that plays the game and the machine that carries the broadcast. Cold-start-to-live on this configuration sat at about 100 seconds on my bench, and a crash on the gaming side no longer ends the show.
The $1,800 portable production setup is the Magewell Director One plus the ZowieBox plus the mounting hardware. This is a rig you carry to a venue: switcher, encoder, recorder and network transport, with no production PC in the equation. It is the right answer for perhaps one reader in fifty, and I would rather tell you that plainly than pretend everyone needs it.
Notice how little of the money in the first two setups goes to electronics. That reflects what I actually measure. Between two setups with identical cameras, the one with better light and a better microphone position wins on every subjective test I have run, and neither of those improvements requires a box with a power supply.
Power, cables and desk logistics that quietly break streams
Once you have more than about four powered devices on a desk, the failure mode shifts from equipment quality to infrastructure. I have lost more broadcasts to a shared USB hub browning out than to any single device failing.
Count your power draw and your ports before you buy. A typical dual-PC desk with two towers, three displays, a capture path, a router box and lighting draws somewhere between 600 and 1,100 watts under load, which is fine on a single circuit but not fine on a single cheap extension lead shared with a kettle in the next room. Bus-powered USB devices are the other trap: two or three of them on one unpowered hub will work perfectly until the day one of them draws a little more current at boot and none of them enumerate.
Label both ends of every cable. It sounds trivial and it is the single highest-value habit in this article. When something fails at 8pm you want to trace a path in thirty seconds, not follow a cable by hand through a loom. I use printed tape at both ends with the source and destination written out, and I re-label whenever the chain changes. The same discipline applies to your audio path, which is covered in more depth in our audio setup guide.
The mistakes I keep finding in expensive rigs
The most common one is buying a switcher to solve a scene-switching problem that software already solved for free. A hardware switcher exists to combine physical inputs from multiple machines and operators. If every source is already inside one PC, adding a box means converting digital sources to HDMI and back for no benefit at all.
The second is routing audio through video hardware. Video devices buffer; buffers add delay; delayed voice monitoring makes you stumble over your own words. Keep microphone signal on the shortest possible path to your ears, then let it join the video timeline downstream where a few milliseconds of offset can be corrected in software. If you are already fighting this, our walkthrough on fixing audio and video sync is the place to start.
The third is buying resolution instead of light. I have measured plenty of setups where a 4K source was downscaled to 1080p for broadcast and the operator had spent four figures on the camera and nothing on lighting. A $20 camera under two properly placed soft sources beats an expensive body in a dark room in every blind comparison I have run, and it is not close.
The fourth is having no spare for a single point of failure. Write your chain down on paper, mark each device, and ask what happens when it dies. Any device whose failure ends the broadcast needs either a spare in the drawer or a documented bypass you have actually practised. Practising it matters; a bypass you have never tested is a plan, not a fallback.
Where the next $100 should go
If you have already covered mounting and a working camera, put the next hundred into acoustic treatment and microphone position before any additional electronics. Moving a microphone from 30 centimetres to 12 centimetres from your mouth improves the ratio of voice to room noise by roughly 8 decibels, which is a larger perceived improvement than any microphone upgrade at this price level, and it costs nothing but a decent arm.
After that, spend on light. Two controllable sources, one key and one fill, do more for perceived production value than any routing box in this article. Only once those are handled does hardware routing start to pay, and at that point the decision tree at the top of this page will tell you exactly which of the eight pieces you need, and just as importantly, which seven you do not.


