
Setting up a home recording studio or a high-end home office desk is an exercise in acoustics and ergonomics. You have selected the perfect condenser microphone, clamped a heavy-duty boom arm to your solid oak desk, and treated your walls with acoustic panels. Yet, the moment you start recording a podcast or jumping into a video call, your listeners complain about a low-frequency rumble every time you type, shift in your chair, or bump your desk.
This low-frequency rumble—usually hovering between 20 Hz and 120 Hz—is structural noise traveling directly up your desk, through your mic stand, and straight into your microphone’s highly sensitive capsule. The solution is a suspension shock mount, which decouples the microphone from physical vibrations using a system of elastic bands.
However, many home studio enthusiasts make a critical mistake: they buy a shock mount based solely on aesthetics or price, only to find that their microphone slips right through the collar, won’t fit inside the frame, or causes the suspension bands to sag to their absolute limit. Choosing the correct size is not just a matter of convenience; it is the difference between a secure, crystal-clear recording setup and a damaged, $300 microphone crashing onto your floorboards.
Top 3 picks at a glance
Decide These 3 Things First
Before looking at specific sizes or materials, you must answer three fundamental questions about your recording environment and hardware.
- Is your microphone body straight or tapered? Standard condenser microphones (like the Audio-Technica AT2020 or MXL 990) have straight, cylindrical bodies that require a friction-fit or screw-in collar. Handheld vocal microphones (like the Shure SM58) have tapered bodies that require specialized, clip-in shock mounts. Measuring a tapered microphone requires checking the diameter at the exact point where the clamp will sit.
- What is the thread size of your boom arm? Most microphone stands and boom arms use either a 5/8″-27 standard thread (common in the US) or a 3/8″-16 thread (common in Europe). Ensure your chosen shock mount comes with a high-quality brass or copper adapter so you do not strip the threads during installation.
- How much clearance do you have behind your microphone? If you use an integrated pop filter or a bulky reflection shield behind your microphone, a massive “spider” style shock mount (which can exceed 6 inches in total diameter) might crowd your workspace or block your line of sight to your monitors.
1. Microphone Diameter (The Sizing Ranges)
The most critical specification you will encounter is the compatible diameter range of the shock mount clamp. This is typically measured in millimeters. There is no single “universal” size, but rather three distinct sizing brackets that cover 95% of the microphones on the market.
- Small-Diameter Mounts (20mm to 40mm): These are designed primarily for pencil condenser microphones, shotgun mics, and slim handheld dynamic microphones. If you attempt to force a standard studio condenser into one of these, you will snap the plastic frame or permanently stretch the metal clips.
- Standard-Diameter Mounts (45mm to 50mm): This is the sweet spot for the vast majority of project studio condenser mics. Microphones like the AT2020 (47mm diameter) and the Rode NT1-A (50mm diameter) fit perfectly into this bracket. A shock mount designed for 46mm-51mm offers a secure, padded clamp that holds the microphone body tight without scratching the finish.
- Large-Diameter Mounts (51mm to 60mm+): Heavy-duty broadcast microphones and large-diaphragm tube condensers (such as the Neumann U87 or Samson G-Track Pro) require these wider mounts. These shock mounts often feature heavy-duty screw-tightening collars rather than pinch-to-open clips to handle the extra circumference.
When choosing, always measure your microphone’s diameter with a pair of calipers if the manufacturer’s spec sheet is unavailable. A mismatch of just 2mm can result in a microphone that slowly slides out of the mount during a long recording session.
2. Material Composition and Weight
A shock mount must be strong enough to support your microphone, but light enough that it does not cause your boom arm to sag. Material choice directly dictates this balance.
Budget shock mounts (typically priced under $15) are almost exclusively made of Acrylonitrile Butadiene Styrene (ABS) plastic. While incredibly lightweight (often weighing less than 3 ounces), ABS plastic is prone to hairline fractures around the mounting threads if over-tightened.
Mid-range and premium shock mounts (ranging from $15 to $80+) utilize aluminum alloys, zinc, or solid steel frames. An aluminum spider mount typically weighs between 6 and 10 ounces. This added weight provides excellent structural rigidity and helps dampen high-frequency resonances. However, if you are using a budget, spring-tensioned boom arm, adding a 10-ounce metal shock mount plus a 20-ounce microphone can exceed the arm’s weight capacity, causing the arm to slowly sink.
3. Suspension Band Elasticity and Durability
The magic of a shock mount lies entirely in its suspension bands. These bands act as a low-pass mechanical filter, absorbing kinetic energy before it reaches the microphone capsule.
Look for bands made of high-density elastic cords or silicone polymers. Budget mounts often use thin, polyester-wrapped rubber bands (around 1.5mm to 2mm in thickness). These bands tend to dry out, lose their elasticity, and sag within 6 to 12 months of daily use, especially in dry or warm home studio environments.
Premium mounts employ multi-strand latex or silicone bands that are 3mm to 4mm thick. Silicone is particularly desirable because it does not degrade over time when exposed to UV light or ozone. Furthermore, look for shock mounts that feature at least 4 to 8 distinct suspension points. More suspension points distribute the weight of the microphone more evenly, preventing the inner cage from sagging and making contact with the outer metal frame—an issue known as “bottoming out,” which renders the shock mount completely useless.
4. Weight Capacity and Sag Prevention
Every shock mount has a maximum weight capacity, yet this spec is frequently omitted on budget listings. A standard condenser microphone weighs anywhere from 12 ounces (340g) to 25 ounces (700g). Heavy-duty USB microphones, which contain internal preamps and analog-to-digital converters, can weigh upwards of 32 ounces (900g).
If you pair a heavy microphone with a shock mount that has weak adjustment joints, the microphone will slowly droop. The critical point of failure is the locking tilt joint. Look for joints that feature a rosetted or textured locking surface rather than two smooth plastic faces pressed together. A rosetted joint physically locks the teeth together when tightened, ensuring your microphone remains at your preferred 45-degree or 90-degree angle throughout the day.
5. Price Tiers: What Do You Actually Get?
Understanding what you get at different price points will prevent you from overspending or buying a frustratingly cheap product.
- The Budget Tier ($8 to $15): These are usually plastic-framed mounts with thin elastic bands. They are highly functional for lightweight microphones (under 12 ounces) and occasional use. They often feature pinch-to-open clips and fit standard 47mm-53mm sizes. They are perfect for beginners or secondary setups.
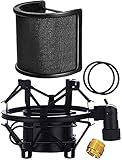
- The Mid-Range Tier ($15 to $30): Here, you transition to aluminum alloy frames, thicker 3mm elastic bands, and better joint hardware. These mounts frequently include integrated metal pop filters that attach directly to the shock mount frame, saving space on your boom arm. They offer a great balance of durability and weight for the average home studio.
- The Premium Tier ($30 to $100+): At this level, you are buying brand-specific, custom-engineered mounts or professional studio-grade universal mounts (like those from Rycote or Rode). These often replace traditional elastic bands with thermoplastic Lyre suspensions, which virtually never degrade, sag, or require replacement. They offer the absolute highest level of vibration isolation.
6. Box Contents and Setup
When your shock mount arrives, the unboxing and setup process should be straightforward. However, a lack of preparation can stall your studio workflow.
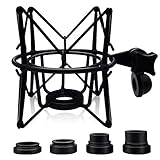
As we look ahead to home studio trends in 2026, manufacturers are increasingly shipping shock mounts as complete kits to reduce packaging waste and shipping footprints. A well-rounded package should include the shock mount itself, a 5/8″ to 3/8″ metal thread adapter, and at least one set of replacement elastic bands.
Because elastics are wear-and-tear items, having a backup pair in the box saves you from having to hunt down proprietary band sizes later. If the mount includes an integrated pop filter, check that it uses a dual-layer steel mesh rather than single-layer nylon, as steel mesh is significantly easier to clean and sanitize without degrading the material.
Spec Checklist
To help you quickly identify which tier matches your current microphone setup, consult the comparative spec checklist below.
| Specification | Budget ($8 – $15) | Mid-Range ($15 – $30) | Premium ($30 – $100+) |
|---|---|---|---|
| Frame Material | ABS Plastic | Aluminum Alloy / Zinc | Steel Alloys / Thermoplastics |
| Compatible Diameters | Fixed (e.g., 47mm-53mm) | Adjustable (46mm-51mm) | Highly adjustable or custom-fit |
| Suspension Element | Thin Rubber Bands (1.5mm-2mm) | Multi-strand Elastic Cords (3mm) | Silicone Bands or Lyre Suspensions |
| Weight Capacity | Up to 14 oz (400g) | Up to 24 oz (680g) | Up to 35+ oz (1000g+) |
| Thread Adapter | Often plastic (easily stripped) | Brass or Copper | Stainless Steel / Integrated |
Red Flags to Avoid
When shopping online, look out for these design flaws that indicate a low-quality product:
- Unpadded Clamps: The inner metal or plastic ring that clamps onto your microphone must be lined with high-density EVA foam or thick felt. If it is bare metal or hard plastic, it will permanently scratch, scuff, or dent your microphone body.
- Plastic Threaded Inserts: Avoid shock mounts where the female threads that screw onto your boom arm are made of plastic. Metal-on-plastic cross-threading happens easily, rendering the mount useless. Look for solid brass or steel threaded inserts.
- Smooth, Toothless Tilt Joints: If the tilt joint relies entirely on friction between two smooth plastic washers, it will eventually wear down. Once worn, the weight of the microphone will cause it to droop forward, no matter how hard you tighten the wingnut.
- Non-replaceable Suspension Bands: If the elastic bands are glued or molded directly into the frame without any hooks or loops, you cannot replace them when they eventually dry out or snap. This turns a simple, cheap maintenance task into a forced replacement of the entire unit.
Frequently Asked Questions
How do I measure my microphone’s diameter without calipers?
If you do not have digital calipers, you can easily find the diameter using a piece of string and a standard ruler. Wrap the string snugly around the widest part of your microphone’s cylindrical body and mark the overlap point. Lay the string flat against a ruler to find the circumference in millimeters. Divide that number by 3.14 (Pi) to calculate the exact diameter. For example, a circumference of 150mm divided by 3.14 gives you a diameter of approximately 47.7mm, meaning you should look for a 46mm-51mm shock mount.
Can a shock mount be too big for my microphone?
Yes. If a shock mount’s minimum compatible diameter is larger than your microphone’s actual diameter (for example, putting a 45mm microphone into a mount designed for 53mm-60mm), the clamp will not be able to apply enough tension. The microphone will slide straight through the bottom of the mount. Never assume “one size fits all.” Always check that your microphone’s diameter falls comfortably within the mount’s specified range.
As an Amazon Associate we earn from qualifying purchases at no extra cost to you. Product prices and availability are accurate as of the date shown and are subject to change.


Do universal shock mounts work with USB microphones like the Blue Yeti?
USB microphones like the Blue Yeti or Razer Seiren often present sizing challenges because they are significantly wider and heavier than standard studio XLR microphones. A standard 47mm-53mm spider shock mount will not fit a Blue Yeti, which has a diameter of roughly 68mm. For these oversized USB microphones, you must purchase a shock mount specifically designed and sized for that exact model, or search for an “oversized” universal mount that explicitly supports diameters up to 70mm.
How often do I need to replace the elastic bands on a shock mount?
For budget and mid-range shock mounts that use standard fabric-covered rubber bands, you should expect to replace them every 12 to 18 months under normal studio conditions. You will know it is time to replace them when you notice the inner microphone cage hanging lower than usual, or if you see tiny rubber threads fraying through the fabric cover. Premium silicone or thermoplastic mounts do not suffer from this degradation and can easily last for years without needing tension adjustments.


