
A clean, organized desk is the holy grail of any modern streaming setup, editing bay, or production studio. Elevating your Elgato Stream Deck off your desktop and onto your monitor arm keeps your physical workspace clear while placing your essential macros directly in your line of sight. However, attempting this modification without a clear plan can quickly lead to a frustrating workspace disaster.
If you fail to execute this setup properly, several things can go wrong. A poorly balanced monitor arm can sag or tilt under uneven weight distribution. Flimsy DIY rigs or weak adhesive tape can fail, sending a $150 to $250 piece of hardware crashing onto your desk. Furthermore, if you do not account for cable strain, moving your monitor arm can snap the Stream Deck’s USB-C port or yank your computer’s motherboard connections. Learning how to mount stream deck to desk monitor arm safely requires the right hardware, precise balance calibration, and careful cable management.
As an Amazon Associate we earn from qualifying purchases at no extra cost to you. Product prices and availability are accurate as of the date shown and are subject to change.
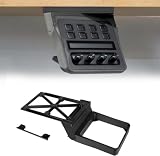
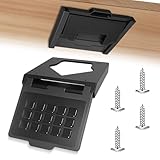
What You Need
To ensure a secure, vibration-free installation, you will need a mix of specialized mounting hardware and basic tools. Below is a breakdown of the essential equipment required for this project.
| Item | Why You Need It | Optional? |
|---|---|---|
| Stream Deck Mounting Bracket | Secures the physical Stream Deck unit. Options range from $12.99 retractable under-monitor mounts to $35.99 heavy-duty articulating brackets designed for the Stream Deck Plus. | No |
| VESA Extension Plate or Pole Clamp | Provides the physical mounting surface on your monitor arm, allowing you to share the 75x75mm or 100x100mm VESA pattern. | No (unless your monitor arm has a built-in auxiliary bracket) |
| M4 Screws and Spacers | Standard size hardware needed to attach the bracket or VESA plate to your existing monitor setup. | No |
| Hook-and-Loop Cable Ties | Secures the USB cable along the monitor arm to prevent snagging and strain. | No |
| Screwdriver Set | For tightening VESA screws and adjusting bracket tension. | No |
| USB-C Extension Cable (6 to 10 feet) | Ensures the cable has enough slack to accommodate the full range of motion of your monitor arm. | Yes (highly recommended) |
Step-by-Step
Follow these steps to safely integrate your Stream Deck into your monitor arm configuration. This process works for standard 15-key models, the larger XL, and the dial-equipped Stream Deck Plus.
Step 1: Assess Your Arm Configuration and Clearance (Time: 5 Minutes)
Before buying or installing hardware, determine where your Stream Deck will sit. As we design workspaces for 2026, the shift toward clean, floating screens means ergonomics are more critical than ever. You have two main options for placement: mounting the device directly beneath your monitor using a shared VESA plate, or clamping it to the main vertical pole of your monitor stand. Measure the distance between the bottom of your monitor and your desk surface. You will need at least 4 to 6 inches of clearance to comfortably access the Stream Deck without your hand blocking the view of your screen.
Step 2: Choose and Install Your VESA Bracket (Time: 15 Minutes)
If you are mounting the Stream Deck directly to the monitor arm, you must use a VESA adapter plate. This metal plate sandwiches between your monitor and the monitor arm’s VESA plate, extending a small metal wing to the side or bottom of your screen.
Align the holes of the VESA extension plate with your monitor’s 75x75mm or 100x100mm mounting holes. Thread the M4 screws through the monitor arm bracket, through the extension plate, and into the monitor. Tighten them in an “X” pattern to distribute the pressure evenly. Do not over-tighten, as this can damage the internal threads of your monitor.
Step 3: Attach the Stream Deck Mount (Time: 10 Minutes)
With your extension plate secured, it is time to mount the specific bracket for your Stream Deck. Depending on your model, you will use one of two common configurations:
- For standard 15-key MK.2 models: Use a lightweight retractable or fixed bracket (often priced around $12.99). These typically slide or snap around the chassis of the Stream Deck and screw directly into the extension plate.
- For the Stream Deck Plus: Because this model features physical dials and a heavier footprint, use an articulating, ratchet-up sliding mount (typically priced around $35.99). Secure this heavier bracket to your VESA extension plate using the provided locknuts and screws. This style of mount allows you to slide the device out of the way when it is not in use.
Step 4: Secure the Stream Deck and Route the Cable (Time: 10 Minutes)
Slide your Stream Deck into the bracket. Ensure it sits snugly and does not wobble when you press the buttons. Once secured, plug in the USB-C cable. Run the cable along the structural joints of your monitor arm, leaving a small loop of slack (about 2 to 3 inches) at every articulating joint. Secure the cable using hook-and-loop wraps. Avoid tight plastic zip ties, which can pinch the cable over time and cause connection drops.
Step 5: Adjust Monitor Arm Tension (Time: 5 Minutes)
Adding a VESA plate, bracket, and a Stream Deck adds between 0.5 and 1.5 pounds of weight to one side of your monitor arm. If you use a gas-spring or mechanical tension arm, you will need to adjust the internal spring. Use an Allen wrench to tighten the tension screw on the arm until the monitor stays perfectly level and does not drift downward or tilt to the side when you release it.
Mistakes to Avoid
- Ignoring Weight Limits: Most budget monitor arms are rated for 15 to 20 pounds. Adding a heavy monitor plus VESA plates and a Stream Deck Plus can exceed this threshold, leading to sudden arm collapse or joint slipping.
- Creating Cable Pinch Points: Always test the full range of motion of your monitor arm before powering on your computer. If the USB-C cable is too tight, rotating or elevating your monitor can rip the port out of the back of your Stream Deck.
- Over-tightening Plastic Mounts: Many aftermarket Stream Deck brackets are 3D-printed or made of molded plastic. Over-tightening the mounting screws can crack the plastic, rendering the bracket useless. Tighten until snug, then stop.
- Blocking Heat Vents: Ensure your VESA extension plate does not cover your monitor’s cooling vents. Blocking these vents can cause heat buildup, shortening the lifespan of your monitor’s internal power board.
How Often
A mounted Stream Deck requires light, periodic maintenance to ensure structural integrity. Every three months, check the tightness of the VESA screws. The vibrations from typing, desk movement, and pressing the Stream Deck buttons can slowly back the screws out of their threads. Additionally, inspect your cable wraps every six months to ensure they have not slipped or put tension on the USB port.
When to Call a Pro or Replace
While this is generally a straightforward DIY project, there are times when you should replace your mounting hardware or seek professional workspace installation help. If you notice structural sagging in your monitor arm that cannot be corrected by tightening the tension screws, your arm is overloaded and needs to be upgraded to a heavy-duty model.
You should immediately replace your Stream Deck mount if you notice hairline cracks in the plastic brackets. Plastic degrades over time due to UV exposure and the physical force of daily button presses. If a bracket cracks, your device could fall and break during use. If you are integrating this setup into a complex multi-monitor array with hidden wall-routing, hiring an AV or commercial office installer can prevent costly damage to your walls and high-end displays.
FAQ
Can I mount a Stream Deck to a dual monitor arm?
Yes. You can mount a Stream Deck to a dual monitor arm by attaching a VESA extension plate to either monitor mount. However, you must ensure that the secondary monitor has enough clearance on the side or bottom to accommodate the Stream Deck without blocking your viewing angles.
Will mounting the Stream Deck to my monitor arm void my warranty?
Using third-party VESA plates and brackets will not void your Elgato or monitor warranty, provided you do not physically modify or open the chassis of the devices. Always use the correct screw lengths to avoid puncturing the internal components of your monitor.
How do I stop the Stream Deck from shaking when I press the buttons?
Shaking is usually caused by a loose monitor arm joint or a flimsy mounting bracket. To fix this, tighten the tilt and swivel tension bolts on your monitor arm. Using a heavier metal VESA extension plate rather than a thin plastic one will also significantly reduce vibration.
Do I need a different bracket for the Stream Deck Plus compared to the MK.2?
Yes. The Stream Deck Plus is thicker, heavier, and has a different footprint than the standard 15-key MK.2. You will need a specialized bracket designed specifically for the Plus model, preferably one with an articulating joint to handle the extra pressure of turning the dials.
