
Top 3 picks at a glance

The Short Answer
When comparing acoustic panel thickness 1 inch vs 2 inch streaming setups, the ideal choice depends on your room’s existing acoustics, your microphone style, and your budget. If you are a casual streamer looking to eliminate high-frequency echoes, such as the clacking of a mechanical keyboard or high-pitched room hiss, 1-inch foam panels are a cost-effective solution. A 24-pack of 1″ x 12″ x 12″ foam panels costs around $30, while larger 80-packs run about $60, making them highly accessible for beginners.
However, for professional-grade streaming, 2-inch panels are vastly superior. Human vocal frequencies, especially deeper chest tones, sit in the low-midrange (between 250 Hz and 500 Hz). Thin 1-inch panels cannot absorb these longer sound waves, leaving your stream sounding muddy, boomy, or hollow. Two-inch panels—especially those made of dense fiberglass rather than open-cell foam—absorb a much wider frequency spectrum, capturing both the high-frequency mouse clicks and the deep bass of your speaking voice. While 2-inch fiberglass panels are heavier and more expensive (ranging from $15 to $80 per panel), they create the warm, broadcast-quality vocal presence that modern audiences expect.
As an Amazon Associate we earn from qualifying purchases at no extra cost to you.

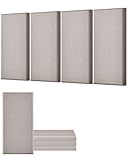

Standard Sizes
Acoustic panels come in several standardized dimensions. Foam panels are typically sold in smaller, interlocking tiles, whereas professional fiberglass or rockwool panels are sold in larger, fabric-wrapped boards. Understanding these dimensions helps you calculate exactly how many panels you need to cover your walls without over-treating the space.
| Panel Type & Material | Dimensions (Inches) | Dimensions (Metric) | Typical Weight | Average Price Range (Per Unit/Pack) |
|---|---|---|---|---|
| 1-Inch Wedge Foam Tile | 12″ x 12″ x 1″ | 30.5 x 30.5 x 2.5 cm | < 0.1 lbs (0.04 kg) | $1.00 – $1.50 (Sold in packs of 24 to 80) |
| 2-Inch Wedge Foam Tile | 12″ x 12″ x 2″ | 30.5 x 30.5 x 5.1 cm | 0.15 lbs (0.07 kg) | $1.50 – $2.50 (Sold in packs of 12 to 48) |
| 2-Inch Fiberglass Panel (Medium) | 23.6″ x 11.8″ x 2″ | 60.0 x 30.0 x 5.1 cm | 1.5 lbs (0.68 kg) | $15.00 – $20.00 (Sold in packs of 4) |
| 2-Inch Fabric-Wrapped Panel (Large) | 24″ x 48″ x 2″ | 61.0 x 122.0 x 5.1 cm | 8.0 – 10.0 lbs (3.6 – 4.5 kg) | $65.00 – $90.00 (Sold individually) |
While lightweight foam tiles can be easily mounted with double-sided adhesive tape, heavy-duty 2-inch fiberglass panels require mounting hardware, such as impaling clips or heavy-duty wall anchors, due to their weight.
How to Measure Your Space
To optimize your streaming environment, you do not need to cover every square inch of your walls. In fact, over-treating a room makes it sound unnaturally dead and sterile. Follow these steps to calculate your room’s acoustic needs:
- Calculate the Wall Surface Area: Measure the length and height of each wall in your streaming room. Multiply the length by the height to get the square footage of each wall, then add them together. For example, a 10 x 10-foot room with 8-foot ceilings has 320 square feet of wall space.
- Determine Target Coverage Percentage: For a standard streaming or gaming room, you want to cover between 15% and 25% of the wall surface area. Using our 320-square-foot room example, 20% coverage requires approximately 64 square feet of acoustic treatment.
- Identify First Reflection Points: Sit at your desk in your streaming position. The primary reflection points are the areas on the walls directly to your left and right, as well as the wall space directly behind your monitors and behind your head. Sound waves travel in straight lines; treating these specific zones prevents the microphone from picking up immediate bounces.
- Choose Panel Quantities Based on Thickness:
- If using 12″ x 12″ tiles (1 sq. ft. each), you would need 64 tiles.
- If using medium 23.6″ x 11.8″ panels (approximately 2 sq. ft. each), you would need 32 panels.
- If using large 24″ x 48″ panels (8 sq. ft. each), you would need only 8 panels.
By Room or Use Case
The Bedroom Streaming Corner
In a small bedroom setup, space is tight and background noise from computers or HVAC systems is highly noticeable. If you are on a tight budget and stream casually, a combination of 1-inch and 2-inch foam panels is highly effective. You can mount lightweight 1-inch wedge foam tiles directly behind your monitors to catch high-frequency keyboard clicks and sibilant speech. A 24-pack of 1-inch foam tiles (priced around $30) is perfect for treating the immediate desk area without taking up physical space or requiring heavy wall anchors.
Dedicated Gaming and Streaming Room
If you have a dedicated room for streaming and content creation, you need balanced sound absorption. As streaming standards advance into 2026, viewers expect clean audio free of hollow echoes. A dedicated room benefits immensely from 2-inch fiberglass panels. Placing self-adhesive 2-inch fiberglass panels (such as a 4-pack of 23.6″ x 11.8″ panels for around $60) on the side walls directly adjacent to your desk will capture mid-range vocal reflections, preventing your voice from sounding like you are streaming from a bathroom.
Home Recording Studio & Podcast Suite
For high-end production where you host guests or record voiceovers alongside your stream, 2-inch fabric-wrapped fiberglass boards are the gold standard. Large 24″ x 48″ x 2″ panels (priced around $80 each) should be mounted at the primary reflection points on the side walls and on the wall behind your streaming chair. The 2-inch thickness ensures that even low-frequency vocal resonances are controlled, giving your voice a deep, warm, and authoritative broadcast quality.
Living Room / Open-Concept Stream Setup
Streaming from a living room presents unique challenges due to high ceilings, hard floors, and open spaces. Thin 1-inch foam tiles are virtually useless in these large volumes of air. Instead, opt for large, aesthetically pleasing 2-inch fabric-wrapped panels. A few strategically placed 24″ x 48″ x 2″ beveled-edge panels can be hung like picture frames, blending into your home decor while taming the long reverb times common in larger, open rooms.
Common Sizing Mistakes
One of the most common mistakes beginners make is buying massive packs of cheap, 1-inch foam tiles and covering their entire room with them. While this eliminates high-frequency flutter echo, it does absolutely nothing to absorb lower-mid or bass frequencies. This results in an acoustically “unbalanced” room that sounds muddy, dark, and boomy, as only the high pitches are sucked out of the air while the low-mids continue to bounce off the walls unchecked.
Another frequent error is neglecting the weight of thicker panels. While 1-inch foam tiles weigh less than an ounce and stick easily with double-sided adhesive, 2-inch fiberglass panels are heavy, dense, and structurally rigid. Attempting to mount a 2-inch, 10-pound fiberglass panel with simple tape will damage your drywall when it inevitably falls. Always use appropriate mounting clips, impaling spikes, or heavy-duty screw-in anchors for 2-inch rigid panels.
FAQ
Does a 1-inch acoustic panel block sound from leaving my streaming room?
No. Acoustic panels—whether 1-inch or 2-inch thick—are designed for sound absorption (improving the sound quality inside the room), not sound proofing (blocking sound from entering or leaving). To block sound, you need mass and decoupling, which requires construction materials like green glue, dense drywall, or mass-loaded vinyl.
Can I mix 1-inch and 2-inch panels in the same streaming setup?
Yes, mixing thicknesses is an excellent, budget-friendly strategy. Place thicker 2-inch panels at your primary reflection points (directly to your left, right, and behind your microphone) to handle mid-range vocal frequencies. You can then use cheaper 1-inch foam tiles on the ceiling or back walls to catch remaining high-frequency reflections.
What is the main performance difference between foam and fiberglass panels?
Fiberglass is much denser than open-cell polyurethane foam. A 2-inch fiberglass panel will absorb sound waves much more efficiently and down to a much lower frequency than a 2-inch foam panel. While foam is cheaper and easier to install, fiberglass provides a professional, linear frequency response.
How far from my microphone should my acoustic panels be placed?
For the best results, place your thickest panels (preferably 2-inch) directly behind your head (where your voice travels after passing the microphone) and on the wall behind the microphone itself. Keeping panels within 3 to 5 feet of your streaming position maximizes their ability to catch direct sound waves before they bounce around the rest of the room.


