
Cooking, crafting, painting miniatures, card games, keyboard builds, soldering: any stream where the action happens on a desk or table lives or dies on a good overhead shot. A top-down camera lets viewers see exactly what your hands are doing, which a face cam simply cannot. Building a stable, well-lit overhead rig is less expensive than it looks once you understand the few parts that matter.
As an Amazon Associate we earn from qualifying purchases at no extra cost to you.
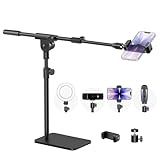


Top 3 picks at a glance
The three parts of an overhead rig
Every overhead setup is a camera, a mount that holds it above the work surface, and lighting that avoids casting your own shadow onto the table. Get all three right and the shot looks effortless; skimp on the mount and you will fight wobble and drift for months.
Mount options ranked
An overhead boom arm that clamps to your desk is the most popular choice, keeping the tripod legs out of your workspace. A dedicated copy stand is rock solid but bulky. A standard tripod with a horizontal arm works but eats floor space and can tip if unbalanced.
Overhead mount comparison
| Mount type | Desk space used | Stability | Typical cost |
|---|---|---|---|
| Desk-clamp boom arm | Minimal | Good | $25-70 |
| Copy stand | Takes a corner | Excellent | $60-150 |
| Tripod + horizontal arm | Floor space | Fair, needs counterweight | $40-120 |
Choosing the camera
A 1080p webcam is plenty for most craft and tabletop content, and its light weight is easy for a clamp arm to hold. If you need to show fine detail, such as stitching or circuit boards, a camera with good close focus or a phone with a macro mode gives sharper results. Whatever you pick, keep the weight within your mount’s rated capacity, usually under 1 to 1.5 kg for clamp arms.
Framing the surface
Mount the camera high enough to capture your whole working area, typically 40 to 70 cm above the desk depending on the size of your project. Center it over the action and keep the lens parallel to the table so straight edges do not look skewed. A small grid overlay while you position helps you square it up.
Lighting without shadows
The enemy of an overhead shot is your own hand casting a shadow over the work. Light from two sides at a shallow angle, or use a ring light around the lens, so illumination comes from multiple directions and fills in shadows. Aim for a neutral color temperature around 5000 to 5600 K so colors on the table look true.
Frequently asked questions
Do I need a special camera for overhead work?
No. A standard 1080p webcam mounted on a clamp arm covers most craft and tabletop streams. You only need a dedicated camera if your content demands extreme close-up detail, in which case macro focus matters more than raw resolution.
How do I stop the overhead camera from drifting down?
Drift usually means the camera exceeds the arm’s comfortable load or the clamp is not fully tightened. Stay well under the arm’s rated capacity, tighten every joint, and add a small counterweight on tripod-style rigs. A slightly overbuilt mount holds position far better than one at its limit.
Reducing glare on shiny surfaces
Glass, resin, glossy cards, and polished tools throw hot reflections straight back at an overhead lens, and a blown-out glare spot ruins the detail viewers came to see. The fix is softer, more diffuse light and smarter angles. Bounce your lights off a wall or through a diffuser instead of aiming them bare at the surface, and position them slightly off to the side rather than directly overhead so reflections bounce away from the lens. A polarizing filter, if your camera accepts one, can cut glare dramatically on very shiny work. Matte work mats also help by keeping the surface itself from reflecting. If you frequently shoot glossy subjects, test your lighting on the shiniest thing you own before you go live, because a setup that looks fine on matte cardboard can flare badly on a laminated card or a wet paintbrush. A little diffusion and a small angle change usually tame the worst of it.
Bottom line
A great overhead stream is a light camera, a stable desk-clamp boom arm, and shadow-free lighting from two sides or a ring around the lens. Keep the camera 40 to 70 cm above the surface, lens parallel to the table, and weight well within your mount’s rating. Nail those basics and your hands become the star of the show.


