
Top 3 picks at a glance
The Short Answer
For a typical small room—defined as a space under 120 square feet, such as a 10 x 12-foot bedroom or home office—you need to cover 20% to 40% of the wall surface area with acoustic treatment. This range effectively controls distracting echoes, flutter noise, and muddy sound reflections without making the room feel unnaturally dead or claustrophobic.
In practical terms, a 10 x 12-foot room with standard 8-foot ceilings has approximately 352 square feet of wall space. To achieve balanced sound, you will need between 70 and 140 square feet of acoustic panel coverage. Depending on your budget and aesthetic goals, this translates to roughly four to eight packages of standard 12-packs of 12 x 12-inch panels. If you are using budget-friendly solutions like a 6-pack of 12-inch foam wedges (typically priced around $13.99) or high-density 18-packs of polyester panels (typically around $29.99), the total cost to treat a small room ranges from $80 to $250.
As an Amazon Associate we earn from qualifying purchases at no extra cost to you. Product prices and availability are accurate as of the date shown and are subject to change.
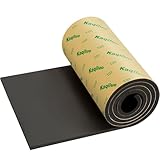


Standard Sizes
Acoustic treatment products come in a variety of dimensions, thicknesses, and materials. Understanding these standard sizes helps you calculate exactly how many packages you need to purchase to hit your target coverage.
| Product Type & Material | Dimensions (Inches) | Dimensions (Metric) | Coverage Per Unit / Pack | Average Price Range |
|---|---|---|---|---|
| 12″ x 12″ x 0.4″ | 30.5 x 30.5 x 1.0 cm | 18.0 sq. ft. per pack | $25.00 – $35.00 | |
| 12″ x 12″ x 1.0″ | 30.5 x 30.5 x 2.5 cm | 6.0 sq. ft. per pack | $12.00 – $18.00 | |
| 16″ x 12″ x 0.4″ | 40.6 x 30.5 x 1.0 cm | 8.0 sq. ft. per pack | $20.00 – $25.00 | |
| Varies (e.g., 5.8 sq. ft. roll) | Varies (e.g., 0.54 sq. m) | 5.8 sq. ft. per roll | $18.00 – $22.00 | |
| 12″ x 12″ x 24″ | 30.5 x 30.5 x 61.0 cm | Linear corner coverage | $40.00 – $70.00 |
How to Measure Your Space
Calculating your acoustic treatment needs does not require an advanced physics degree. Follow these five steps to determine the exact number of panels your small room requires:
-
Measure the Floor Dimensions:
Measure the length and width of the room in feet. For example, a room that is 10 feet wide and 11 feet long has a floor area of 110 square feet. This qualifies as a small room. -
Calculate the Wall Surface Area:
Measure your ceiling height (usually 8 or 9 feet). Multiply the perimeter of the room by the height of the ceiling.
Formula: 2 x (Length + Width) x Height = Total Wall Area
For a 10 x 11 x 8-foot room: 2 x (10 + 11) x 8 = 336 square feet of wall area. -
Select Your Target Coverage Percentage:
Choose your coverage percentage based on how you intend to use the room:- Light Treatment (15% to 20%): Best for home offices, casual gaming rooms, and living spaces. (336 x 0.20 = ~67 square feet).
- Moderate Treatment (25% to 35%): Ideal for home studios, mixing suites, podcasting spaces, and listening rooms. (336 x 0.30 = ~100 square feet).
- Heavy Treatment (40% to 50%): Required for vocal booths or rooms housing loud acoustic instruments like drums. (336 x 0.45 = ~151 square feet).
-
Convert Coverage into Panel Counts:
Divide your target coverage area by the square footage of the panels you plan to buy.- If using standard 12 x 12-inch panels (which cover exactly 1.0 square foot each), you need 100 panels for a moderate 30% treatment setup.
- If using larger 16 x 12-inch panels (which cover 1.33 square feet each), you need approximately 75 panels (100 / 1.33 = 75).
-
Identify First Reflection Points:
Do not just stick panels anywhere. Sit in your main listening or working position and have a friend slide a mirror along the side walls. Wherever you can see your speakers or your own face in the mirror is a “first reflection point.” Mark these spots; this is where your first panels must be mounted.
By Room or Use Case
Different activities demand different acoustic environments. A room treated for high-stakes audio mixing will feel too quiet and unnatural for a daily remote work office.
Home Office & Zoom Rooms
As remote work setups continue to evolve in 2026, clear speech intelligibility has become a non-negotiable household priority. To stop your voice from bouncing off bare walls and sounding hollow on video calls, aim for 15% to 20% coverage. Focus your panels directly on the wall behind your computer monitor (to catch your voice as you speak) and on the wall directly behind you (which is visible on camera). High-density, decorative 12 x 12-inch polyester panels in neutral colors work beautifully here, providing a clean, professional aesthetic for under $60 total.
Home Recording & Podcast Studios
Microphones are highly sensitive and will pick up any room reflections, resulting in a cheap, “roomy” recording. To combat this, target 30% to 40% coverage. You should use a combination of materials. Place dense, sound-absorbing polyester panels (such as 16 x 12 x 0.4-inch panels) at the first reflection points to the left and right of your desk. Supplement these with lightweight polyurethane foam wedges behind your microphone setup to absorb high-frequency flutter echo. Budget roughly $120 to $180 for this configuration.
Dedicated Music Listening & Audiophile Rooms
For high-fidelity listening, you want to tame the room’s harshness without killing its natural energy. Target 25% to 30% coverage. Focus primarily on the wall behind your speakers and the side-wall reflection points. Avoid treating the entire wall surface; instead, checkerboard your panels to leave some exposed drywall, keeping the room sounding lively but controlled. High-density panels with a 50+ kg/m³ rating are highly recommended here to manage lower-mid frequencies effectively.
Vocal Booths
A vocal booth needs to be a “dead” acoustic environment to allow for clean editing and processing later. Target 50% to 70% coverage. In these ultra-small spaces, sound bounces off walls almost instantly. Line the walls with high-density self-adhesive closed-cell foam or thick wedge tiles. Because these booths are small, you can achieve this high level of coverage for under $100 using a few rolls of closed-cell foam and a couple of packs of foam wedges.
Common Sizing Mistakes
When treating a small room, it is easy to make mistakes that cost time and money. Watch out for these common pitfalls:
-
Confusing Sound Absorption with Soundproofing:
This is the most common mistake. Light acoustic foam, polyester panels, and closed-cell rolls are designed to absorb reflections inside the room to reduce echo. They will not stop sound from leaking out of the room or prevent noisy neighbors from disturbing you. True soundproofing requires heavy, dense structural materials like green glue, mass-loaded vinyl, and double-drywall installations. -
Over-treating the Room:
Covering 100% of your walls in foam creates an unnatural, claustrophobic environment that lacks high-frequency life. Your voice will sound muffled, and your ears will feel a strange pressure. Always start with 20% to 30% coverage and add more only if necessary. -
Ignoring the Corners:
Low frequencies (bass) naturally pool in the corners of a room, causing a boomy, muddy sound. Putting thin, flat 0.4-inch panels in corners does nothing for bass. If your room sounds boomy, you must install thick, triangular bass traps in the vertical corners where walls meet. -
Focusing Only on One Wall:
Grouping all your panels on a single wall leaves the opposing wall completely bare, allowing sound to bounce back and forth between them. Always distribute your panels evenly across opposing walls to break up parallel reflections.
FAQ
How thick should acoustic panels be for a small room?
For general echo reduction, mid-range speech control, and high-frequency flutter control, panels that are 0.4 inches to 1.0 inch thick are perfectly adequate. If you are dealing with low-end frequencies, mixing music, or tracking instruments, you will need panels that are 2.0 to 4.0 inches thick to absorb those longer, more powerful sound waves.
Can I use self-adhesive panels on painted drywall?
Many high-density closed-cell foam rolls and polyester panels come with pre-applied self-adhesive backings. While convenient, these adhesives are often incredibly strong and can peel off paint or drywall paper when removed. If you rent or plan to change your room layout, mount your panels using damage-free adhesive strips, small t-pins, or hook-and-loop fasteners instead.
What is the difference between polyurethane foam and polyester fiber panels?
Polyurethane foam (like standard wedge foam) is lightweight, inexpensive, and excellent at diffusing high frequencies. However, it is easily damaged and can degrade over time. Polyester fiber panels are much denser (often 50+ kg/m³), offer better mid-frequency absorption for their thickness, are highly durable, fire-resistant, and can be easily wiped clean.
How do I find my room’s primary reflection points?
Sit in your listening position and have a friend slide a small mirror flat against the left wall at your eye level. Mark the spot on the wall where you can see the reflection of your left or right speaker in the mirror. Repeat this process on the right wall and on the ceiling. These are your primary reflection points, and they should be your top priority for panel placement.


