
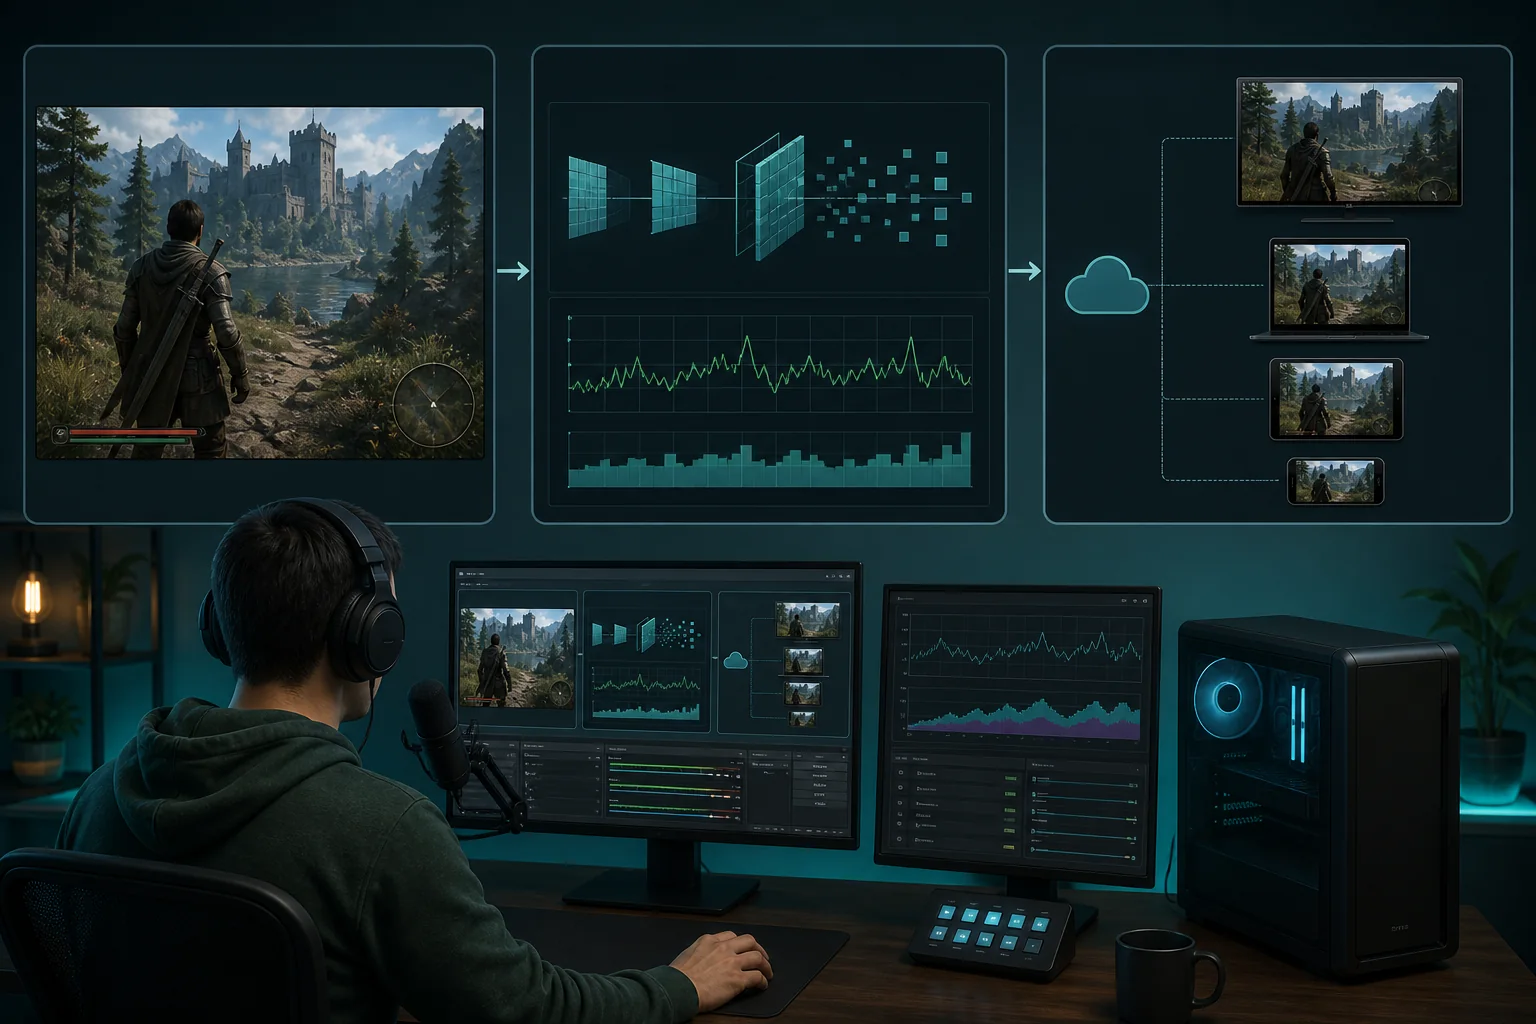
Starting a Twitch stream requires four things: a Twitch account, OBS Studio (free), a microphone, and an internet connection with at least 1.5x your target bitrate in upload speed. Most gaming PCs built in the last several years already have enough encoding power built into the GPU to stream at 720p or 1080p without a second machine. The setup itself, from account creation to your first test stream, takes under an hour.
Top 3 picks at a glance
What you need before your first stream
The minimum viable hardware list is shorter than most beginners expect: a PC capable of running your game plus OBS simultaneously, a microphone (even a basic USB one), and a stable internet connection with enough upload bandwidth for your target bitrate.
As an Amazon Associate we earn from qualifying purchases at no extra cost to you.




A dedicated webcam isn’t strictly required for your first stream, particularly for gameplay-focused content where face cam is optional, though most viewers respond better to streams with some visible presence, even a simple laptop-integrated camera for casual chatting segments.
Check your GPU generation before assuming you need a second PC for dual-PC streaming; most graphics cards released in the last several years include a dedicated hardware encoder (NVENC on NVIDIA, similar technology on AMD and Intel cards) that handles encoding with minimal impact on game performance.
Internet upload speed matters more than most other hardware factors combined. Run a speed test specifically measuring upload, not download, since home internet plans commonly advertise fast download speeds while offering comparatively limited upload bandwidth, particularly on cable and DSL connections.
A quiet recording environment matters more than expensive equipment for audio quality specifically; a $40 microphone in a room with soft furnishings (curtains, carpet, a couch) often sounds better than a $150 microphone in a bare room with hard, reflective walls.
Building this checklist before opening OBS for the first time prevents the common frustration of discovering a bandwidth or hardware limitation mid-setup, after you’ve already invested time configuring software settings that then need to be revisited.
Creating and configuring your Twitch account
Sign up at Twitch’s website or through the desktop or mobile app using an email address, then verify the account through the confirmation email or phone verification step, which is required before you’re able to go live for the first time.
Set your channel name deliberately before building any following around it, since changing it later can affect existing links, search visibility, and viewer recognition, whereas a name chosen thoughtfully from the start avoids that disruption entirely.
Configure your channel’s basic profile: a profile picture, a short bio, and panels below the stream window describing your setup, schedule, and social links. New viewers often check these before deciding whether to follow, so leaving them blank costs potential followers.
Set a stream title and select a category (game or “Just Chatting”) before going live, since Twitch’s discovery browse pages organize primarily by category, and an accurate, specific category selection meaningfully affects whether new viewers find your stream at all.
Locate your unique stream key under Creator Dashboard settings, specifically the Stream section, since this key is what connects OBS to your Twitch channel and needs to be entered into your streaming software before you can broadcast.
Review Twitch’s Community Guidelines before your first stream, particularly around content ratings and copyrighted music, since violations here can affect your channel’s standing even during an early, low-viewership stream that might otherwise seem low-risk.
Installing OBS and the basics that matter
Download OBS Studio directly from the official OBS Project website rather than a third-party source, since modified or repackaged versions distributed elsewhere can bundle unwanted software or lack recent security updates that the official build includes.
Run the Auto-Configuration Wizard on first launch, found under Tools in the menu bar, which tests your hardware and suggests baseline resolution, bitrate, and encoder settings appropriate for streaming versus recording, giving you a reasonable starting point rather than a blank configuration.
Understand the core OBS layout before your first stream: Scenes (different layouts you can switch between), Sources (individual elements like your game capture, webcam, or overlay images within a scene), and the Mixer (audio levels for each input) are the three panels you’ll use most.
Add a Game Capture or Display Capture source first, since this is the core of any gameplay stream, then add an Audio Input Capture source for your microphone, checking that levels in the Mixer panel move visibly when you speak without pinning to the far right (indicating clipping).
Enter your Twitch stream key under Settings, then Stream, selecting Twitch as the service. Keep this key private, since anyone with it can stream to your channel; if it’s ever exposed publicly, regenerate a new one immediately from your Creator Dashboard.
Run a private test stream before your actual public debut, using Twitch’s option to keep a stream unlisted or by streaming briefly to a test account, confirming audio, video, and stability all work together before an audience is watching.
Minimum vs recommended setup by budget
Streaming setups scale meaningfully with budget, but the jump from “functional” to “comfortable” doesn’t require the largest possible investment. The table below outlines what’s realistic at three common budget tiers for a first streaming setup.
| Budget tier | Microphone | Webcam | Output target |
|---|---|---|---|
| Minimum ($50-80) | Basic USB mic ($30-40) | Built-in laptop cam or skip | 720p30 |
| Comfortable ($150-250) | Mid USB mic ($70-100) | 1080p USB webcam ($60-100) | 1080p30-60 |
| Upgraded ($400+) | XLR mic + audio interface | 1080p/4K webcam with good low-light | 1080p60 |
The jump from minimum to comfortable produces the largest perceptible quality improvement for viewers, mainly through audio clarity, since viewers tolerate modest video quality far more readily than distorted or noisy audio.
The jump from comfortable to upgraded delivers diminishing returns for a brand-new streamer with a small audience, and is generally worth revisiting only once your stream has an established, regular viewer base that would notice the difference.
Audio setup: mic levels and noise suppression
Set your microphone input level so that normal speaking volume peaks around -12 to -6 dB on the OBS audio mixer, leaving headroom before hitting 0 dB (clipping), which causes distorted, unpleasant audio that’s difficult for viewers to listen to for extended periods.
Enable OBS’s built-in Noise Suppression filter on your microphone source, available under audio filters, set to the RNNoise method if available, which handles common background noise (fan hum, keyboard clicks) more effectively than the older Speex-based method on most modern systems.
Add a Noise Gate filter after noise suppression to fully silence the microphone between sentences, preventing residual background hum from being audible during pauses, with a threshold set just below your normal speaking volume so it doesn’t cut off quieter speech.
Position the microphone 4-8 inches from your mouth for USB condenser mics, slightly off-axis rather than directly in front, which reduces plosive sounds (harsh “p” and “b” bursts) without needing a separate pop filter, though a pop filter improves this further.
Monitor your own audio through headphones during a test stream, not speakers, since speaker playback can create feedback loops with an open microphone and makes it harder to accurately judge how your voice actually sounds to viewers listening through their own headphones.
Test game audio and voice balance together before going live; a common early mistake is game audio significantly louder than the microphone, forcing viewers to strain to hear commentary over sound effects and music from the game itself.
Camera and lighting basics
Position your camera at or slightly above eye level rather than looking up from below, which is generally a more flattering angle and creates a more natural sense of eye contact with viewers watching the stream.
Add a single key light source in front of you, angled slightly to one side, rather than relying solely on overhead room lighting, which tends to cast unflattering shadows under the eyes and nose on most webcam sensors.
A budget ring light or a simple desk lamp with a diffusing shade both work as an effective first light source; the specific product matters less than having a consistent, front-facing light source rather than backlighting from a window or overhead fixture alone.
Avoid sitting directly in front of a bright window during daytime streams, since the camera will expose for the bright background, leaving your face underexposed and dark, a common and easily avoidable first-time streaming mistake.
Set your webcam’s resolution and frame rate explicitly in OBS’s source properties rather than accepting default settings, since some webcams default to a lower frame rate than they’re capable of, producing a noticeably choppier face cam than necessary.
Keep your background reasonably tidy and, if possible, add subtle depth (a shelf, a poster, ambient lighting) behind you rather than a completely blank wall, which helps the stream feel more visually engaging without requiring an expensive backdrop.
Scene and overlay setup without overcomplicating it
Start with two or three scenes maximum for your first stream: a “Starting Soon” scene, a main “Gameplay” scene, and optionally a “Just Chatting” or break scene, rather than building out a large scene collection before you’ve streamed at all.
Free overlay templates from OBS-focused community resources are sufficient for a first stream; investing in a paid custom overlay package before you’ve confirmed your streaming setup, schedule, and content direction is a common early over-investment.
Keep overlay elements (webcam frame, alert boxes, chat display) positioned to avoid covering important game UI elements like health bars or minimaps, which frustrates viewers trying to follow gameplay and can look unprofessional even with an otherwise polished visual design.
Add a simple alert box for new followers and subscribers using a free service that integrates with OBS through a browser source, since viewer alerts meaningfully improve engagement by acknowledging new community members in real time during the stream.
Test scene transitions before going live, confirming that switching between scenes doesn’t cause an audio glitch, a black flash, or a noticeable freeze, all of which are common issues caught easily during a private test stream but jarring during a live broadcast.
Resist the urge to add every available overlay element (donation goals, recent follower ticker, social media banners) simultaneously; a cleaner, less cluttered layout in your first weeks is generally easier for both you and new viewers to follow.
Testing before you go live
Use OBS’s built-in Stats window (View menu, then Stats) during a test stream to monitor dropped frames, encoding lag, and rendering lag in real time, catching performance issues before they affect an actual live audience.
Record a local test rather than streaming live for your very first check, reviewing the file afterward for audio sync issues, visual glitches, or scene transition problems that are easier to spot on playback than while actively managing a live stream.
Check your stream on Twitch’s actual player, not just OBS’s local preview, ideally from a second device or by asking a friend to view it, since compression and platform-side processing can reveal issues not visible in OBS’s own preview window.
Verify your microphone and game audio balance sounds correct through the actual Twitch stream, not just your local monitoring headphones, since OBS audio filters and Twitch’s own processing can produce slightly different results than what you hear directly.
Confirm your stream key and title/category settings are correct before announcing a stream time publicly, since a misconfigured stream key is one of the most common reasons a scheduled first stream fails to appear live on Twitch at the announced time.
Build a short pre-stream checklist (microphone level, scene order, stream key, title and category, internet connection check) and run through it every time, even after your first few streams, since consistency here prevents avoidable technical issues from disrupting a live broadcast.
Common first-stream mistakes
Streaming without checking upload bandwidth first is one of the most common early mistakes, leading to dropped frames and buffering that viewers notice immediately; our dedicated guide on fixing dropped frames while streaming covers this in more depth.
Setting bitrate and resolution too high for your actual upload speed, rather than matching them to your tested bandwidth, is a closely related mistake; the relationship between these settings is covered fully in our guide to streaming bitrate and resolution.
Ignoring audio quality in favor of visual polish is a common misallocation of a limited starter budget; viewers consistently tolerate lower video quality more readily than poor or inconsistent audio, making a modest microphone upgrade a higher-priority purchase than a camera upgrade.
Comparing early viewer counts to established streamers discourages many beginners unnecessarily; nearly every successful streamer started with single-digit viewership, and consistent scheduling matters more in the early weeks than any single stream’s numbers.
Neglecting to engage with chat, even with a small audience, is a missed opportunity; responding to the two or three viewers present in an early stream builds the habit and community foundation that scales as audience size grows over time.
Overspending on hardware before confirming a consistent streaming habit is a common early trap; starting with the minimum viable setup covered earlier in this guide and upgrading specific pain points as they appear is a more sustainable approach than buying everything upfront.
Frequently asked questions
Do I need an expensive PC to start streaming on Twitch?
No. A CPU with 6+ cores and a GPU with hardware encoding (most cards from the last several years) can handle 720p or 1080p streaming at 30fps using NVENC. Budget setups in the $600-900 range handle entry-level streaming fine; the bigger factor is upload bandwidth, not raw PC power.
What’s the minimum upload speed needed to stream on Twitch?
Twitch recommends at least 1.5x your target bitrate in available upload speed. For a common 6,000 kbps (6 Mbps) stream, that means roughly 9 Mbps upload minimum, though 10-15 Mbps gives more comfortable headroom for other household internet usage during your stream.
How much does a basic streaming setup cost?
A functional starter setup, assuming you already own a gaming PC, runs $80-150: a USB microphone ($30-60), a basic webcam if not already built into a laptop ($30-50), and free software (OBS Studio). Lighting and a capture card are optional additions beyond this baseline.
Should I use OBS Studio or Streamlabs for my first stream?
Both work well for beginners and use the same underlying encoder. OBS Studio is more lightweight and has a smaller resource footprint, which matters more on modest hardware. Streamlabs adds built-in alert and widget tools out of the box, at the cost of slightly higher CPU and RAM usage.
How long does it take to get my first followers on Twitch?
There’s no fixed timeline, but streaming consistently 3-4 times weekly for 8-12 weeks is a realistic baseline before meaningful follower growth typically begins, based on common new-streamer patterns. Consistency and category selection tend to matter more than stream length in the earliest weeks.


