
Setting up a professional-grade workstation, streaming setup, or podcasting studio requires careful spatial planning. While most creators focus on selecting the perfect microphone, the physical footprint of the microphone boom arm is frequently overlooked. If you do not calculate your desk clearance beforehand, you risk purchasing an arm that cannot clamp onto your desktop, collides with your computer monitors, or scrapes against your wall every time you adjust it.
Whether you are looking to mount a classic spring-assisted scissor arm or a sleek, low-profile mount, understanding the exact spatial tolerances of your desk is essential for an ergonomic, clutter-free setup.
As an Amazon Associate we earn from qualifying purchases at no extra cost to you. Product prices and availability are accurate as of the date shown and are subject to change.


Top 3 picks at a glance
The Short Answer
To safely install and operate a standard microphone boom arm, you need to account for three primary clearance zones: the desk clamp zone, the rear wall gap, and the overhead operating path.
At the edge of your desk, a standard C-clamp requires an edge thickness of 0.5 to 2.1 inches, alongside at least 2.0 inches of flat depth underneath the desktop lip for the clamp plate to grip securely. You also need 2.5 to 3.0 inches of vertical space directly beneath the desk to turn the fastening hand-screw.
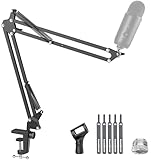
Behind the desk, you need a 2- to 5-inch gap between the desk edge and the wall to prevent the folding joints of standard articulating arms from scraping your drywall. Above the desk, a standard scissor-style arm—such as the classic InnoGear Boom Arm Microphone Mic Stand ($24.99)—requires a vertical operating clearance of 15 to 30 inches. Conversely, low-profile boom arms, like the FIFINE BM88 Low Profile Stand ($56.99), require as little as 3.5 to 8 inches of vertical clearance, as they are engineered to glide directly beneath your monitors.
Standard Sizes
Different styles of boom arms have vastly different spatial requirements. The table below outlines the standard clearances required for the three most common categories of microphone boom arms on the market today.
| Boom Arm Style | Max Horizontal Reach | Required Desk Edge Depth | Under-Desk Vertical Clearance | Above-Desk Height Clearance |
|---|---|---|---|---|
| Standard Scissor Arm (e.g., SUNMON QuadCast Arm, $19.99) |
27″ – 32″ (68.5 – 81.3 cm) |
1.5″ – 2.0″ (3.8 – 5.1 cm) |
2.5″ – 3.0″ (6.4 – 7.6 cm) |
15″ – 32″ (38.1 – 81.3 cm) |
| Low-Profile Arm (e.g., FIFINE BM88, $56.99) |
28″ – 30″ (71.1 – 76.2 cm) |
2.0″ – 2.5″ (5.1 – 6.4 cm) |
2.0″ – 2.5″ (5.1 – 6.4 cm) |
3.5″ – 12″ (8.9 – 30.5 cm) |
| Flexible Low-Profile Arm (e.g., InnoGear 360 Flex, $25.19) |
26″ – 28″ (66.0 – 71.1 cm) |
1.8″ – 2.2″ (4.6 – 5.6 cm) |
2.2″ – 2.8″ (5.6 – 7.1 cm) |
5″ – 15″ (12.7 – 38.1 cm) |
How to Measure Your Space
To avoid return shipping hassles, spend five minutes measuring your desk setup before choosing a microphone arm. Follow this step-by-step measurement guide:
- Measure Desktop Thickness: Use a tape measure to find the exact vertical thickness of your desk edge. Standard clamps adjust to grip surfaces between 0.5 inches and 2.1 inches. If your desk is a thick solid-wood slab or has a decorative beveled trim exceeding 2.2 inches, standard clamps will not fit.
- Inspect the Under-Desk Lip Depth: Look beneath your desk. Measure how far back the flat, unobstructed wood extends before hitting a metal support beam, structural reinforcing rib, or modesty panel. You need at least 2.0 inches of flat, horizontal depth. If a metal support bar sits 1.0 inch from the edge, a standard C-clamp cannot seat flat.
- Measure Under-Desk Vertical Clearance: Check the vertical clearance directly beneath the edge of the desk. The long threaded screw of a C-clamp requires 2.5 to 3.0 inches of clear space so you can turn the handle to tighten it. If you have built-in drawers directly beneath the desk surface, this screw may block them or fail to fit entirely.
- Determine Rear Wall Clearance: If your desk faces a wall, measure the gap between the back edge of the desktop and the drywall. Standard scissor arms bend backward at the elbow when pushed out of the way. If your desk is flush against the wall, the arm will strike the wall, limiting its movement and potentially damaging your paint. You will need a 2- to 5-inch gap, or you must mount the clamp on the side of the desk instead of the back.
- Check Monitor and Overhead Clearance: If you plan to swing the mic arm over or under your computer screens, measure the distance from the desk surface to the bottom bezel of your monitor. If this gap is less than 8 inches, standard arms like the SUNMON QuadCast ($19.99) must be mounted to the side to reach over the top of the screen, or you must switch to a low-profile model like the FIFINE BM88 ($56.99) to slide underneath.
By Room or Use Case
The Compact Home Office or Bedroom Nook
In tight spaces where desks are pushed into corners or alcoves, every inch of space counts. Compact desks (typically 40 to 48 inches wide) often sit flush against walls, leaving zero rear clearance. In these scenarios, a standard scissor arm mounted to the back edge will constantly collide with the wall. For these setups, a highly flexible, low-profile arm like the InnoGear Low Profile 360° Flex ($25.19) is ideal. It can be clamped to the side edge of the desk, folding flat against the side when not in use and requiring virtually no rear clearance.
The Dedicated Gaming Station or Streaming Setup
Gamers and live streamers usually prioritize clean sightlines. You do not want a bulky microphone blocking your facecam or obscuring your view of a high-refresh-rate monitor. A low-profile arm like the FIFINE BM88 ($56.99) sits low to the desk, running parallel to your keyboard. This setup requires only about 4 inches of vertical clearance to glide safely beneath your primary display, keeping your screen and face completely unobstructed. If you prefer an overhead reach, a standard arm can be clamped to the side of the desk, requiring about 30 inches of vertical clearance to arch over the top of your monitors.
The Multi-Purpose Creative Studio
With the evolution of home office design heading into 2026, workspaces are becoming cleaner and more integrated, making the footprint of your desk accessories more critical than ever. In a multi-purpose creative studio—where you might write, draw, edit, and record podcast episodes at the same desk—the ability to clear your workspace quickly is vital. A standard articulating arm like the SUNMON QuadCast ($19.99) can be rotated 360 degrees and folded entirely out of your workspace when not in use. This setup requires a wider swing radius clearance (roughly 30 inches of horizontal clearance around the base mount) to ensure the arm does not knock over desk organizers, speakers, or studio monitors when swung aside.
Common Sizing Mistakes
Avoid these frequent pitfalls when planning your microphone arm installation:
- Ignoring Under-Desk Support Beams: Many modern metal-frame desks feature a metal support beam running along the perimeter underneath the wood. Clamping a boom arm over both the wood and a hollow metal beam can bend the beam or cause the clamp to slip. Always ensure the clamp sits entirely on flat wood or bypasses the beam.
- Clamping onto Beveled or Rounded Edges: C-clamps require parallel flat surfaces to distribute pressure evenly. Attempting to attach a clamp to a desk with a decorative chamfered, rounded, or sloped edge will cause the clamp to slip off under the weight of the microphone, potentially damaging your gear.
- Forgetting the Weight-Leverage Factor: Heavy microphones, such as the Blue Yeti (weighing approximately 1.2 pounds without accessories), exert significant downward leverage. When a standard arm is fully extended, this leverage is transferred directly to the desk clamp. If your desk is made of thin glass or hollow-core particle board, this localized pressure can crack or crush the desk surface. Always check that your desktop material can support a clamped load.
- Overlooking Cable Routing Space: Built-in cable management channels on boom arms can add up to 0.5 inches of thickness to the arm’s joints. Ensure that when the arm folds down, these cable clips do not pinch against your monitor stands or nearby desk accessories.
FAQ
Can I mount a boom arm on a glass desk?
Yes, but you must take extra precautions. Standard C-clamps concentrate a high amount of force onto a very small area. To prevent the glass from shattering under the weight and leverage of the arm, use a metal or wooden reinforcement plate to distribute the clamping force over a larger surface area. Alternatively, look for a boom arm that supports a grommet mount, which routes through a pre-drilled hole for safer weight distribution.
What is the difference in desk clearance between a C-clamp and a grommet mount?
A C-clamp requires clearance at the very edge of your desk, needing about 2.0 inches of flat depth on both the top and bottom of the desktop. A grommet mount bypasses the edge entirely by mounting through a hole drilled directly into the desktop (typically 0.4 to 2.0 inches in diameter). Grommet mounts require zero edge clearance or rear wall clearance, making them perfect for desks with modesty panels or built-in backboards.
How much rear clearance do I need to prevent the arm from hitting the wall?
Standard articulating scissor arms need 2 to 5 inches of rear clearance if mounted to the back of the desk. This space allows the middle elbow joint of the arm to bend backward when you push the microphone away from you. If your desk must remain flush against a wall, you should mount the arm to the left or right side-edge of the desk, or choose a low-profile arm that folds horizontally rather than vertically.
Will a low-profile boom arm fit under a standard 24-inch monitor?
Yes. Most standard 24-inch monitors sit roughly 4 to 8 inches above the desktop surface on their factory stands. Low-profile arms, such as the FIFINE BM88 ($56.99), are specifically engineered with a low-clearance lower joint that rises only about 3 to 4 inches off the desk surface. This design allows the arm to swing freely beneath your screen without scraping the bottom bezel or blocking your view.

