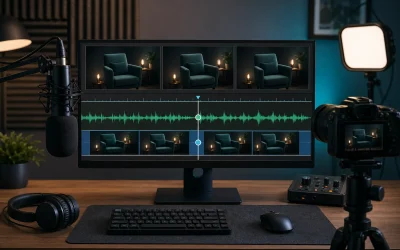
Audio quality affects stream retention more than most new streamers expect, since viewers tolerate mediocre video far more readily than they tolerate harsh, echoey, or inconsistent audio, which reads as unprofessional within seconds and drives clicks away faster than a lower-resolution webcam feed ever would. Building a clean audio chain is also one of the more affordable upgrades available, with most of the improvement coming from mic choice, positioning, and room treatment rather than expensive gear alone.
This guide covers choosing between dynamic and condenser microphones, whether you need a dedicated audio interface, practical room treatment that does not require a dedicated studio, and the noise gate, compression, and EQ settings in OBS or a mixer that clean up the remaining issues gear and room treatment cannot fully solve on their own.
Why Audio Matters More Than Video for Retention
Viewers process audio and video differently: a slightly soft or lower-resolution video feed reads as a minor technical limitation, while distorted, inconsistent, or noisy audio reads as an active annoyance that most viewers will not tolerate past the first thirty seconds. This asymmetry is well documented across streaming platforms’ own creator guidance and is consistently cited by top streamers as the area worth prioritizing first when budget is limited.
Poor audio also compounds other problems on stream, since clipped or overly quiet mic levels make it harder for viewers to follow commentary, jokes land less effectively when delivery is muffled or distorted, and inconsistent levels between game audio and voice chat force viewers to constantly adjust their own volume, all of which increase the likelihood of a viewer clicking away rather than staying to chat or follow.
The good news is that audio quality does not scale linearly with spending the way some other streaming gear does; a well-positioned $100 dynamic USB microphone in a reasonably treated room frequently sounds better than a $300 condenser microphone in an untreated room with hard walls and hardwood floors. Technique and environment matter as much as, or more than, the microphone’s price tag.
Building an audio setup in the right order, starting with microphone type and positioning, then room treatment, then software processing as a final polish, produces better results faster than buying expensive gear first and trying to fix positioning and room issues with software EQ and compression afterward, which can mask but rarely fully corrects a fundamentally poor acoustic starting point.
Microphone Types: Dynamic vs Condenser
Dynamic microphones use a simpler magnetic coil mechanism that requires the sound source to be relatively close and loud to register clearly, which makes them naturally directional and resistant to picking up background noise, room echo, and sounds from outside their narrow pickup pattern. This makes dynamic mics, such as the Shure SM7B or Rode PodMic, the more forgiving choice for streamers in untreated bedrooms, shared apartments, or rooms with noisy PC fans nearby, since the mic simply does not “hear” as much of the surrounding room.
Condenser microphones use a more sensitive capacitor-based design that captures a wider frequency range and more subtle detail, which sounds excellent in a properly treated room but also means the mic picks up considerably more ambient room noise, echo, and even distant sounds like traffic or a neighbor’s conversation. Popular options like the Blue Yeti or Elgato Wave series fall into this category and generally reward users who have taken at least basic steps toward room treatment.
Gain requirements differ meaningfully between the two types: dynamic mics typically need considerably more gain (amplification) to reach a usable level, which means a basic USB interface or a motherboard’s onboard audio may struggle to drive a dynamic mic to sufficient volume without introducing noise, making a dedicated audio interface with strong preamp gain (like the Focusrite Scarlett series or the Rodecaster Pro) a more meaningful investment for dynamic mic users than for condenser mic users.
For most streamers starting out in a typical bedroom or home office without dedicated acoustic treatment, a dynamic microphone is the more reliable recommendation, since its natural noise rejection compensates for exactly the kind of untreated-room issues that most new streamers have not yet addressed, while a condenser mic in the same room often requires more troubleshooting to sound clean.
Audio Interfaces and Mixers Explained
USB microphones include a built-in analog-to-digital converter and connect directly to a computer’s USB port, requiring no additional hardware, which makes them the simpler and often cheaper entry point. XLR microphones, by contrast, output an analog signal that requires a separate audio interface or mixer to convert into a digital signal your PC and streaming software can use, adding a device and typically $80 to $250 to the total cost depending on the interface’s quality and features.
An audio interface’s most important specification for a dynamic microphone is preamp gain, measured in decibels (dB), since dynamic mics like the SM7B require 60dB or more of clean gain to reach a strong signal level; interfaces or mixers with weaker built-in preamps may require boosting gain to a point where background hiss or noise becomes noticeable, while stronger preamps (or a dedicated inline gain booster like a Cloudlifter or FetHead) deliver a clean, strong signal without that trade-off.
A mixer, as distinct from a simple interface, adds physical controls for routing and blending multiple audio sources (microphone, game audio, music, alerts) with independent volume faders and often built-in noise gate, compression, and EQ processing directly on the hardware, which appeals to streamers who prefer physical controls over navigating software menus mid-stream, at a typically higher price point than an interface alone.
For most solo streamers, a simple two-channel audio interface paired with software-based mixing in OBS or a tool like Voicemeeter covers all necessary functionality at a lower cost than a dedicated hardware mixer, with the mixer’s advantages becoming more relevant for streamers regularly managing several live audio sources or co-hosts simultaneously.
Positioning and Pop Filters
Microphone distance and angle affect sound quality as much as the microphone model itself. For most dynamic mics designed for close-range use (like the SM7B), positioning the mic 2 to 4 inches from your mouth, slightly off-axis (angled rather than pointed directly at your lips), captures a fuller, warmer sound while reducing plosive pops from hard consonants like “P” and “B” sounds that can otherwise distort the recording.
A pop filter, either the traditional round mesh screen or a foam windscreen, placed between your mouth and the microphone further reduces plosive distortion by dispersing the burst of air from hard consonants before it hits the microphone’s diaphragm directly. This is a cheap addition (typically $10 to $20) that measurably improves recording quality regardless of microphone type or price point.
A boom arm, rather than a fixed desk stand, allows precise positioning of the microphone at the correct distance and height without permanently occupying desk space, and its spring tension also helps isolate the microphone from desk vibrations (keyboard typing, mouse clicks, or desk bumps) that a fixed stand transmits directly into the mic body, appearing as low thumping noise in recordings.
Consistency in positioning matters over a full streaming session; a microphone position that sounds great when you lean in but noticeably drops in volume and clarity when you lean back to a normal sitting posture creates an inconsistent listening experience for viewers, so testing your typical range of motion during setup, not just your ideal static position, produces a more reliable result across an entire stream.
Room Treatment and Noise Reduction
Hard, parallel, reflective surfaces (bare walls, windows, hardwood or tile floors, and even large flat monitors or desks) are the primary cause of the echoey, hollow sound that plagues untreated recording spaces, since sound waves bounce between these surfaces and reach the microphone slightly delayed and phase-shifted from the direct sound, which the ear perceives as reverb or “room sound.” No amount of software EQ or compression fully removes this once it is captured in the recording.
Soft, irregular surfaces absorb and diffuse these reflections rather than bouncing them back, which is why simple additions like heavy curtains, a rug, bookshelves filled with irregularly sized books, or even a closet full of clothes positioned near the recording area measurably reduce room echo without requiring dedicated acoustic foam panels. Recording inside a closet full of hanging clothes is a well-known budget trick among podcasters and voice actors for exactly this reason.
Dedicated acoustic foam panels ($30 to $80 for a basic set covering the wall area directly behind and beside your microphone position) provide a more consistent, purpose-built solution than improvised soft furnishings, and are worth the investment for anyone streaming regularly from a space with genuinely hard, reflective surfaces and no easy way to add furniture or fabric nearby.
Background noise sources like PC fans, HVAC vents, or a nearby window facing a street benefit from physical mitigation (positioning your PC further from the mic, closing windows during recording, or directing an HVAC vent away from the mic’s pickup pattern) before relying on a noise gate or noise suppression software, since physical noise reduction produces a genuinely cleaner recording rather than software that can introduce its own subtle audio artifacts when working hard to suppress a loud, constant background noise.
Software Processing: Noise Gate, Compression, and EQ
A noise gate automatically mutes or significantly reduces your microphone’s output when input level drops below a set threshold, which is effective for eliminating keyboard clacks, chair creaks, and low-level room hum during pauses in speech. In OBS, this is available as a Noise Gate filter on your audio source; set the “Close Threshold” just below your typical speaking volume and the “Open Threshold” slightly above your background noise floor, testing with normal speech at varying volumes to avoid the gate cutting off quiet words or trailing syllables.
Compression reduces the volume difference between your loudest and quietest moments, which helps keep your voice at a more consistent, listenable level for viewers without them needing to manually adjust volume between your normal speaking voice and moments of excitement or laughter. OBS’s Compressor filter, or a dedicated plugin, with a moderate ratio (around 3:1 to 4:1) and a threshold set to catch only your louder peaks, smooths levels without producing the flat, over-processed sound that overly aggressive compression creates.
EQ (equalization) shapes the frequency balance of your voice, and while it cannot fix a fundamentally poor room or mic positioning, moderate adjustments can reduce boominess (cutting slightly in the 200-400Hz range for voices that sound muddy), add clarity (a small boost around 3-5kHz for presence), and reduce harsh sibilance (a gentle cut around 6-8kHz if “S” sounds feel piercing). Small adjustments, made while listening critically rather than guessing, produce better results than large, dramatic EQ moves.
Apply these filters in a sensible order for the cleanest result: noise gate first (to remove unwanted noise before it hits other processing), then compression (to even out levels), then EQ (to shape the final tone), since processing in a different order can cause the noise gate to react inconsistently to a signal that compression has already altered in level.
Recommended Signal Chain by Budget
The table below outlines three realistic starting points for a streaming audio setup, illustrating how the core components scale together across budget tiers while the fundamentals (positioning, room treatment, and software processing) remain equally important at every price point.
| Tier | Microphone | Interface/Accessories | Estimated Total |
|---|---|---|---|
| Starter | USB condenser or dynamic mic ($60-$100) | Boom arm + pop filter ($25-$35) | $85-$135 |
| Intermediate | XLR dynamic mic, e.g. Rode PodMic ($100) | Basic 2-ch interface + boom arm ($100-$150) | $220-$280 |
| Advanced | XLR dynamic mic, e.g. Shure SM7B ($400) | Interface w/ strong preamp + Cloudlifter + acoustic panels ($250-$350) | $650-$800 |
The jump from Starter to Intermediate typically produces the most noticeable improvement in perceived audio quality, since it introduces a purpose-built streaming microphone and better positioning hardware; the jump from Intermediate to Advanced delivers real but more incremental gains, concentrated mostly in noise rejection quality and headroom for professional-grade room treatment rather than a dramatic leap in baseline clarity.
Balancing Game Audio, Mic, and Music Levels
A common mixing mistake among new streamers is setting mic and game audio levels once and never revisiting them, even as game audio varies dramatically between a quiet menu screen and an explosive combat sequence; using OBS’s Advanced Audio Properties to apply a compressor specifically to your desktop/game audio source, separate from your mic processing, helps keep game audio from suddenly overwhelming your voice during loud in-game moments.
A practical target for most streams is keeping your voice as the consistently loudest and clearest element in the mix, with game audio present but noticeably lower (viewers are there primarily to hear you, with game audio as supporting context), and background music, if used, lower still, typically 15-20% of your mic’s peak volume, positioned as ambient texture rather than a competing element.
Using OBS’s per-source audio monitoring and the built-in audio mixer meters, rather than relying on ear alone, helps catch level imbalances objectively; aim for your mic to peak around -12dB to -6dB on the meter during normal speaking volume, leaving headroom before clipping (0dB) during louder moments like laughter or excited reactions.
Test your final mix by recording a short clip and listening back on a different device (phone speaker, in addition to your studio monitors or headphones), since a mix that sounds balanced on high-quality studio headphones can reveal your voice buried under game audio when played through a typical viewer’s laptop or phone speakers, which is a more representative test of how most of your audience will actually experience the stream.
Troubleshooting: Common Audio Problems
If your voice sounds distant or thin despite correct positioning, check your gain staging first; a dynamic mic run through a weak interface preamp often needs more gain than the interface can cleanly provide, and adding an inline gain booster like a Cloudlifter or FetHead, or switching to an interface with stronger preamps, resolves this more effectively than boosting gain further on an already-maxed weak preamp, which mostly adds noise rather than volume.
If you hear a persistent hum or buzz, this is frequently a ground loop issue, caused by multiple devices (PC, audio interface, monitor, and sometimes a nearby power strip) sharing power in a way that creates an electrical interference loop; a cheap ground loop isolator (under $15) inserted in the audio signal chain resolves this in the majority of cases without needing to rewire anything.
If your mic sounds fine when you speak normally but distorts or cracks during louder moments, your gain is likely set too high for your loudest volume, causing clipping; reduce the interface’s gain slightly and rely more on software compression to bring up your quieter moments, rather than running gain so high that your loudest moments distort.
If audio and video appear out of sync, particularly noticeable when watching back a recorded VOD, check your OBS audio source’s Sync Offset setting (found in Advanced Audio Properties), which can correct small, consistent delays; larger or inconsistent sync drift usually points to a performance bottleneck during recording rather than a simple offset that a fixed correction can address, worth checking against your how to record gameplay without lag troubleshooting steps if it coincides with dropped frames.
According to Elena Marchetti, Streaming and Creator Editor who evaluates audio chains using dedicated measurement tools on a dual-PC streaming rig, the single most common issue in viewer-submitted audio troubleshooting requests is an untreated room being compensated for entirely with EQ and noise suppression software, when adding even a single strategically placed blanket or moving the desk away from a bare wall corner would have solved the underlying problem more completely.
For readers building out the rest of their audio chain, our best streaming microphone and best audio interface for streaming picks cover specific tested products, and our best microphone arm and best pop filter guides round out the positioning hardware discussed here. If you are troubleshooting alert or music mixing specifically, see our best mixer for streaming roundup for hardware-based routing options.
Frequently Asked Questions
Is a dynamic or condenser microphone better for streaming?
Dynamic microphones (like the Shure SM7B or Rode PodMic) are generally better for streaming because they reject background noise and room echo more effectively, which matters for untreated bedrooms and offices, while condenser mics capture more detail and sensitivity but also pick up far more room noise unless you have real acoustic treatment.
Do I need an audio interface if I already have a USB microphone?
No, USB microphones have a built-in interface (analog-to-digital converter) and connect directly to your PC, while XLR microphones require a separate audio interface or mixer; the choice is really about which microphone type you buy, not an optional add-on for an existing USB mic.
What is a noise gate and do I need one?
A noise gate automatically mutes your microphone when your input level drops below a set threshold, which is useful for cutting keyboard clacks, fan noise, or room hum between sentences, and most streamers benefit from one set correctly, though an overly aggressive threshold can clip off the start or end of quiet words.
How much does a decent streaming audio setup cost?
A solid entry point (USB dynamic mic, boom arm, pop filter) runs $80 to $150, while stepping up to an XLR dynamic mic with a basic audio interface runs $250 to $400 total, and most of the perceptible quality jump between those tiers comes from mic technique and room treatment rather than the gear price alone.
Why does my voice sound echoey or hollow on stream?
This is almost always room reflection from hard, parallel surfaces (bare walls, windows, hardwood floors) rather than a microphone problem, and it is fixed by adding soft materials near the mic (blankets, foam panels, even a closet full of clothes) rather than by adjusting EQ or compression settings.